Michelle G Brown | Mixed Media Art

Taking your Gel Prints to the Next Level

This article is written by Michelle Brown

~ * ~

I love how we can get lots of unique prints from our gel plates, really, really quickly. The challenge, of course, is how you can store your gel prints and how to use them in your crafting. I spoke about how to store them over in this article: Storing your Gel Prints. And we had a few ideas on how to use your gel prints over here: What to do with your Gel Prints.

Now I want to talk about taking your gel prints to the next level.
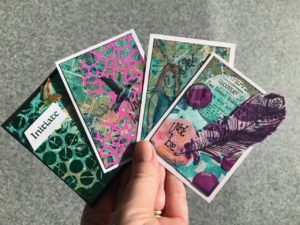
Here are my top for favourite ways to enhancing our gel printing a crafting projects.

1. Gel Prints with Foils

.
mixed media art classes Melbourne australia

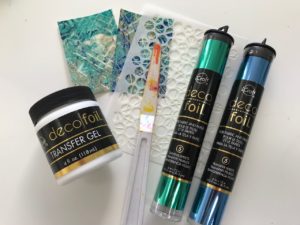
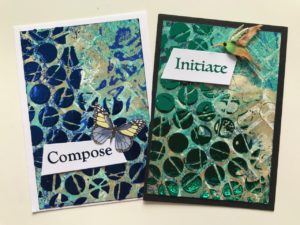
Adding a touch of shine to our gel prints can be done easily with foils. There are many ways to adhere the foil to gel prints. Here we have used the transfer gel and applying it through a stencil. Once it dries clear (about 30 minutes, depending on room temperature) the gel print can then be run through a hot laminator, with a layer of the foil on top. The foil then adheres to the gel and adds shine to your art. This foil system is by Thermo Web.

Then we added the gel print to an ATC sized cardboard and added embellishments to complete our project.
2. Gel Prints with Embossing powders

.
mixed media embossing powders

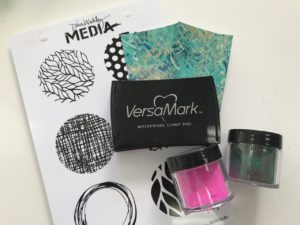
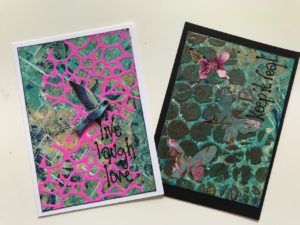
Embossing powders are basic craft supplies for many of us and adding them as an extra level on top of our prints creates depth and a real texture to them. Here I have used the Dina Wakley stamps and Versamark ink to add Emerald Creek embossing powders in Fluorescent Hot Pink and Seth Apter‘s Patina Oxide Baked Texture.
mixed media gel prints

3. Gel Prints with Stamping and Colouring

.
mixed media gel prints

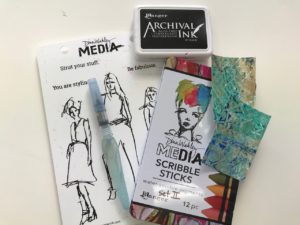
It’s easy to forget our crafting roots and miss the simplicity that stamping offers us! Plus is gives us a chance to use some of those stamps we have collected over the years! Here I used Jet Black Archival Ink. It stamps well onto painty surfaces and is waterproof so it won’t run when using the Scribble Sticks over it. The Dina Wakley Scribble Sticks were applies directly onto the background and activated with a water brush. The words are a sticker from Dylusions Creative Dyary Stickers book.
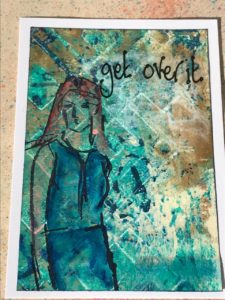
mixed media gel prints

4. Gel Prints with Collage

.

mixed media stickers

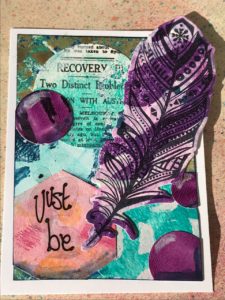
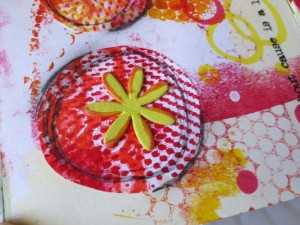
One of my favourite things to do with gel prints is to turn them into stickers! Stickers makes it SO easy to take your prints on the road and allows you to create and art journal anywhere!

To create your own gel print stickers, use a double sided adhesive and stick it to the back of the print. Then you can cut into shapes with your die cutter or stamp and die cut, like we have done with the feather (above). The feather is from the Kaisercraft stamp and die set.
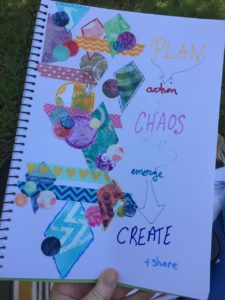

If you would like to learn more about taking your gel prints to the next level, you might be interested in an upcoming class at the MMA studio. The studio is based in Melbourne Australia. Click here for class details!

Happy creating,
Michelle
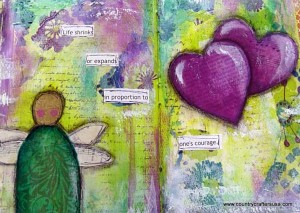
“It Takes Courage” Art Journal Page

~ * ~

This article is written by Tamara Dinius

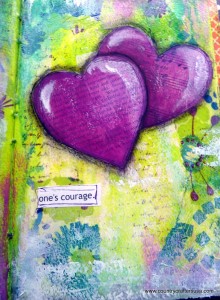
Tamara shares her fun art journaling process, showing we don’t need to be great at drawing to get started! The videos (Part 1 and Part 2) show the process of completing an art journal layout, start to finish.

Mixed media art journal layout with Dylusion sprays, stamping and collage

The layout was completed using Dylusion Sprays, Liquitex Acrylic Inks, stamps, stencils, papers, paper napkins, as well as other items.

Follow along and complete a layout in less than 30 minutes.

Part 1

Part 2

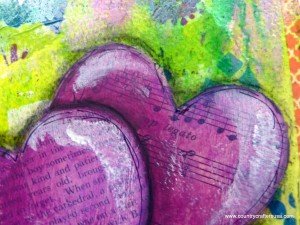
Here are a few close-ups of the layout elements:

Mixed media art journal layout
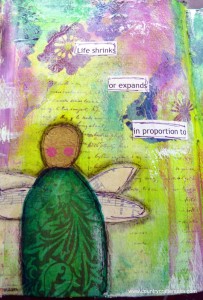
Angel in art journal by Tamara Dinius
mixed media ephemera hearts

~*~*~*~*~*~*~*~*~*~*~*~*~*~*~*~*~*~*~*~*~*~*~*~*~

Tamara Dinius lives in the Pacific Northwest with her husband and chocolate lab. She has two grown daughters who make her life meaningful. They support her, ground her, embrace her, and are amazing people in their own right.

Her love for mixed media has taken over most aspects of her creative journey. She believes mixed media allows for a broad range of styles and anyone can find success in this form of artistic expression.

~*~*~*~*~*~*~*~*~*~*~*~*~*~*~*~*~*~*~*~*~*~*~*~*~

.

.

What to do with your Gelli Plate Prints

~ * ~

For those of you who have been playing with your Gelli Art mono printing plates I’m sure you have a huge collection of colourful prints. So what are we actually going to do with all of these Gelli plate prints?

using background papers for mixed media art ideas

Here are some of the projects Michelle has undertaken to put these colourful prints to use. If you don’t have a Gelli plate or a huge collection of Gelli plate prints, you can always use bought background papers or backgrounds you have made using other mixed media technique, like Credit card printing or found object painting.

Swap and Share

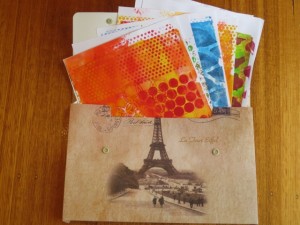
One of my crafting friends had admired my colourful Gelli print backgrounds. For her birthday I chose some of my favourite prints and put them into a nice folder. She was delighted with them and even made me a card from one of the prints I had given her.

using background papers for mixed media gift ideas

The prints are also fun to swap and share with friends, as each of us has a different style and colour preference, so all of the backgrounds turn out so differently.

Handmade greeting cards

using background papers for mixed media art ideas

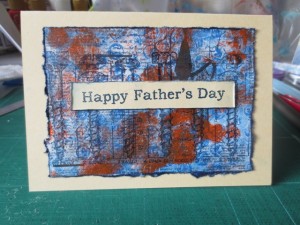
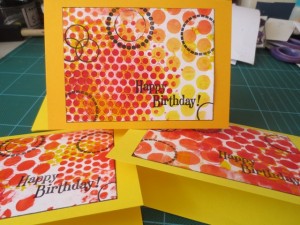
It is easy to turn your Gelli plate prints into lovely handmade greeting cards. My preference is to simply cut or tear to size, add a little ink around the edges and stamp a greeting. Then use double sided tape to stick it to the card. This is a great way to show off the colourful prints and not hide any of the details.

using background papers for mixed media art ideas

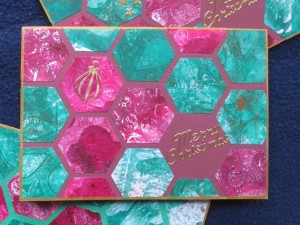
I have also used my punches to cut out shapes from the Gelli plate print. These cards were made for my Christmas cards for 2013. Firstly I punched shapes out os several sheets of gelli print paper, so I had a variety of patterns and colours available. I then arranged the pieces and checked I was happy with the overall colours and patterns. The shapes were stuck down using a glue stick. To finish off the cards are used some Christmas stickers. These were simple to add and stood out well on top of the brightly coloured background.

using background papers for mixed media art ideas

Teabag Folding

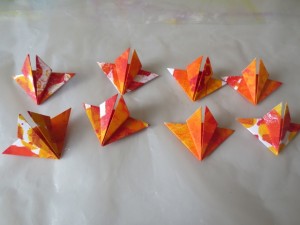
Teabag folding is a specific kind of origami. You can buy prints that are identical to make these arrangements. I decided to try using my Gelli plate prints.

Firstly I cut out 8 2 inch squares. Then folded them into the correct shape.

using background papers for mixed media art ideas

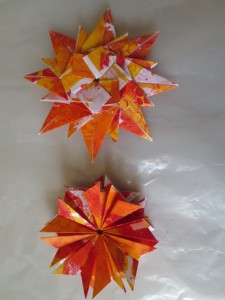
I stuck into the eight pieces carefully into the flower arrangements using PVA glue on a toothpick to get into the folds of each piece.

using background papers for mixed media art ideas

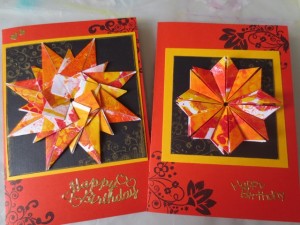
Once the flower arrangement was dry I did added it onto the card background with double sided tape.

using background papers for mixed media art ideas

These cards are not as simple as the ones above but they are worth the effort and are perfect for crafting friends who appreciate them.

Art journalling

While I am making my Gelli plate prints, I also use the excess paint from the stencils and brayer in my art journal to create a pre-painted background. It is then easy to use the colour-coordinated prints to add features in the art journal layout.

Here are a few of my favourites:

using background papers for mixed media art ideas

using background papers for mixed media art ideas

using background papers for mixed media art ideas

using background papers for mixed media art ideas

Paper ornaments

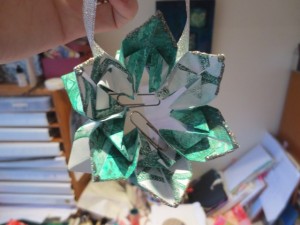
For my 2013 Christmas ornaments swap I also used a piece of Gelli plate print. You can see the full details of how these were made here at #4. Like the teabag folding it was a tricky process but I love how it turned out.

using gelli arts mono printed papers for mixed media art ideas

Personalised Envelopes and Stationery

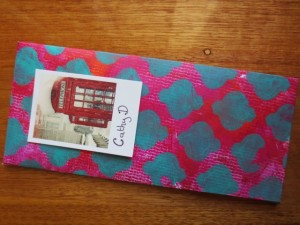
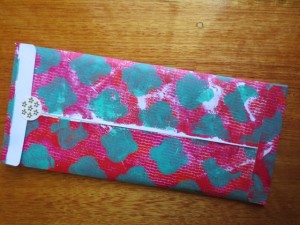
Having these prints lying around certainly makes it handy when you need inspiration. When I needed a quick gift wrapped for a Christmas gift, I decided to turn one of my sheets into an envelope. I then sealed it with double sided tape.

using background papers for mixed media art project ideas

using background papers for mixed media art project ideas

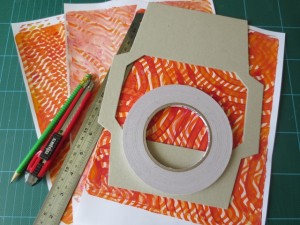
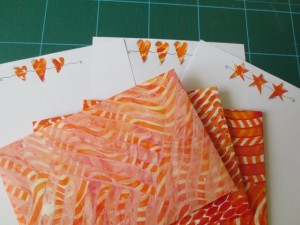
That inspired me to make more envelopes. And want to have finished with the envelopes I still had more offcuts, so I got out of my punches and created some stationery to go with the envelopes, decorating the plain copy paper. It will make a lovely gift.

using background papers for mixed media art project ideas

using background papers for mixed media art project ideas

~*~*~*~*~*~*~*~*~*~*~*~*~*~*~*~*~*~*~*~*~*~*~*~*~

We hope this has given you a few ideas as to what to do with that BIG pile of Gelli plate prints you have been creating. Of course, this list isn’t exhaustive – if YOU have another great use for handmade background papers, we’d LOVE to hear from you – just leave a note in the comments!
.

.

Packing Tape Postcard

~ * ~

This article was written by Martice Smith II

Create an image transfer from packing tape to design a custom postcard

Learn a quick and simple way to create image transfers made from packing tape. Layer bold graphics and found imagery, combined with stylized handwriting, to create a dynamic piece of correspondence. In the end, you’ll have a stunning postcard- worthy of being framed!

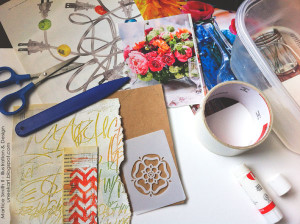
Gather supplies of your choice

Gather supplies of your choice.

You’ll also need:

  • a bowl of water
  • bone folder
  • scissors
  • magazine pages and paper ephemera (Grab up some of your favorite, textured papers, too!)
  • 4×6 inch cardstock paper (elements will be layered onto this)

How to Make a Packing Tape Postcard

Prepare the image transfer

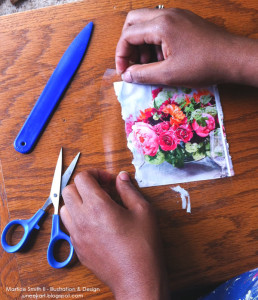
Cut strips of packing tape, slightly larger than the size of your image.

1. Cut strips of packing tape to the size of your image.

Carefully, lay the tape across the magazine image, starting at one end and slowly working your way across. Use manageable strips of tape for this step.

TIP: Images (photos or text) with white or light-colored backgrounds will show up transparent in the final tape transfer. This is a great way to add interesting dimension by layering multiple graphics, text, or paper.

Burnish with a bone folder.

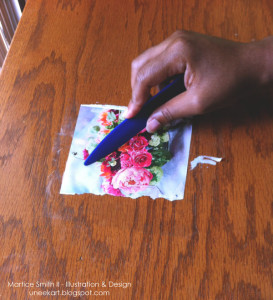
2. Burnish with a bone folder.

From the center out, use the bone folder to remove any bubbles or creases. You do not need to apply heavy pressure when burnishing. Simply rub the tool across one way and repeat going another direction.

TIP: Lay the tape down on a clean plastic, wooden, or any non-porous surface to prevent tape from picking up fibers and dust particles.

(If there are bubbles left unburnished, they will appear as a clear spot on the image.) You may or may not want this effect- sometimes it can leave an interesting, distressed effect to your transfer. You might like it after all!

Trim around your image and place into bowl of water.

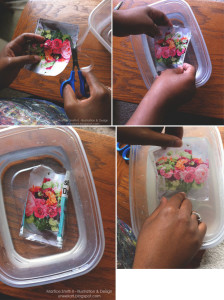
3. Trim around your image and place into bowl of water.

4. Rub away the paper backing with your thumbs.

The paper will start to roll up. This indicates that you can start rubbing the paper off.

TIP: For a clean, crisp image, make sure you do not scratch the surface of the tape while rubbing off the paper. If you want an old, worn-out look, gently scratch the tape’s surface with your fingernail. If you want wrinkles, take the entire piece and ball it up, in your hand; unfold and smooth out.

If you’re heavy-handed like me, you will appreciate this technique because this it allows you to rub quite vigorously without tearing the tape.

Remove the paper and let dry

5. Remove the paper and let dry on non-porous surface. 

As the tape dries, it will become sticky again. After the tape dries, paper fibers may reappear. If so, re-moisten the paper and gently, rub them off.

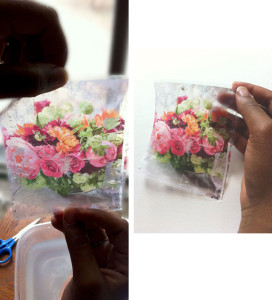
These pictures show how a tape transfer looks when held near a window. Take a close look at the expressive textures! Next, I show how the transfer looks when placed on top of a white background. (Did you notice how some details from the magazine image reappears when placed on a white background?)

6. Discard paper fibers from bowl.

Flush paper pulp down the toilet- not the sink!

Of course, you can also save this paper pulp to create your own handmade paper.

Now we are ready to create our Package Tape Postcard!

Create a Package Tape Postcard

Here is the approach I took to create this postcard:

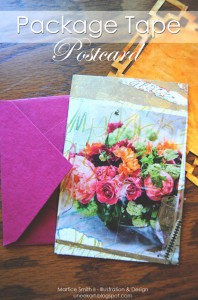
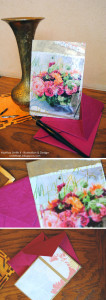
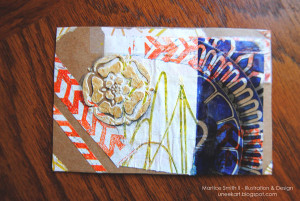
This postcard looks elegant and modern but with a slight, urban twist. I gathered some of my paper scraps from previous projects to combine with my image transfer.

To reinforce the look of the ‘handmade’, I decided to tear the paper with my hands. This creates the deckled edges.

Pushing this idea forward, I also decided to add a twist by incorporating my stylized handwriting. (I simply used the end of a paintbrush to scratch into wet, acrylic paint, on paper that had a layer of paint already on it.) Look closely to see the subtle shift in colors!

Continue adding collage elements but keep in mind that ‘less is more’. You don’t want to create an overwhelming design on your postcard. Layering is key; build up layers to add drama.

TIP: If your packing tape isn’t sticking, use a glue stick, decoupage medium, or add more tape on top to keep it in place.

Think about overall composition. My focal image is the bouquet of flowers. Everything else was secondary, or in other words, complementary to that image.

The image transfer (of the flowers) was placed on top of the stylized, handwriting layer. For exciting pops of color, I used fluorescent orange paint!

Next, a small piece of diamond patterned washi tape was added.

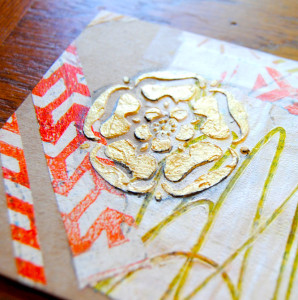
Finally, gold leaf was painted on to create a more elegant look.

For the reverse side, I cut out and glued some scrapbook papers onto the brown kraft paper, leaving a 1/4 inch border on all sides.

As you can see, I repeated the diagonal lines from the front side to create a divider for the text and address areas.

Create a Package Tape Postcard; variation

Here’s another postcard I created with this same image transfer technique.

I chose to go with a bold and, somewhat, abstract look. I found a beautiful image of decorative chinaware in a home decor magazine. The geometric patterns combined with organic shapes are interesting and has great sense of energy.

Create a Package Tape Postcard

This packing tape postcard features:

  • my hand-carved, chevron stamp
  • Modeling paste
  • “Grace” stencil from Artistcellar’s new Pocket Stencils, “Mini Virtues” set

Spray or brush on a varnish to seal and protect the surface. Write your message on the back, apply a postage stamp and pop it in the mail!

~*~*~*~*~*~*~*~*~*~*~*~*~*~*~*~*~*~*~*~*~*~*~*~*~

Mixed-media illustrator and designer Martice Smith II

Martice Smith II is creative director of Martice Smith II – Illustration & Design Studio, based in Kansas City, Missouri and owner of Uneek Art Boutique. She established herself as a freelance Illustrator and graphic designer after receiving her Bachelor of Arts Degree. Her stunning illustrations reveals her love for fashion, typography and wildlife- using a combination of analog and digital techniques.

Martice also contributes as an article writer for the Creating Mixed Media Art website.

You can see more of her work via her Facebook page or her blog. She invites you to join her monthly newsletter, Uneek Art Letter, for art biz tips, advice and free digital goodies!

~*~*~*~*~*~*~*~*~*~*~*~*~*~*~*~*~*~*~*~*~*~*~*~*~

.

.