Michelle G Brown | Mixed Media Art

Cheryl Boglioli is heading Down Under to Mixed Media Art Studios

The Mixed Media Arts team is excited to have Cheryl Boglioli heading Down Under, to Melbourne Australia, in October 2018.

Who is Cheryl Boglioli?
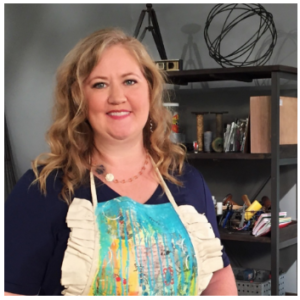
Cheryl gel press ambassedor“Living the Art Life” is Cheryl’s by-line and she certainly does that! As a Gel Press Ambassador and The Crafters Workshop Education and Design Team Co-ordinator, Cheryl is best known for her colourful mixed media pieces, as well as travelling around the United States of America and Canada in her caravan Glinda the Glamper.

Where will Cheryl be?

Cheryl appeared at the From Picture to Page Papercrafts, Scrapbooking and Mixed Media Art show on Saturday 13 and Sunday 14 October, 2018, where she was be wearing her Gel Press Ambassadors hat and demonstrating gel printing across the weekend.

Then Cheryl headed to the Mixed Media Art Studio to teach for a few days – see below for details.

Then Cheryl and Michelle will be heading north, touring the Australian countryside, where Cheryl will teach at:

Classes at Mixed Media Art Studio

Cheryl will be teaching THREE new classes at Mixed Media Art Studio,
135/45 Gilby Road, Mount Waverley [Click here to see Where to Find us]
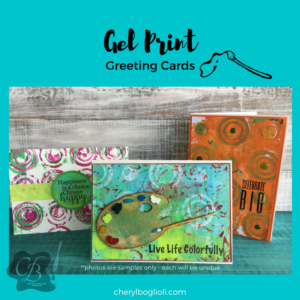
Gel Print Greeting Card Class – Thursday 18 October 2018 6:30 – 9:30pm


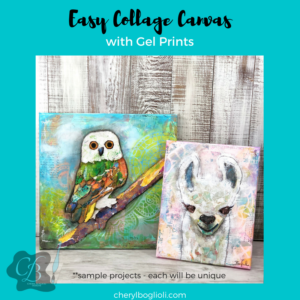
Easy Collage Canvas with Gel Prints
– Friday 19 October 2018, 9:30am to 4:oopm


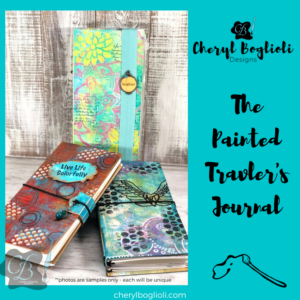
Painted Travelers Journal – Saturday 20 October 2018, 9:30am to 4:00pm

Gelato Resistance Technique

~ * ~

This article is written by Michelle G. Brown

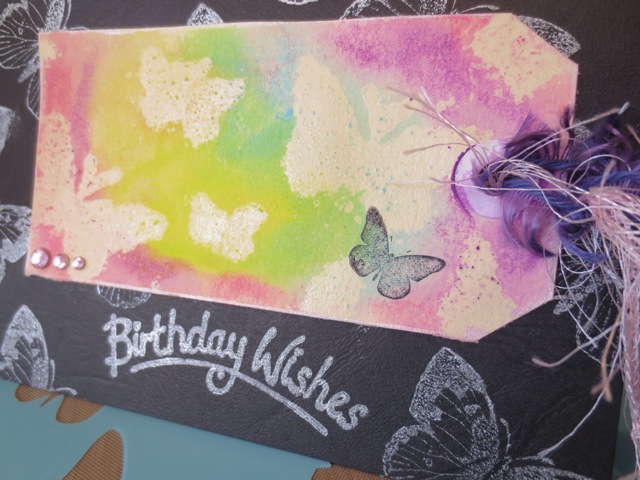
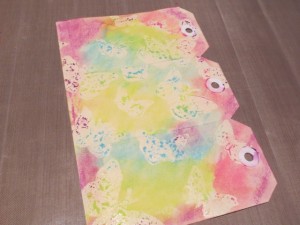
Know what it’s like to wake up early with a BRILLIANT idea in your head?!? That happened to me this week and I couldn’t wait to combine this gorgeous Kaisercraft butterfly stencil with the Goosebumps and Gelatos! The results was this bright card  – perfect for my nieces birthday!

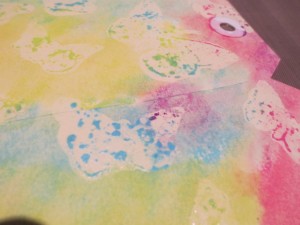
Gelatos work well with this resistance technique with goosebumps

~ * ~

Materials

.

Michelle G Brown creates this bright butterfly birthday card

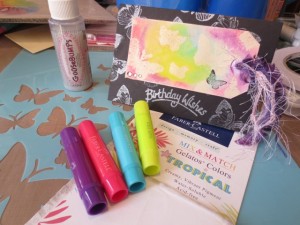
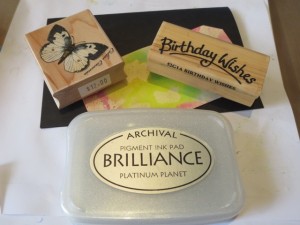
* Shipping tags

Kaisercraft Template – Flutter

* Goosebumps by Imagine Crafts 

* Gelatos – Tropical Set by Faber-Castell

 Plus

  • plastic cereal box sheet
  • masking tape
  • water container

And card making stuff, as desired

~ * ~

Gelato Resistance Technique

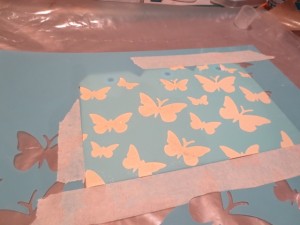
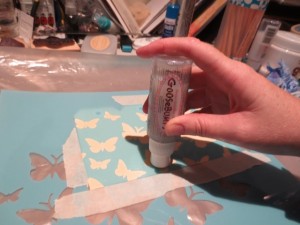
Gather materials and add the tags onto the plastic sheet, using masking tape to secure the stencil (it’s easier than trying to hold it still with one hand and apply the Goosebumps with the other – trust me on this one!)

Michelle G Brown creates this Gelato Resistance Technique

Daub the Goosebumps medium on the stencil. Once you get to the end, go back to the start and repeat to add a second layer. Take care not to add too much or the stencil will bleed.

Michelle G Brown creates this resistance background

Set tags aside to dry. Wipe your stencil clean with a baby wipe or kitchen towel and a little water. The goosebumps will clean off your stencil if you wipe it STRAIGHT AWAY!

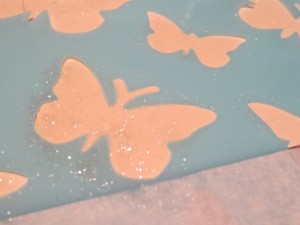
The Goosebumps medium also comes in “Shimmer” which has silver glitter in the mixture.

Michelle G Brown creates this background with shimmer goosebumps

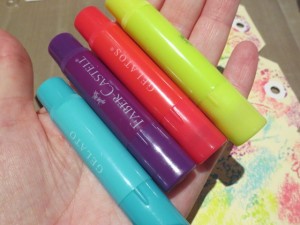
Grab your Gelatos – I used the Tropical set. You can use a combination that inspires you!

Color in with the Gelatos. This is the fun part!

Michelle G Brown creates a Gelato resistance background

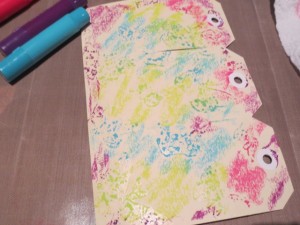
Then use water to activate the Gelatos. I use my finger and start with the lighter colours, cleaning off my finger between colours. Use kitchen towel to rub over your butterflies and clean them up a bit.

Michelle G Brown creates a Gelato resistance backgrounds

Some clean off better than others, depending on the amount of goosebumps applied – I love this effect!

Michelle Brown creates a Gelato resistance background

Now your tags are ready to turn into whatever you choose – a card, bookmark or gift tag!

~ * ~


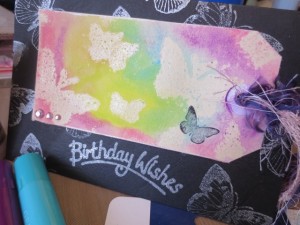
Butterfly Birthday Card

Gather your card making stuff. Here I’ve used black card with silver ink and a few other embellishments to complete the card.

Michelle G Brown makes a handmade greeting card

Using shipping tags makes it easy to add fibres into the top hole. I’ve also added a bit of bling.

Handmade greeting card

~ * ~

Gelato Resistance Trials

After I finished my first card with Goosebumps I realised I had other mediums that could also produce a resist with the Gelatos. So for the sake of completeness, I trialled a total of four mediums:

1. Goosebumps

2. Clear embossing powder

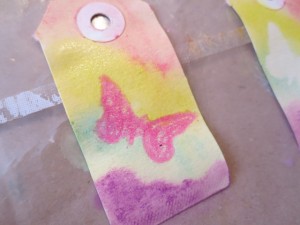
3. Crayon (using pink because I couldn’t find my white one)

4. Gesso

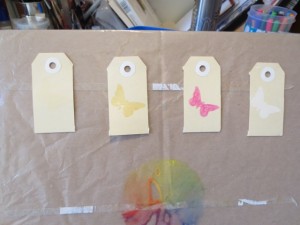
Each mini tag got a butterfly in each of the mediums

shipping tag trials

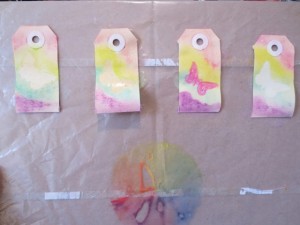
Then I applies the same Tropical Gelatos as above, using the same process.


Here are the final results:

1. Goosebumps – quick an easy and produces a soft resist

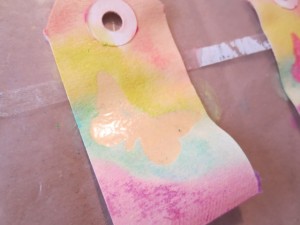
2. Clear Embossing Powder – produces a clear, shiny image. Applying the heat to melt the embossing powder has made the small tag a bit wavy

3. Crayon – quick and easy; not a solid image but a different look

Michelle G Brown is super creative

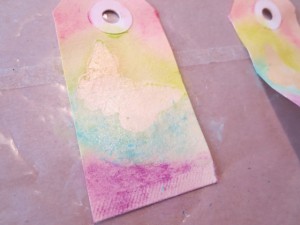
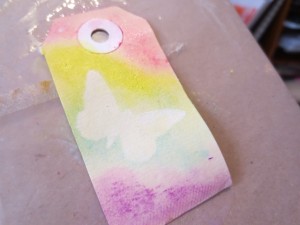
4. Gesso – nice white image

Gesso with stencil for mixed media resistance technique

Each medium produces a slightly different effect, so feel free to choose whichever medium you have on-hand. It’s great to have so many options when it comes to creating fun backgrounds for your mixed media art project.

Happy creating!

~*~*~*~*~*~*~*~*~*~*~*~*~*~*~*~*~*~*~*~*~*~*~*~*~

Michelle G. Brown is passionate about mixed media art and enjoys sharing her knowledge and techniques with you to allow you to express your own creativity. Michelle understands that many of us have an inner need to create. By learning a few basic techniques the amazing world of mixed media art is accessible to everyone!

Michelle lives with her husband and two boys in Melbourne, Australia.

~*~*~*~*~*~*~*~*~*~*~*~*~*~*~*~*~*~*~*~*~*~*~*~*~

Disclosure: Some of  these products have been provided by Imagine Crafts and Kaisercraft  for the purpose of review. All opinions are that of the MixedMediaArt team. The links on this page are affiliate links and any purchases help to support the ongoing work by MixedMediaArt.

The Story Behind the Artist – Seth Apter

~ * ~

This article was written by Michelle G. Brown

While the true definition of “mixed media art” is extremely broad, there are three main categories in abundance on the internet at the moment – mixed media painting / collage, journals / books and mixed media assemblage. The artwork of Seth Apter may well be one of the most recognisable in the mixed media community, with his pieces crossing between these main categories. Many of his pieces are dark, rich and full of layers and elements of interest, put together in such a way as to engage the brain as well as the visual feats presented to our eyes.

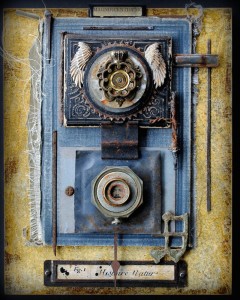
Seth Apter New York City mixed media artist

I was very excited to meet Seth in person during the CHA Winter Show 2014 and jumped at the chance to chat further to get an understanding of the story behind the artist. I have followed Seth’s work via his blog ~ The Altered Page ~ which has been around for many years and celebrates and shares Seth’s mixed media adventures.

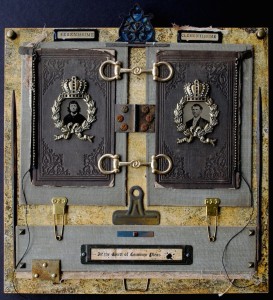
Seth Apter New York City mixed media artist creates wonderful pieces of assemblage and collage

You might be mistaken to think that with the richness and depth of Seth’s pieces, that he has been gluing bits together since he was a small boy but this wasn’t the case. Seth’s introduction to mixed media art was during vacation in 2000 to Washington and Vancouver when he wandered into a gallery, “like one you’d find in New York” and discovered this new and wonderful type of art. It turned out to be encaustic and collage mixed media, and Seth began talking to the gallery owner who happened to be the artist of these pieces that Seth was admiring. A month after buying a few pieces and returning home, Seth received a handmade postcard from the artist, just checking in that Seth was happy with his purchases. Seth wanted to return the thank-you but felt a store bought card would be inadequate to post in return, so he set about creating his own postcard. This “mail art” went back and forth, and Seth was captivated and leaped into the world of mixed media, through looking online at what other people were doing and through taking classes.

Now over 10 years later, Seth has written and curated several books, teaches extensively and continues to share his love for mixed media. Seth has a home-based studio, allowing him to work when he pleases, most often when he gets his second wind at 11pm. Having a separate studio space would make this kind of work much harder to do.

Seth Apter New York City mixed media artist creates wonderful pieces of assemblage and collage

In April 2014, Seth has extended his repertoire to a gallery exhibition as part of the New York City Art Expo, a juried show that has been going for many years. Seth was finding through all of his obligations with writing, developing products and preparing for workshops, he was having less time for his “own art”. Committing to the exhibition allowed him to change focus to make artwork outside of his “job” tasks. It was also a great chance to meet other artists and get exposure to the broader art community. When I asked Seth what had surprised him about the exhibition and the process of preparing for it, Seth replied that it was an amazing education. Seth created and submitted three separate series for the exhibition. The series that got the most attention and had the best sales was the series that Seth actually liked the best himself. He had not expected this. It was a great reminder for Seth to create work that appeals to him and that will also then resonate with the audience. The exhibition also helped Seth to set the direction for further work and he will continue to “do what comes to you, do your heart”. He wants to remind all of us that when we do what we are passionate about, others will relate to it.

With Seth living and working in New York, he finds he is surrounded by inspiration every time he steps out of his front door – the energy of the city, the architecture, the culture and the shops, all provide a dose of daily inspiration. Even the found objects that Seth picks up can spark a new piece. Seth finds that working on more than one piece at a time is a way to keep his work fresh and moving. Often working on three or four pieces, he will leave them and then return to them with fresh eyes to decide if the piece is finished or not. Another way of assessing his own work is for Seth to take photos of works in progress and the view them on the computer. This allows Seth to see his work differently and what may have appeared finished at first glance actually needs more work.

Layers are a key part of Seth’s mixed media work. He suggests that we experiment and use products and colours we don’t like or usually use in the lower layers. It gives us a chance to use up product we have bought or experiment with colour combinations that are outside our usual comfort zone. In these base layers, they are often covered up, so we are free to play and see what we can come up with. I love this tip from Seth – it allows us to give ourselves permission to play and experiment. And you just never know which product or combination will spark a new idea or move your interests in a new direction. And there are always new products to try. Seth says he is a self confessed “product fiend” who loves getting new stuff to play with.

Seth Apter New York City mixed media artist creates wonderful pieces of assemblage and collage

“The wonderful or not so wonderful thing about the craft industry is there is always something new” Seth says. And that leads to trying new things and evolving his process but he always comes back to the basics; gesso, acrylic paints and glazes. Seth will then use the new products, like inks and sprays as adjuncts to the core of his designs. Of course, he loves stencils (his latest stencil designs can be seen over at Stencil Girl Products) and enjoys playing with Gelli plats to create prints to use in backgrounds or in small pieces in collage. Seth also loves bookmaking and likes to use Gelli printed papers to cover book board, either to create a book or to use as a layer in his collage.

Seth Apter New York City mixed media artist creates wonderful pieces of assemblage and collage

We got onto the topic of helping people expand their crafting into the freeing space of mixed media, where anything goes. Seth suggest finding other creative people on line and taking classes to move you out of your comfort zone. And consider the art supplies you have and might buy – which ones give you freedom to use in a number of different ways.

If you wanted to take a class with Seth, you can see where he will be on his website www.sethapter.com. Seth finds teaching so inspiring and learns as much from his students as they learn from him. it gives everyone a chance to become part of the community. “I love seeing excited and happy students” Seth says “and seeing the impact I have with students who start less than confident, then let go”.

Seth Apter New York City mixed media artist creates wonderful pieces of assemblage and collage

One of his upcoming teaching engagements will be part of the Art Is You team heading to Australia in August 2014.

“I’ve always wanted to visit Australia” Seth says and he had his chance to combine the trip and teaching with an a amazing group of instructors in Sydney, Melbourne and Brisbane in 2015. Seth is very keen to see what the mixed media community is like in Australia.

~*~*~*~*~*~*~*~*~*~*~*~*~*~*~*~*~*~*~*~*~*~*~*~*~

Michelle G. Brown is passionate about mixed media art and enjoys sharing her knowledge and techniques with you to allow you to express your own creativity. Michelle understands that many of us have an inner need to create. By learning a few basic techniques the amazing world of mixed media art is accessible to everyone!

Michelle lives with her husband and two boys in Melbourne, Australia.

~*~*~*~*~*~*~*~*~*~*~*~*~*~*~*~*~*~*~*~*~*~*~*~*~

.

.

Getting Started with Beeswax Collage

~ * ~

This article is written by Debbie Davis from In Art Therapy.

Debbie has previously shared her Christmas beeswax collages with us. Now she is back to step us through the process of getting started with this interesting medium.

claybord beeswax mixed media collage

Introduction

Beeswax is a wonderful medium to use in art. It can be used as a decoupage medium for adhering papers and objects to a number of surfaces. It can be stamped into to add texture to your art and rubbed with an oil pastel to add color.

There are many options available when choosing a substrate upon which to create your collage. Here are a few:

  • Wood
  • Masonite
  • Paper
  • Canvas (small gallery wrapped or canvas panel)
  • Encaustic board
  • Clayboard
  • Metal

I have read that you should not apply beeswax over acrylic paint because it will eventually fall off. I do use small canvases that have been primed with acrylic gesso and have never had a problem with it coming off. I wouldn’t use a wrapped canvas any bigger than 5×5 inch because there isn’t as much support. I find the 4×4 inch to be the perfect size. You could also use a canvas panel which would be much sturdier.

Choosing your wax

Beeswax is sold in one or two pound blocks. It is also available in bags or jars that contain small pellets. It can be yellow (natural) or white (filtered) in color.You can find beeswax online or at a number of craft and hobby stores. Prices will vary but I usually pay around $11.00 for a 1lb block.

Heating tools options

  • Crock pot
  • Griddle
  • Melt Pot (made by Ranger)
  • Heat Gun
  • Mini iron (I love using my Clover mini iron)
  • Travelers iron (without holes)

If using a block of wax, you will need to break off pieces for melting. Put the wax in a plastic bag and hit it a few times with a hammer. Melting the wax can take a while, depending on how much you put in your pot. I like to use a small crock pot I bought at a yard sale. You should be very careful not to overheat the wax. Put it on the medium to low setting.

You could also use an electric griddle and put a pan on top with the wax in it. Just remember that whatever you put the wax in, you will not be able to use it for anything else.   Keep the temperature setting around 200 degrees. If the wax starts to smoke, the temperature is too high.

I love to use a mini iron to smooth the wax out after adding elements to the collage.  A heat gun can be used to fuse layers of wax together. You can also easily fix mistakes by melting the wax and removing any elements you are not happy with. All of these tools can be found on-line or at your local craft stores.

When painting the wax onto your substrate, use a natural bristle brush because synthetic brushes will melt. I just buy the cheap chip brushes. Also know that once you use the brush in the wax, you will not be able to use it for anything else. The wax will harden quickly on the brush but will melt again once placed back in the hot wax.

Items to use in your collage

  • Any type of paper (Scrapbook, dictionary pages, vintage book pages, magazine clippings)
  • Old photos or printed images
  • Buttons
  • Keys
  • Dried flowers
  • Found objects
  • Material
  • Lace
  • Ribbon
  • Paper napkins
  • Gift wrap tissue
  • Pattern tissue

This is where you can really have fun because if you don’t like where you put something, you can melt the wax, move the object and start over again. No need to worry about ruining your substrate.

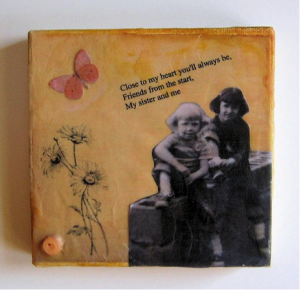
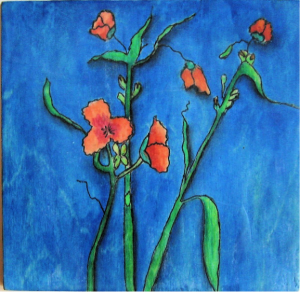
Here are some examples of collages I have created on various substrates:

canvas beeswax collage

Collage on Canvas using an image of my sweet cousins, flowers and a poem stamped onto white tissue paper along with a paper butterfly and a button.

wood substrate beeswax collage

Beeswax on Wood – Ink and watercolor painting coated in Beeswax

claybord beeswax collage

Beeswax on Clayboard – I used tissue paper, scrapbook papers, a page torn from a vintage children’s book and an image printed from my inkjet printer.

I hope you have fun experimenting with this new medium – it’s perfect for a range of mixed media projects!


~*~*~*~*~*~*~*~*~*~*~*~*~*~*~*~*~*~*~*~*~*~*~*~*~

My name is Debbie and I live in Morton, Illinois, USA. I’m happily married and have a wonderful family that includes a daughter, son, son-in-law and 2 of the sweetest grandchildren ever!

What I love most about mixed media art is that you don’t have to be an expert at anything to create beautiful art. It is a great way to recycle found objects. Art is such a wonderful stress reliever. I just wish I had more time to play!

I have a shop on Etsy called Artful Explorations where I place some of the art I have created for sale. Having been inspired by others who are willing to share their techniques and ideas, I decided to start a blog called In Art Therapy and hope you will visit me there.

~*~*~*~*~*~*~*~*~*~*~*~*~*~*~*~*~*~*~*~*~*~*~*~*~

For further reading:

.