Michelle G Brown | Mixed Media Art

Mixed Media Canvas – “Be Brave” Girl

~ * ~

This article and mixed media canvas was created by Melanie Statnick

1. Start with a blank canvas. I’ll be using a hard board canvas for more support. Cover the entire service with decorative tissue paper of your choice using Gel Medium. The paper creates great texture for this piece.

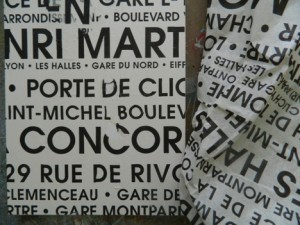
Printed tissue for canvas layering

2. After you’ve dried the tissue paper start covering the surface with white acrylic paint. Dry between layers of paint.

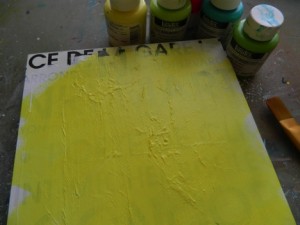
Printed tissue is covered with bright paints

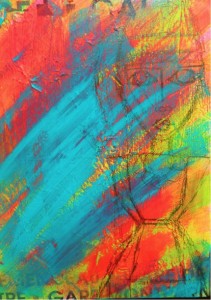
3. Start layering your background starting with the lightest paint colors first. Apply paint in a diagonal fashion using back and forth strokes with a med size brush.

Add more colours with diagonal strokes

4. After your layers of paint have built a foundation as your background you’ll want to use an 8B graphite pencil to free hand sketch a character anywhere on your canvas.

Lightly sketch with graphite pencil

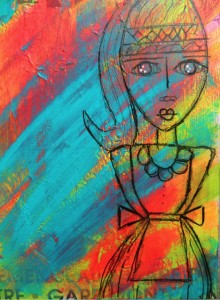
5. Next you’ll want to go over the pencil line using a black marker. I suggest a 1.2 mm.  Line the face and body. This will make your character stand out.

Define sketch with 1.2mm black marker

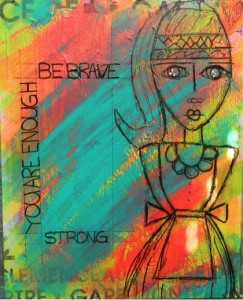
6. Using a ruler pick an open spot on your canvas to create a rectangular space to write. Using your black marker outline the rectangle twice creating blocks to write in words. Choose words that are inspiring to you.

Use ruler to add lines and words

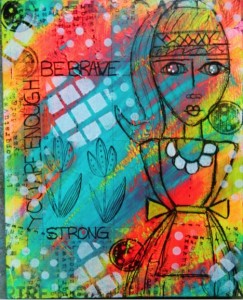
7. To complete the painting use stamps and stencils of your favorite and create the next layer to your back ground. In some spots you may want to layer over your character as you see here. Add details to your characters body face and clothing.  When using your stamps be sure to use permanent ink pad. I also suggest using lighter paint on a dark back ground when you stencil.

Stencilling and stamping add final touches to canvas

~*~*~*~*~*~*~*~*~*~*~*~*~*~*~*~*~*~*~*~*~*~*~*~*~

I’m a Canadian Mixed Media & Collage Artist out of North Carolina . I create art daily from my private studio. My artwork is fun and whimsy . I teach mixed media & Art Journaling online and in classroom. I hold mixed media workshops around the USA. My artwork can be found in art galleries and shops extensively in NC with international private collections. I have created my personal line of original stamps to purchase and use in your art. Look in my Etsy shop for my line.

Please visit my website to learn more about me and my work on Facebook.

~*~*~*~*~*~*~*~*~*~*~*~*~*~*~*~*~*~*~*~*~*~*~*~*~
.
Taking the leap from Hobbyist to Full-Time Artist

~ * ~

This article is written by Keri Sallee

Pursuing a dream is never an easy task. It takes strength of heart, a heap of patience and maybe…just a dash of insanity.

Many people thought I was beyond crazy when I decided to quit my job and try my hand at being a full-time artist in the paper-crafting/mixed media world. And in all honesty, it was never something that I had considered until I met an amazing woman named Cheryl Boglioli. This homeschool mom/medical transcriptionist turned full-time artist and social media maven has become my mentor as I figure out my way in this new territory and today I want to share some of her wisdom and experience with you.

Cheryl Boglioli full-time artist and social media mave

Be practical

So you want to be a full-time artist? Here are some practical tips from Cheryl:

(1) Do your research! Take time to figure out what kind of business is right for you right now. There are LLCs, DBAs and so many others. Seek help from those who know more than you. Cheryl was inspired to take her leap into full-time artist by attending a Craft and Hobby Association (CHA) roundtable discussion with other designers and still uses them and CHA as resources.

(2) Find a mentor. The mentor/mentee relationship can sometimes be misconstrued, Cheryl says. It’s not meant to be someone who does the hard work for you or acts as a business coach. Rather they are meant to be your example of a professional designer and to be your sounding board for questions. This is a very special relationship, so choose carefully.

(3) Be prepared for rejection. You will not get every opportunity you reach for and it’s hard not to take it personally. Here’s what Cheryl suggests: think of it this way…they aren’t saying “no” to you or your art…it is just not what they are looking for. Cheryl also reminds us to be open to critiquing; in the long run, it will make you a better business person and artist.

(4) Be organized and have a plan. Cheryl loves tools such as Google calendar to keep track of deadlines (a necessary evil! LOL), both personal and professional. Being organized she said, also helps keep the lines of communication clear and allows you to be an active member of the art community, both vital to your cause.

Cheryl Boglioli full-time artist and social media mave

The Artist’s View

Getting to do what she loves everyday is Cheryl’s favorite part of her choice to become a full-time artist. In her studio in historic downtown Fort Pierce, FL, she has the opportunity to be surrounded by the positivity and creativity of other artists. But, she says, it can be easy to get bogged down with creating for others, deadlines and the business side of what you are doing. Cheryl’s suggestion is to make time to play. Take time to sit at your desk…in your studio or wherever you create and create just for you.

Be prepared to ask yourself self-evaluation questions. Cheryl says that is some of the best advice she received from Julie Fei-Fan Balzer. Always be asking yourself questions like “Why am I doing what I’m doing?” and “What am I passionate about?” The questions and answers like this will always be changing and will help guide you, so ask them often.

Be inspired by those around you, but stay true to yourself is another great piece of advice from Cheryl. Even as advanced as she, she still takes classes, learns from others and then incorporates it into her own person style.

In a Nutshell

You CAN do it! That is the most important thing that Cheryl has taught me. Yes…there are rough days, but then there are days when you are so inspired there aren’t enough hours in a day to get it all done. It takes planning and faith to move forward, but if others can do it….so can you.

Photo of Cheryl and Keri at Winter CHA 2013

To learn more about Cheryl, check out her website: Cheryl’s Window and for the complete interview, check out my blog: The Creative Life Studios

~*~*~*~*~*~*~*~*~*~*~*~*~*~*~*~*~*~*~*~*~*~*~*~*~

Keri Sallee is a paper-crafter and mixed media artist who believes that EVERYONE was made to create. She loves thinking outside the box when it comes to her designs, like her Wizard of Oz inspired high-heel shoe that won her a spot on Graphic 45’s 2014 Design Team. She has also designed for The Canvas Corp family of companies, Susan K. Weckesser, The Craft Warehouse, Authentique Paper, Want2Scrap and The Buckle Boutique. Her favorite artistic quote is by Picasso and it says “Inspiration Does exist, but it must find out working.”

You can see more of Keri’s work on her blog ~ The Creative Life

~*~*~*~*~*~*~*~*~*~*~*~*~*~*~*~*~*~*~*~*~*~*~*~*~

.
.

Faux Dichroic Glass

This article has been written for us by Linda Giese

Making faux dichroic glass is a little smelly and time consuming, but a whole lot of fun and endlessly creative!  Whenever I get out all the stuff I never want to stop.  I keep adding more elements, trying new color combinations and when something works particularly well, I want to do it again before I forget what I did.

coloured glass

There is a little planning in the process and a whole lot of serendipity. I’ve been surprised more than a few times with how a particular embossing powder acts on the surface.  Some spread into flower blossoms and some leave airy spaces while others cover everything you did before.  The Asian text loses the paper and leaves the beautiful lettering.

So let’s get started.  I use my 44 year old electric frying pan for my heat source.  I learned the technique from a friend with a hot plate.  We set the glass on a craft sheet, but often burned our hands or dropped the glass using tongs.  I tried to find an inexpensive used hot plate to no avail, so looked for another option.  One more of my small appliances is now dedicated to my art.  I tried putting my glass pieces on a craft mat, but soon had powder and beads all over my pan.  I also burned my fingers and dropped a few pieces.

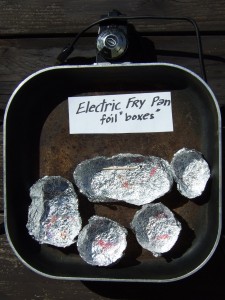
Frypan to make your own coloured glass

I tried aluminum pans, but most had patterned bottoms so the heat was uneven and parts of the embossing powder took forever to melt.  My little foil boxes work so well.  I can pick them up easily and keep most of the powder inside the boxes. I can also easily remove the finished pieces while leaving others in place.

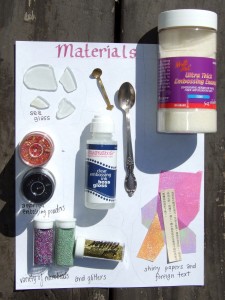
The other materials you will need are sea glass, clear embossing ink, clear ultra thick embossing powder, assorted colored embossing powders, a small spoon for adding new elements and a toothpick for moving things around.  Optional extras are microbeads, glitters, shiny papers and foreign text.

materials needed to make your own coloured faux dichroic glass

The sea glass can be clear or colored, but should be nice and flat.  If you can get real sea glass with the smooth edges, that would be ideal.  But I often uses the bag of sea glass from the craft or dollar stores.  I prefer the bottle of embossing ink with the dauber top to the pad.  I feel I have more control and get better coverage.  I found my shiny papers at the dollar store as holographic tissue paper.

The process is quite easy.  I heat the frying pan to between 250 and 300 degrees fahrenheit   I tear some pieces of aluminum foil and fold up the sides, pinching the corners for open boxes, trying to keep the bottom nice and flat.  I put embossing ink on one side of the glass and dip it in the clear ultra thick embossing powder.  Put the glass, powder side up, in the foil box and into the heated pan until it melts.

Now it is time to have some fun.  Add some papers (save the text for a near the top layer)or add microbeads, or colored embossing powders a bit at a time with a very small spoon.  Let each layer melt before adding more.  Don’t add too much powder at a time. Whenever you want something to show through, add more clear embossing powder on top.

I keep preparing new pieces while waiting for others to melt.  You will know it’s all melted when the whole top is shiny.  You won’t have to add any more embossing ink after the first layer because the wet powders will grab the additional layers.  Leave the pieces in the pan as you add things and remove when they are finished.  The top edges of the foil are cool enough to carefully lift out of the pan, but be aware that the glass will be very hot!  Let it cool before you touch it.

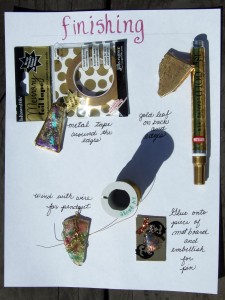
materials needed to finish your own glass

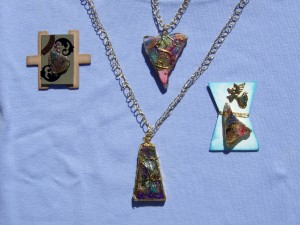
Now that you have a nice array of beautiful pieces, what do you do with them?  Most of mine are made into pendants.  I also crochet gold thread (just a chain stitch) for the necklace when I sell them.  I use 24 gauge wire, cut a piece, make the top loop, wind randomly and tighten.  Sometimes I use my gold pen on the edges and or back.  I tried the metal tape around the edge, but wasn’t pleased with the result.  I also like making the smaller pieces into pins.  I glue them (I use Aleene’s Tacky Glue) to small pieces of mat board and embellish them.  I adhere a pin back.  You can also use them on a mixed media canvas or board.

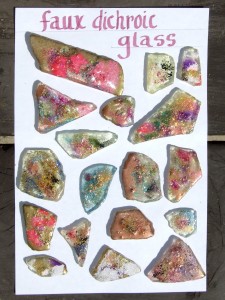
faux dichroic glass pendants and brooches

Let me know if you come up with more ideas for additions or uses.  Have fun and be creative!

Hugs, Linda

~*~*~*~*~*~*~*~*~*~*~*~*~*~*~*~*~*~*~*~*~*~*~*~*~

Linda Giese has an altered book in the Autumn 2012 issue of Art Journaling.
 She welcomes emails, questions and comments at linda.giese@yahoo.com

~*~*~*~*~*~*~*~*~*~*~*~*~*~*~*~*~*~*~*~*~*~*~*~*~

.
.

Documenting your Creative Process with an Art Journal

~ * ~

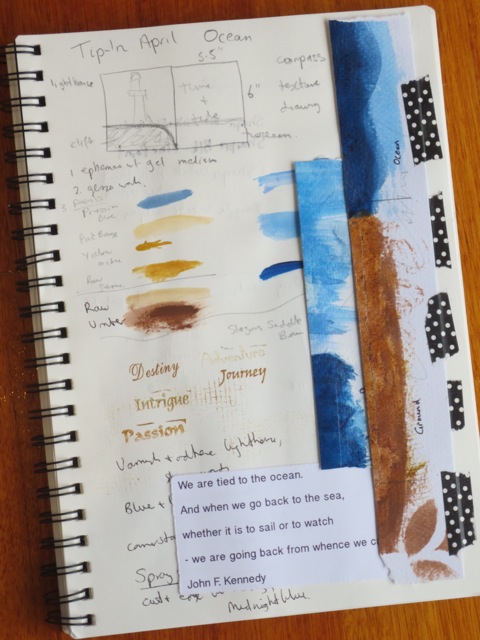
There is nothing more frustrating to have created a wonderful mixed media painting or when you have mixed paints to create new, wonderful colors, and then not being about to repeat the process or outcome because you can’t remember what you did in the first place. That’s where an Art Journal or visual diary can make all the difference. By jotting down a few key steps and materials you used in your artwork, in creative journal, you will have a reference when you are looking for ideas or wanting to replicate a certain technique.

Have an art journal at hand to note down colours and materials used

Tips for using your Art Journal

Here Michelle shows you her art journal and the kind of things she documents.

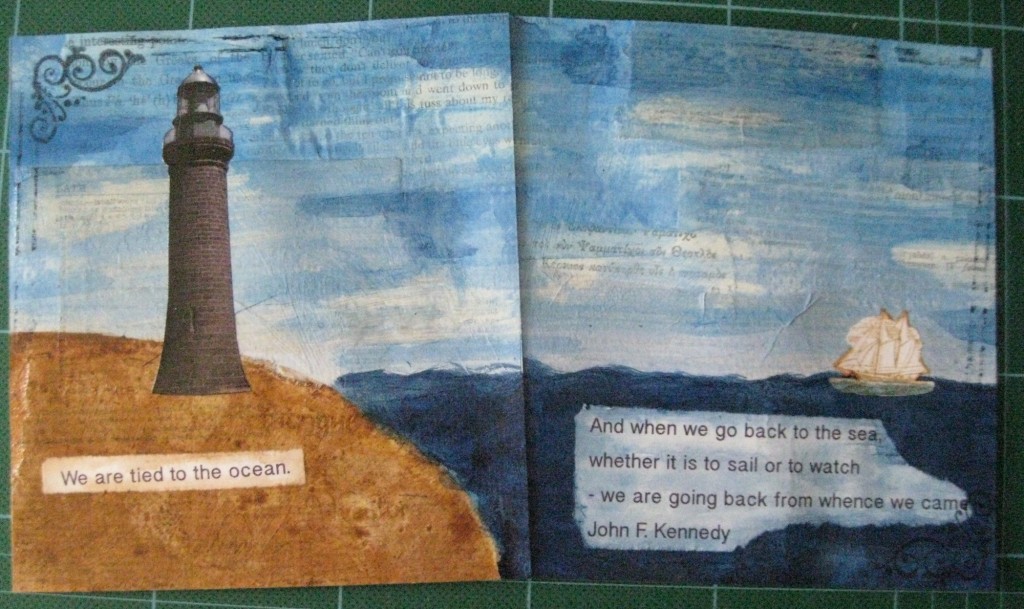
Here is the final mixed media painting Ocean that Michelle was creating while documenting the process steps and the acrylic paints used.

tip in swap spread with "Ocean" as the theme

When you compare the initial sketch at the top of the page in the art journal, shown above, with the finished piece, you can see the sketch is only a rough outline of how the final piece turns out. That’s fine. The art journal is to simply document any thoughts and ideas that you have at the start. then you can show the layers, as you have added them. Note that paints or mediums you have used.

When selecting a book to use as an art journal, consider the different types of mediums you are most likely to use and choose one with paper that matches. Here I’ve used a visual journal, which is great for sketching and adding little samples of paints and adhesives. Some inks and too much paint will run through the pages, so keep the paints fairly dry.

I tend to use both sides of the pages but will always start an important piece of work on a new page. That way I have a nice clean sheet, without any lumps of bumps underneath the paper. Then I can use the backs of pages for straight sketched or to develop and document ideas for future projects.