Michelle G Brown | Mixed Media Art

Mixed Media Art Found Objects

~*~

You can never have too much stuff in your collection, ready and at hand for your next Mixed Media Art project. But you don’t need to purchase special, shop made embellishments. I am always on the lookout for odd pieces of paper, sticks, colourful feathers, rusty pieces of metal and bottle caps that have been run over. All of these items can be used to add detail into your artwork.

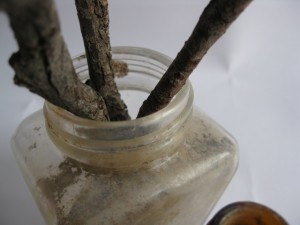
Sticks

My obsession with collecting found objects began after starting down the mixed media path. In my blogging travels, I found fantastic artwork with old keys and bottle caps. I was drawn into the beauty of adding antique objects into artwork; taking an everyday item and creating a story in the piece of mixed media art. I am now embarrassed to admit that I have even bought these items from craft stores which had been repackaged and sold to unsuspecting artists.

After several purchases I realised that some of this stuff was things I could find around my own house or in my Grandma’s bottom drawer. I didn’t need to buy repackaged items from a craft store when I could find these items around me. I needed to put my “art stuff” glasses on.  Once I had changed my mindset, it was amazing at the things I could find around me that can be used in my art.

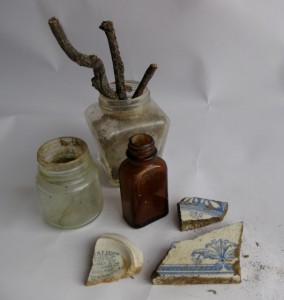
On a recent foray into country Victoria, we were walking around the local lake and found an area that must have been an old dump. While many of the pieces were broken, there were a few pieces worth saving. I’m not quite convinced I have found any antique pieces but they will clean up nicely.

MMA_Collection

As you expand your creativity in the Mixed Media Art field, make sure you are wearing your “found object” glasses when you are out on a walk, tidying up an old drawer or slinking through an antique shop. You never know what you may find. And you will be surprised when that bolt of inspiration hits while you are creating  and you remember those found objects you have hidden away.

Happy Creating!

~*~*~*~*~*~*~*~*~*~*~*~*~*~*~*~*~*~*~*~*~*~*~*~

.

.

Handmade Books – How to Make Covers

Creating your own handmade book is one of the most exciting mixed media art techniques. This is a simple process once you have mastered the basics. When you can make your own book covers, you then have the option to create anything from little booklets to full size books.

Step 1. Determine the sizes
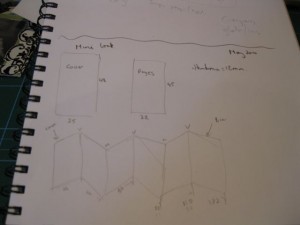
When creating a book, the cover is usually a little larger that the pages, but the spine needs to align. I use my art sketchbook to draw a sketch and write down the size of the pages, the size of the covers and any notes as to colours, layout thoughts or items to use.

Step 2. Cut the covers
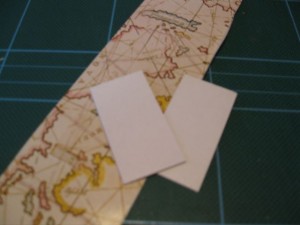
Using a medium weight board (or chipboard) cut out two covers the same size. Lightly sand the outer edges with an emery board or scotchbrite. This removed the sharp edge off the cover giving it better durability once it is covered.

Step 3. Cut the covering paper
The paper used to cover the covers needs to be a sturdy paper. If it is too thin, it will tear when glue and pressure is applied. If it is too thick, it makes it harder to fold over the edges and makes the covers too thick.
Cut this paper 10mm larger than the board cover on each side – this makes it 20mm bigger in length and 20mm bigger in width.

Step 4. Cover the cover with the covering paper
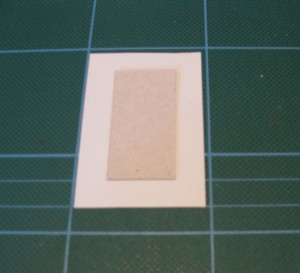
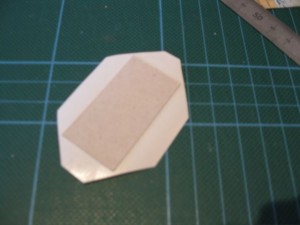
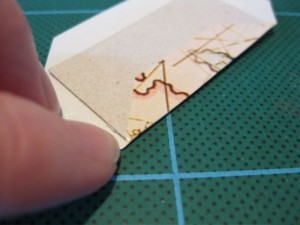
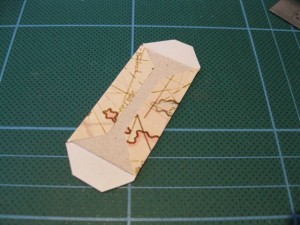
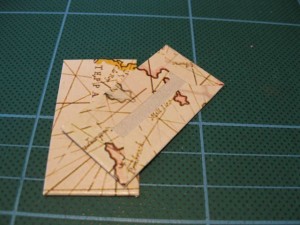
Do each cover separately. Cover the covering paper with glue. Most times a glue stick is adequate. Make sure you have an even layer, right up to the edges. Place the cover board in the middle and press out any bubbles. Cut each corner at a 45 degree angle, leaving enough to completely cover the board.

Fold one side up and over the back of the board. Use your finger nail to press it firmly and to fold in the little corner that will fold under other edge. Fold up the opposite edge. Then fold in the two ends.

Repeat this process with the second cover.

Check there is no excess glue oozing out. Sit them under a heavy book and leave overnight to dry.

Step 5. Attach covers to book pages
As the covers are slightly bigger that the inner pages, apply the glue to the pages then carefully attach the first cover. To ensure the two covers are lined up, close the book, apply the glue to the back page stick down the back cover, then carefully align the cover, checking that they two covers with sit neatly when closed.


Once you have mastered making your own handmade book covers, you can easily make your own books, ready to decorate into any style. They are easily personalised to make the perfect gift.

Happy creating!

*~*~*~*~*~*~*~*~*~*~*~*~*~*~*~*~*~*~*~*~*~*~*~*~*~*~*~*~*~*~*~*~*~*~

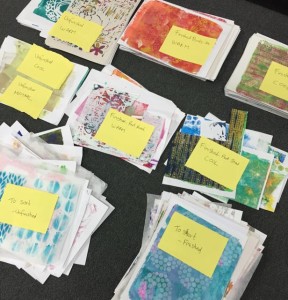
Storing your Gelli Arts & Gel Press Prints

*

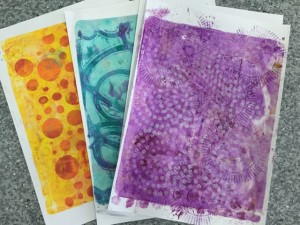
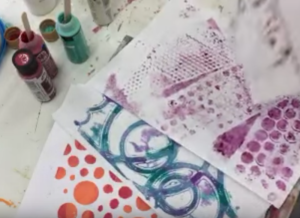
When you get into creating your own background papers with monoprinting, whether you are using a homemade gelatine plate,  a GelliArts plate or a Gel Press one, once you get started, the prints start flowing!

Before you know it you have  H-U-G-E pile of gel prints!

Storing your gel press monoprinting gelli arts gel press gel prints

When it comes time to use your some of your beautiful papers, it gets frustrating when you have to shuffle through a large pile of printed paper and deli papers. Here Michelle talks about her approach to sorting and storing her gel prints, as inspired by Julie Fei-Fan Balzer.

*
*

I hope you find this simple concept easy to adapt to your own gel prints storage. It can even be adapted to all of your scrapbooking and ephemera papers. You can always create more categories to sort but remember that if you make your system too complicated then, you’ll be less likely to use it, so keep it simple when you are getting started with sorting and storing your gel prins. You can improve on your storage system once you have a simple system that works for you.

If you are looking for ideas on using your lovely printed papers, see What to do with your Gel Plate Prints for inspiration. Having your own, unique gel prints allows you to create simple pieces that will always have a personal touch, because the printed papers are originals.

Happy creating,
Michelle

Review of Janelle Nichol’s online mixed media class “Fashionista”

~ * ~

This article was written by Anjuli Johnson

Mixed Media class, Fashionista

I wanted to give myself a big break before writing this review, because I find when I allow myself time, I hold on to the main parts I took away from the class, and forget the rest.  What did I really learn from Janelle Nichol?  Was it more than just a fun class? Is it something that I’ll continue to draw on as I keep creating?  Giving myself a month to write this has made me understand that yes, it was more than a fun class.  Her techniques and instruction have influenced my work and made me a better artist.  I go back to what I learned often and am so grateful I took this course.

mixed media art background with flourish stamping and calligraphy from mixed media class.

The main thing I took away from the Fashionista class was how she pushed us to keep going, keep working and see what happens, especially when working abstractly and with backgrounds.  I tend to add two layers at most, because I get so attached to the elements I’ve added and I want them all to show on my pieces.  I came into this workshop with the same attitude.  I began by saying “Ok, this is more than I usually do, but I have to follow the directions…” which progressed to “Dang, this is a lot and I’m kind of tired of working on this background.  Can’t we just stop now?”  to finally saying “Wow, I can’t believe how awesome this looks… I need to do this more often!”  I found that when I followed Janelle’s instructions to keep working, my backgrounds took on a depth that they’ve never had before, and that experience has carried over into the work I’ve done since, including some commissioned pieces.

mixed media class review, using layers of paint, stamping, text, calligraphy, and stencils.

I loved this workshop because it was detailed, encouraging, and Janelle was very knowledgeable; but I especially loved how it pushed me to do things I was uncomfortable with.  It’s a long class, but Janelle has split it up into several parts, so it’s easy to take breaks and come back if you need to.  She gives a full list of supplies and carefully explains what she’s doing and using, which makes it easy to follow exactly, or substitute other supplies in if you don’t have something or want to use something else.

hand written calligraphy as an added layer in the mixed media grunge background for Janelle Nichol’s mixed media class, “Fashionista”.

I would definitely recommend Janelle’s classes.  She’s an artist that I am proud to have learned from.

You can find Janelle’s Fashionista Class here on SkillShare

~*~*~*~*~*~*~*~*~*~*~*~*~*~*~*~*~*~*~*~*~*~*~*~*~

Anjuli Johnson is a Mixed Media Artist from Raleigh, NC.  She began her art career as a scrapbooker, and it’s been an evolutionary process every since.  She loves all things mixed media- paper, glue, paint, canvas, pens, wire, gears… the list goes on and on.  She is constantly trying to push through her fears to discover and develop her talents, meet new people, and learn from and inspire those around her. Facebook.com/TheFarPavilion

~*~*~*~*~*~*~*~*~*~*~*~*~*~*~*~*~*~*~*~*~*~*~*~*~

Disclosure: Access to this course was supplied by Janelle Nichols for the purpose of review. All opinions are that of the MixedMediaArt team. Some links on this page may be affiliate links and any purchases help to support the ongoing work by MixedMediaArt.
.

.