Michelle G Brown | Mixed Media Art

Journaling on the Quick

~*~

This article is written by Debbie Davis

I like to keep a number of painted backgrounds at the ready in my journal books for when I don’t have a lot of time but am feeling the need to journal.  One of my favorite journals is a vintage ledger binder that I picked up from an antique store.  The ledger pages had never been used.  I sometimes keep a few of the pages handy when I’m working on other projects and use any leftover paint on them to create a background.

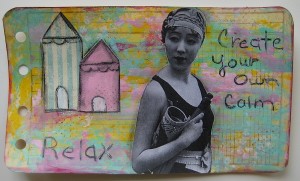
I had just returned from a beach vacation and was starting to think about all that needed to be done at home and work, but what I really wanted to do was journal.  I didn’t do any art or journaling on the trip and was really missing it.  Since I didn’t have much time, I used a previously created background.

Journaling Image

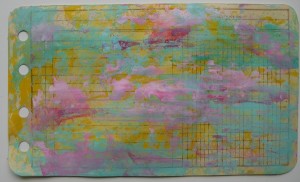
This background was made by randomly scraping pink, yellow and blue/green paints that had been loosely mixed with some white fluid acrylic paint onto the ledger journal page using an old store card.  The colors were so calming and reminded me of the beach.  I then remembered a vintage photo that I had been wanting to use in my journal for a long time.

Journaling Image

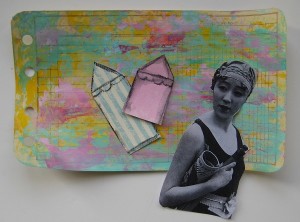
I copied and pasted the photo into a Word document and resized it so that it would fit on the journal page.  I printed, cut out and collaged the photo, along with two little beach cabanas that I had cut out of scrapbook paper, onto the page.  I outlined the photo and cabanas with a Stabilo pencil and lightly went over the pencil with a wet brush.

Journaling Image

Next I wrote some words onto the page with the Stabilo pencil.  The black penciled words were standing out more than I wanted so I took a white gel pen and scribbled over the words to tone them down a bit and give them a washed out look.  This page was so quick and easy, yet I still felt that sense of contentment that I usually feel after getting in some artful playtime.

~*~*~*~*~*~*~*~*~*~*~*~*~*~*~*~*~*~*~*~*~*~*~*~*~*~*~*~*~*~

Debbie Davis is a mixed media artist living in Morton, Illinois.   She finds creating art to be a wonderful stress reliever and plays in the paint and other mixed media mediums every chance she gets.

You can find more of Debbie’s art and techniques by visiting her In Art Therapy blog at inarttherapy.wordpress.com

~*~*~*~*~*~*~*~*~*~*~*~*~*~*~*~*~*~*~*~*~*~*~*~*~*~*~*~*~*~

.

.
Mixed Media Decor Pillow

~*~

This article was written by Melanie Statnick

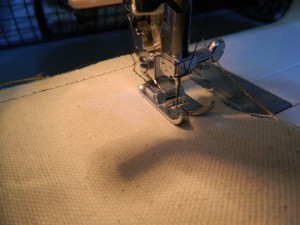
When I go to home décor and craft stores I see an abundance of items for the home that I can create myself with more flare and personal touch. Decor boxes, wall art, candle holders, garden and décor pillows. Sure not all of us can work a sewing machine, believe me it took me a few times to figure out what I learned in Home Studies from high school and that was many moons ago. Thank goodness for instruction books and DVD’s that come with most machines today. I still managed to pop off a needle, (don’t ask).

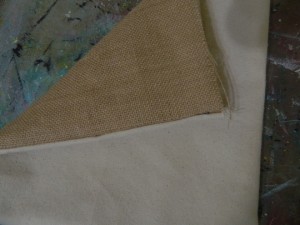
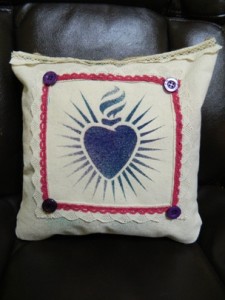
I bought a sheets of burlap and canvas squares. These can be found in the scrapbook paper aisle. To make a small pillow you’ll need one of each or 2 of each depending which fabric you’ll want to play with. I used one sheet of each to make one pillow. The art will be on the canvas side.

using canvas, burlap, ink and stencils to make a décor pillow for your home or gift

: using canvas, burlap, ink and stencils to make a décor pillow for your home or gift

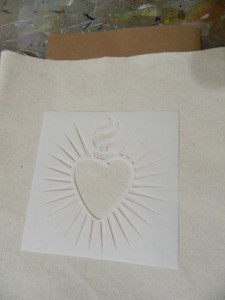
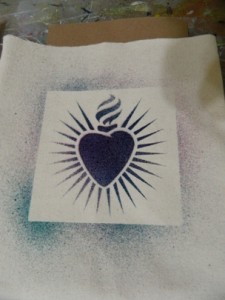
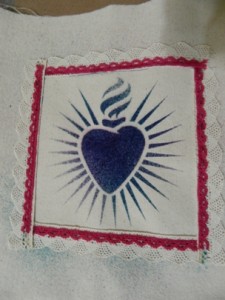
I used a stencil on this pillow. Lay your stencil out in the section you want and I used ink spray for this in pink and blue which gave a purple affect. I thought the speckled boarder from the spray gave it a little character. I also used a light glitter mist over the stenciled design.

using canvas, burlap, ink and stencils to make a décor pillow for your home or gift

using canvas, burlap, ink and stencils to make a décor pillow for your home or gift

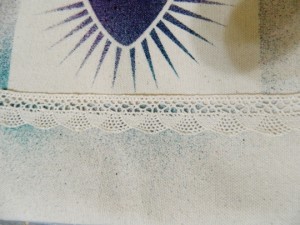
If you do not like the fine mist around the design because it looks messy then cover your edges with scrap paper, but what is Art if not messy?  I then used fabric glue then added a boarder of lace ribbon to fame the design and glued some buttons on the corners. Let dry for 24 hours before adding the stuffing to be sure it’s ready. I sprayed it with a fabric sealer after to avoid any running of ink, should I need to spot clean. Happy Creating!

using canvas, burlap, ink and stencils to make a décor pillow for your home or gift

using canvas, burlap, ink and stencils to make a décor pillow for your home or gift

using canvas, burlap, ink and stencils to make a décor pillow for your home or gift

~*~*~*~*~*~*~*~*~*~*~*~*~*~*~*~*~*~*~*~*~*~*~*~*~

Artist Melanie Statnick is a Published Artist/Writer out of North Carolina who writes and creates art daily from her private studio.

~*~*~*~*~*~*~*~*~*~*~*~*~*~*~*~*~*~*~*~*~*~*~*~*~

.
.
Focal Points in Mixed Media Art

~*~

This article was written by Madeline Faiella

Emergence

We talked about telling a story with mixed media art and now let’s talk about adding texture.

Emergence

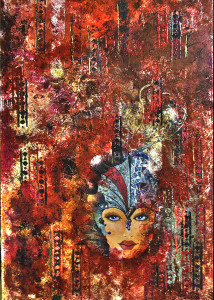
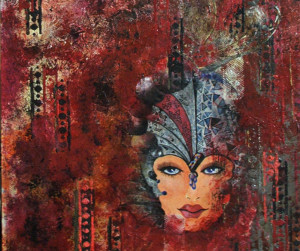
I chose this piece to explain the process because it’s easy to see what I did.  This piece is 3 feet tall and 2 feet wide but try it on a smaller surface if you like.  The surface I used is actually a court room board that an attorney let me have to which I added a base of white paint and gesso.  It’s great when you can re-use something.

The face in this piece is done on paper, painted with acrylic and attached to the base with gesso.  I applied gesso and molding paste in layers across the base surface and around the face in light, graduated layers using a wooden stick.  It’s vital that the edges of the face “live” within the background so lighter layers are better.  Sometimes I add color to the gesso and/or molding paste but in this case I started with clear and let it dry thoroughly.  When applying many layers, drying is very important.  This piece took a while to complete because the humidity here in South Florida can make it very difficult for drying even with the air conditioner on.  Leave your piece to dry overnight between layering to ensure that it’s very dry.

Layer after layer I created my piece with careful planning yet enough spontaneity to keep it free.  I used a trowel and molding paste colored to my desired color and ran it over stencils, burlap and other means of textural items.  Keeping the colors in mind, step back from your work each time you add another layer or item.  Build layer by layer.  The bags that hold oranges make a great textural tool.  Be creative and see what’s around your studio.

Try new things, keep it layered and have fun.  Happy arting.

~*~*~*~*~*~*~*~*~*~*~*~*~*~*~*~*~*~*~*~*~*~*~*~*~

Madeline Faiella is the owner of Madeline Faiella Designs, LLC.  She is a “tradigital” artist.  She works traditionally and digitally in Photoshop and Adobe Illustrator.  Her work is featured on home décor, electronic devices, stationary, fabric and more.  Her arsenal of tools is broad and her work varied.  She is licensed, published, appeared on TV and radio and has written continuing columns for the art and creative community.  She has a line of non-toxic acrylic paint “Art Jacket” with Earth Safe Finishes.  Her art education hails from The School of Visual Arts in Manhattan and the many years she absorbed cultural enlightenment globe-trotting during a 23 year singing career.  She’s been drawing, sewing and making since she was a child. See more of her work at www.madelinefaiella.com

~*~*~*~*~*~*~*~*~*~*~*~*~*~*~*~*~*~*~*~*~*~*~*~*~

.

.
Creating a Simple Mandala Design

~ * ~

This article is written by Shari Welch

What does a mandala look like? A simple explanation of what a mandala looks like is that it kind of looks like a detailed, abstract flower.

On a spiritual level, mandalas are useful devices for centering yourself and getting in touch with your own inner reality. When you color a mandala, you can connect with your spiritual core. Mandalas have long been a part of spiritual practice for many cultures around the world, from Celtic to Tibetan.

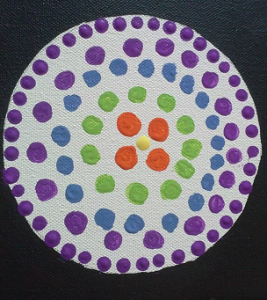
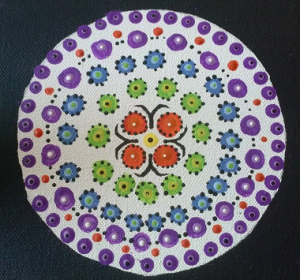
Mandalas can be very detailed works of art. Today I am going to show you a way to create a mandala that looks more difficult than it really is. We will be using lines, dots, circles, and a few diamond shapes. You can create this in an hour or less.

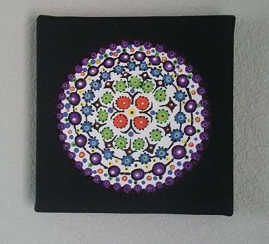
Finished mandala piece

Lets get started

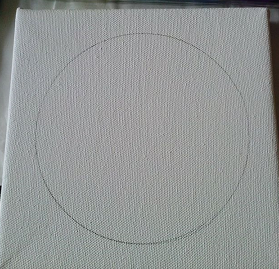
1.Start with a 4×4 canvas. I used a lid as a template to create the main circle.

canvas with plain circle

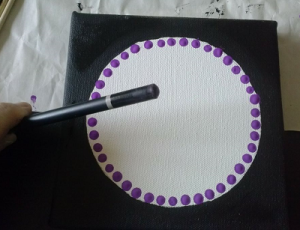
2.Paint around the outside of the circle black.To create the dots you can use the end of a paintbrush, an eraser, glass head pin, dowel, pencil lead, pencil end. You should experiment because each one will give you a different size of dot. Continue to add dots to fill your circle.

dots around inside edge

dots filling circle

3.Experiment using different shades of the same color family, complementary colors, etc. on top of the dots that are already on your canvas. You can add small dots around larger ones to define them. It’s really up to you.

dots on dots

4. Experiment with dashes, diamonds, curved and straight lines until you are happy with your piece.

Finished mandala piece

~*~*~*~*~*~*~*~*~*~*~*~*~*~*~*~*~*~*~*~*~*~*~*~*~

I have been creating art for as long as I can remember. I studied graphic design in Portland,Oregon before moving to Denton, Texas and putting all my focus on mixed media art. In addition to being an article writer for mixed media art, I am on the Creative Paperclay Design team, The Robin’s Nest Design team and a blogger for DecoArt. I strongly believe in giving back. I volunteer at Scrap Denton Creative Reuse Center where I teach workshops, art camps, and perform art demos. I am very passionate about mixed media art and helping others discover their creativity.
You can follow more of my work on My Altered Life’s blog and My Altered Life on FB

~*~*~*~*~*~*~*~*~*~*~*~*~*~*~*~*~*~*~*~*~*~*~*~*~

.

.