Mixed Media Artist – Jenny Crossley

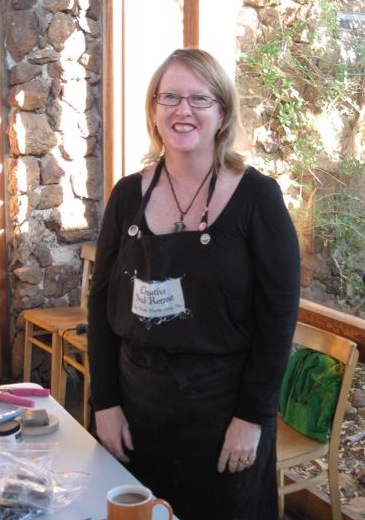
Jenny Crossley is one of Australia’s finest Mixed Media Artists. Based in rural Victoria, her take on Mixed Media art is all about finding unlikely treasures and everyday objects and turning them into brilliant pieces of artwork or jewelry.
A variety of metals and metal objects are the basis for many of Jenny’s creations. A washer or a piece of pipe can have a back piece soldered to it then add an image and other found objects, add ICE resin, and you have the most exquisite necklace.

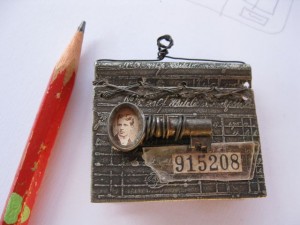
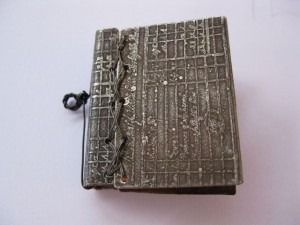
This tiny book made by Jenny features a metal cover that has been etched, using a rubber stamp design. The amount of detail that can be seen is incredible. The pencil shown beside the book indicates how small it is.

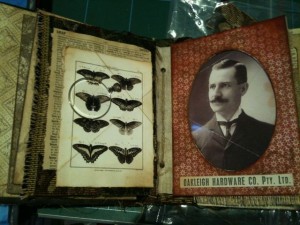
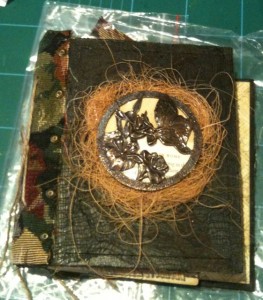
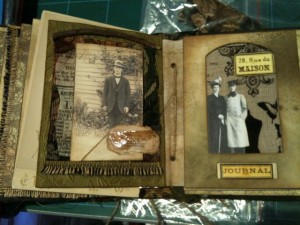
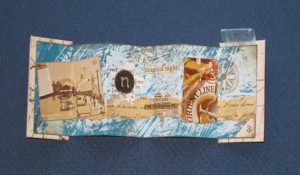
As well as delicate pieces of jewelry, Jenny also creates larger handmade books. This work of art was made by Michelle, from the Mixed Media arts team, under Jenny’s tutelage. The pages are based around pre-cut frames that Jenny has designed. After lots of gluing, aging, antiquing, cutting and sanding, these pages were ready to be embellished and decorated with vintage images and an assortment of found objects. As with most artwork, these photos don’t really show the details in the pages or the cover.

To learn more about Jenny, her art and her online store, her website A Mark in Time can provide more information.

~*~*~*~*~*~*~*~*~*~*~*~*~*~*
MMAT02 – Credit Card Painting Technique

Mixed Media Art Technique 02 was all about credit card painting and here is what I did
with the completed background.

As I wanted to credit card painting and the brilliant colours to show through, I chose to decorate
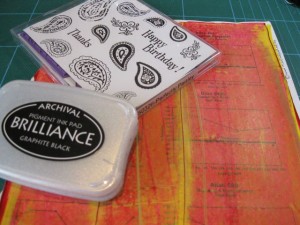
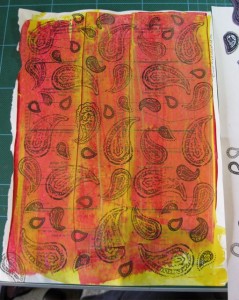
the background with simple stamping, using black ink. My preference is to use
Brilliance Ink in Graphite Black for this project as it is a juicy inkpad, which is good for the more
solid designs and also because it will dry on most surfaces. As I has a thin coating of metallic gold
paint as the top layer, I needed to use an ink that would dry on the non-porous surface. I chose a
paisley design with stamps by See-Ds and used different sizes to cover my background.

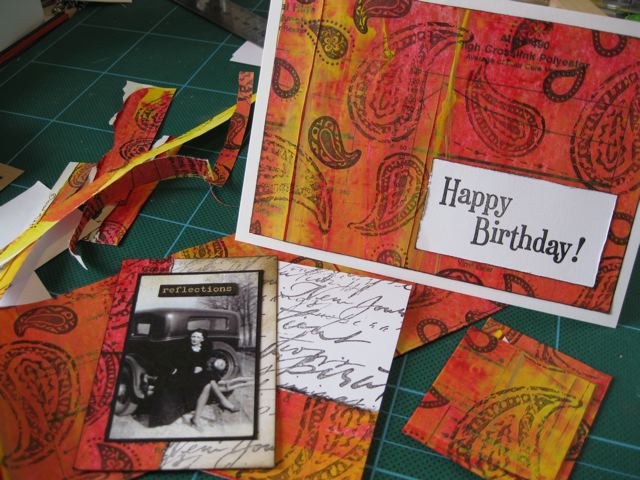
Once dry, I cut up the sheet to make a simple birthday card, an ATC and mini handmade book covers (still to be turned into a book) And I have still got a little left over. Image on ATC from Art-e-zine – my favourite place to go for vintage images.

I hope this inspires you to get creating.

~*~*~*~*~*~*~*~*~*~*~*~*~*~*~*~*~*~*~*~*~*~*~*~*~*~*~*~*~*~*~*~*~*~*~*~
Get your own copy of the Credit Card Painting Technique sheet for
99 cents
and get started on your Christmas card backgrounds NOW!
** use discount code Homemade at the checkout **

Mixed Media Art Techniques

Get your NOW!

The credit card painting technique is great for getting colour onto lots of paper fairly quickly,
which makes it an ideal technique for large swaps or large journal pages.

~*~*~*~*~*~*~*~*~*~*~*~*~*~*~*~*~*~*~*~*~*~*~*~*~*~*~*~*~*~*~*~*~*~*~*
Happy Creating!

.

.

~*~*~*~*~*~*~*~*~*~*~*~*~*~*~*~*~*~*~*~*~*~*~*~*~*~*~*~*~*~*~*~*~*~*~*
Handmade Books – How to Make Covers

Creating your own handmade book is one of the most exciting mixed media art techniques. This is a simple process once you have mastered the basics. When you can make your own book covers, you then have the option to create anything from little booklets to full size books.

Step 1. Determine the sizes
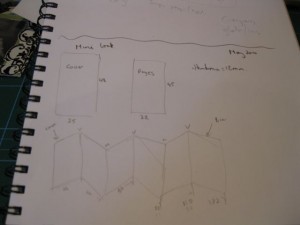
When creating a book, the cover is usually a little larger that the pages, but the spine needs to align. I use my art sketchbook to draw a sketch and write down the size of the pages, the size of the covers and any notes as to colours, layout thoughts or items to use.

Step 2. Cut the covers
Using a medium weight board (or chipboard) cut out two covers the same size. Lightly sand the outer edges with an emery board or scotchbrite. This removed the sharp edge off the cover giving it better durability once it is covered.

Step 3. Cut the covering paper
The paper used to cover the covers needs to be a sturdy paper. If it is too thin, it will tear when glue and pressure is applied. If it is too thick, it makes it harder to fold over the edges and makes the covers too thick.
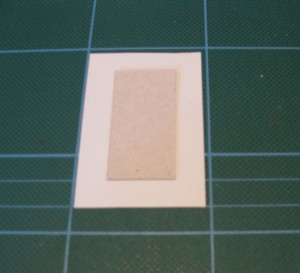
Cut this paper 10mm larger than the board cover on each side – this makes it 20mm bigger in length and 20mm bigger in width.

Step 4. Cover the cover with the covering paper
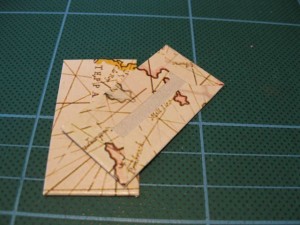
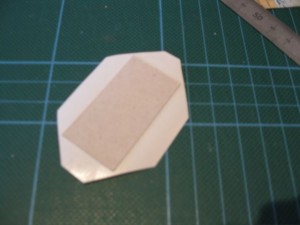
Do each cover separately. Cover the covering paper with glue. Most times a glue stick is adequate. Make sure you have an even layer, right up to the edges. Place the cover board in the middle and press out any bubbles. Cut each corner at a 45 degree angle, leaving enough to completely cover the board.

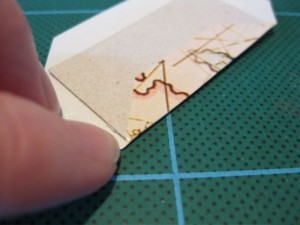
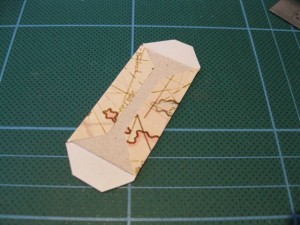
Fold one side up and over the back of the board. Use your finger nail to press it firmly and to fold in the little corner that will fold under other edge. Fold up the opposite edge. Then fold in the two ends.

Repeat this process with the second cover.

Check there is no excess glue oozing out. Sit them under a heavy book and leave overnight to dry.

Step 5. Attach covers to book pages
As the covers are slightly bigger that the inner pages, apply the glue to the pages then carefully attach the first cover. To ensure the two covers are lined up, close the book, apply the glue to the back page stick down the back cover, then carefully align the cover, checking that they two covers with sit neatly when closed.


Once you have mastered making your own handmade book covers, you can easily make your own books, ready to decorate into any style. They are easily personalised to make the perfect gift.

Happy creating!

*~*~*~*~*~*~*~*~*~*~*~*~*~*~*~*~*~*~*~*~*~*~*~*~*~*~*~*~*~*~*~*~*~*~*
There is always more to learn when it comes to handmade books. For further reading:

Creating Handmade Books

Creating Handmade Books

Everyone has a story to tell–so make your own book to tell it with! From the scissors that snip the pages to the glues and stitches and ties that bind them; from elaborate compound structures with pockets to multiple signatures in a thick, sewn volume, here are the techniques you need and the styles you want. Cut and fold pages in a simple accordion, or hide a second book inside. Create pop-ups, fan, and slot-and-tab books. Construct handscrolls and hanging ones, soft- and hardcovers, even portfolios and boxes. Hundreds of illustrations and diagrams will guide you, and dozens of striking pictures will seize your imagination!

~*~*~*~*~*~*~*~*~*~*~*~*~*~*~*~*~*~*~*~*~*~*~*~*~*~

Handmade Books and Albums: An Introduction to Creative Bookbinding

Handmade Books and Albums: An Introduction to Creative Bookbinding

Making notebooks, sketchbooks, albums, and artists’ books by hand is an art in itself. For those who write, draw, sketch, paint, or collect materials in albums and portfolios, and want to do so in one-of-a-kind bindings, or for those who wish to craft exquisite books for any reason, this beautifully illustrated guide explains the main techniques of simple bookmaking and offers step-by-step instruction for numerous projects. Also included are a brief history of handmade books, the vocabulary of bookmaking, the tools and materials used, and the procedures for making adhesive-bound, tied, folded, sewn, and hinged books.
….
….