Creating Layers Online Tutorial

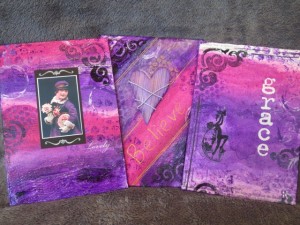
The Mixed Media Art team held an online tutorial about Creating Layers. We shared some of the secrets in creating depth and richness in your mixed media artwork by working through these three canvases, as well as announcing our new book ~ “Creating Layers in Mixed Media Art” ~ your go-to guide to creating the texture and intrigue into the pieces you create.

these magenta and purple pieces were created for this online tutorial

 Online Tutorial Video

This is a recording of one of the five sessions we held. The video goes for 50 minutes, so make yourself a coffee and settle in!

Get your copy of Creating Layers in Mixed Media Art NOW via Amazon

Book available now via Amazon

or get 10% off RRP via our Create Space estore [Code ZSVSWAMK]

Materials & Tools

Beeswax Collages for Christmas

This article is written by Debbie Davis from In Art Therapy

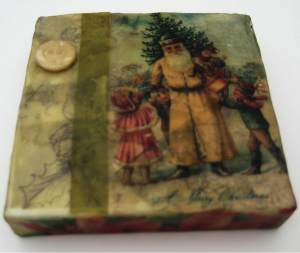
Debbie davis beeswax collage

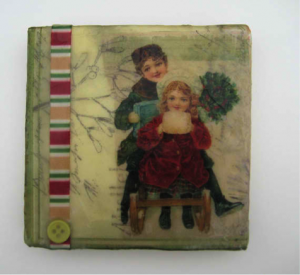
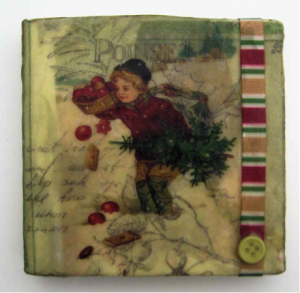
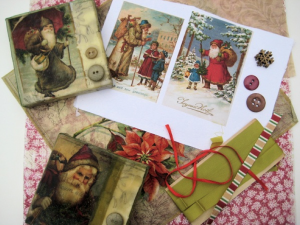
I love creating collages using beeswax as the decoupage medium.  For these collages I used 4 x 4 inch canvases, some paper napkins with Christmas designs, vintage images along with some buttons and ribbon for added texture.

Debbie davis ephemera beeswax collage

Here’s how to create a beeswax collage:

  1. Gather the items you would like to you use in your collage such as papers, napkins, buttons, ribbons, etc.  If using decorative napkins, remove any layers of white paper from the back of the napkins by lightly tearing a corner and rubbing until you are able to peel back and remove the layers.  I like to save the white layers to use for cleaning up in other projects.
  2. Melt beeswax in a small crockpot.  You will not be able to use the crock pot for anything else after you have melted the wax in it.
  3. Using a cheap, natural bristle brush, paint a layer of wax onto the canvas top and sides.
  4. Next add a napkin to the top of the canvas and paint over it with beeswax.  You can wrap the napkin around the sides of the canvas or use pieces of napkins or other papers torn or cut to fit the sides.  Once you have coated the napkins in wax, use a hot mini iron to smooth out the wax and remove any air bubbles.   This also fuses the wax layers together.
  5. I wanted the design/words from the napkins to show through my Christmas images so I printed the images onto tissue paper (see instructions below).  The thinner the paper, the better the images/papers underneath each layer will show through.  Place the printed image on the canvas and paint on more wax.
  6. You can now continue adding whatever embellishments you would like to add to the collage.  For the buttons, I added a puddle of wax and pressed them into it.  Be careful not to burn your fingers on the hot wax.

beeswax collage with images and mixed media ephemera

Printing on Tissue Paper using an Ink Jet Printer

Using a heavier printer paper, such as card stock, rub a glue stick around the edges.  Next lay a piece of tissue paper onto the cardstock and smooth down into the glued edges.  Trim off any excess tissue paper.   Once the glue has dried, place the paper in your printer and print your image onto the tissue paper.  This may take some practice.  I jammed a few papers when I first started printing on tissue!  Remove the image by cutting or tearing around the edges.

printing images on tissue papers

~*~*~*~*~*~*~*~*~*~*~*~*~*~*~*~*~*~*~*~*~*~*~

My name is Debbie and I live in Morton, Illinois, USA. I’m happily married and have a wonderful family that includes a daughter, son, son-in-law and 2 of the sweetest grandchildren ever!

What I love most about mixed media art is that you don’t have to be an expert at anything to create beautiful art. It is a great way to recycle found objects. Art is such a wonderful stress reliever. I just wish I had more time to play!

I have a shop on Etsy called Artful Explorations where I place some of the art I have created for sale. Having been inspired by others who are willing to share their techniques and ideas, I decided to start a blog called In Art Therapy and hope you will visit me there.


Using what you know – Mixing your Media

This article has been written by Linda Giese

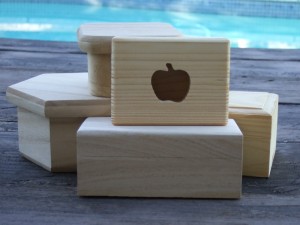
Little boxes provide quick surfaces for a variety of techniques.  People like to collect boxes for storage and for gift giving.  So for those of you who have an annual sale or two, or make your own gifts, boxes are a great source of material.

blank wooden boxes for mixed media collage

No matter which techniques you’ve perfected, or want to practice, try it on a box.  But for wonderful contrast and creating interest, combine two techniques on one box.  Boxes are divided already for you into tops and bottoms – how convenient!

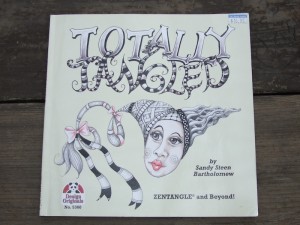
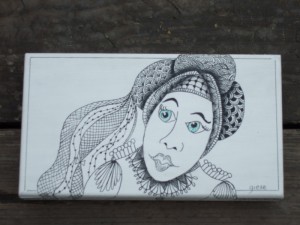
As I was prepping a box for painting or collage, I used white gesso as a sealer and undercoat.  Well, that bright white just called to me to zentangle.  I had Sandy Steen Bartholomew’s book “Totally Tangled”  handy and I’d always loved that face on the cover.

Sandy Steen Bartholomew's book "Totally Tangles"

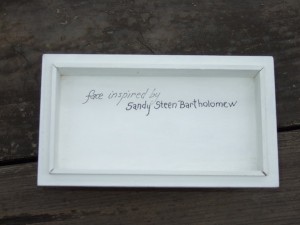
Now faces are not my strong suit, so I copied hers to have a successful outcome.  (Just remember to give the original artist credit.  I put this information inside the box lid.) I set the box aside for months not wanting to mess up that beautiful face by not so great art work.  Sometimes you just have to be in the right mood to create.

Using the inside of the lid for artistic credits

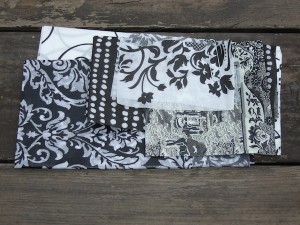
But now the sale was looming and I had to produce and finish projects I had started.  I came across this box.  It would take a lot of time to zentangle the whole thing!  I was going through my stash of napkins to share with a new student.  That’s what gave me the idea to pull out black and white napkins and tissues.

Black and white napkins

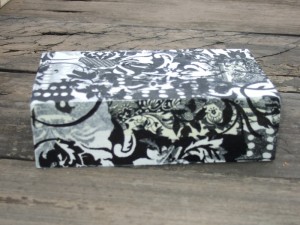
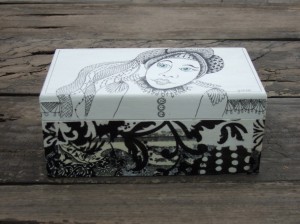
One of the secrets to combining two techniques successfully is to think of the color palette.  Since my box was white with black pen work for the zentangles, I had a natural fit. The same or compatible colors should work for a successful combination.  If I used the napkins and tissues to collage the bottom of the box, I could finish my project much quicker. I used DecouPage by Americana to apply the napkins and tissues.  I began with one napkin and tore it into pieces after separating out the white layers. I put the straight edges of the napkins along the straight edges of the box.  I applied the first pattern around the box on the four sides and the bottom.  Then I started with the second napkin the same manner.  I continued with the other napkin and the tissues until the entire box bottom was covered.

base of gift box covered with black and white napkins

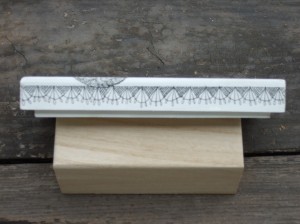
It looked so pretty. It reminded me of a dining room with chair rail separating the smooth painted upper wall and the textured wallpapered bottom wall. I was anxious to finish the zentangled top.  Nothing like a bit of excitement for inspiration!  I used some of my favorite patterns for each segment.   I used a micron pen for the zentangles.   The lid needed a border to make it look finished.  I drew a line on the top using a ruler to frame my woman.  The side still looked too plain.  The lace pattern was just the thing and tied it to the woman as I had used it on her dress.

decorating the edge of the box lid

I decided to use just a bit of color for the eyes. I used a green IDentipen on the smaller tip to make the lines for the iris.

adding color to zentangle face

I used black acrylic paint and a floating technique for shading.  I found to my dismay on another project that if you plan to varnish over your work, pencil shading may spread over the entire surface instead of staying where you want it. The top was then finished with two coats of Delta Ceramcoat Satin Varnish.  This is also why it is very important to use the right pens.  The Sakura IDentipens and Sakura Micron pens won’t bleed when you varnish over them.   If you are unsure about your pens, be sure to test them in advance on something other than your project.

black and white zentangle box

As a mixed media artist, I’m sure you have several techniques in your repetoire.  How about combining them on a special box?  This turned out so pretty that it may not go into my sale.  If you are like me and sell or give away the majority of your art, every now and them you surprise yourself and find a piece hard to part with.  That’s when your art becomes a gift to yourself  or perhaps a favored family member.  Now go grab some boxes and start playing!

~*~*~*~*~*~*~*~*~*~*~*~*~*~*~*~*~*~*~*~*~*~*~*~*~

Linda Giese has an altered book in the current issue of ArtJournaling, Autumn 2012.
She welcomes emails, questions and comments at linda.giese@yahoo.com

~*~*~*~*~*~*~*~*~*~*~*~*~*~*~*~*~*~*~*~*~*~*~*~*~


Mixed Media Art Trading Cards Using Mod Podge

~ * ~

This article is written by Kim Bailey

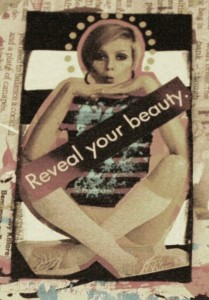
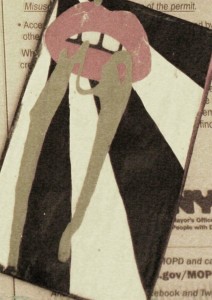
In May of last year I joined a 365 Day Challenge and for this challenge I decided to go on an art journaling journey. During my journey, I explored new ways of expressing my creativity. One of the ways I did this was making Mixed Media Art Trading Cards; bite sized pieces of art that you can trade or just keep for yourself. Below is what you will need to make your own.

Materials:

Card stock or junk mail post cards, magazine clippings, acrylic paints, markers, embellishments, (and your other favorite crafty/artsy materials), glue, foam brush and of course Mod Podge.

  1. Cut (2) 2 in. x 3 ½ in. pieces from your card stock or junk mail post cards.
  2. Now it’s your time to be creative. Using the magazine clippings, acrylic paints, markers and embellishments create pieces of art on these 2 tiny canvases.
  3. Once you have created your 2 pieces of art, glue them together. You’re finished product should be one decorated card. (The card should actually be the size of a standard business card).
  4. The last step is to Mod Podge your card. To make this step easier and less messy, use your foam brush to apply the Mod Podge. I suggest doing one side at a time so that it dries evenly.
Trading Cards     Trading Cards using Mod Podge     Mod Podge Trading Cards
Not only can you use this idea for trading cards, but if you’re really ambitious it’s also a great way to put a spin on your business cards for special events.

Happy Mod Podging!

~*~*~*~*~*~*~*~*~*~*~*~*~*~*~*~*~*~*~*~*~*~*~*~*~

Hello Mixed Media Art Addicts! My name is Kim and I live and create in New York. As a lover of all things crafty and creative I decided to start a blog about 2 years ago to document my obsession. My blog was called The Creative Addiction Blog – it’s not around anymore (sorry!). Currently, I work as a Creative Art Photography Support Assistant within a retail store.  My job helps to fuel not only my creativity, but also my love for photography.

~*~*~*~*~*~*~*~*~*~*~*~*~*~*~*~*~*~*~*~*~*~*~*~*~
.

.