Making It Pop

This article is written by Debbie Davis from Artful Explorations

When I decided to get back into doing arts and crafts last year, I started doing Google searches to find something that would spark my interest. The Mixed Media Art site was one of the first that I came across and I am so glad I found it. I have learned many techniques that have helped me along the way.

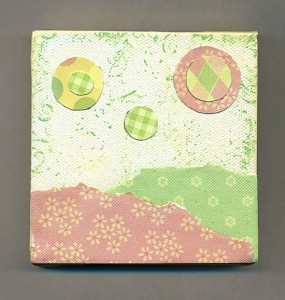
I love scrapbook papers and use them in a lot of art projects. It is fun to sit and sort through the papers while deciding which ones I want to use in a circle tree collage. Once the papers are chosen I tear a few pieces to make “hills” that will fit at the bottom of a wrapped canvas. I trace circles in various sizes and cut them out for the trees. I like to use 2 circles for the larger trees. I’ll play around a bit with the placement of the papers to determine just where I would like them to go.

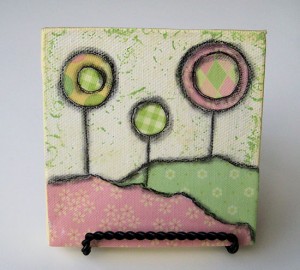
Before adhering the papers to the canvas, I paint it a coordinating color. Sometimes I will add two colors of paint to a palette that are similar and mix lightly (not completely) with a wet brush. I then add the paint to the canvas in a swirling motion with the brush. Before it dries, I’ll pick up some of the paint with a damp paper towel. I usually paint the sides of the canvas black, or sometimes, paint it as I did the top. Once the paint has dried, I will lightly stamp on some ink or paint in a darker color to create dimension. The papers are then collaged onto the canvas using gel medium. Here is one of my circle tree collages, not yet been outlined with the charcoal.

Mixed media art collage

My favorite part of completing the collage is outlining the papers with a charcoal pencil and then smudging it to create shadows and depth. For some reason, I find tracing around the paper and smudging the charcoal very relaxing. It’s kind of like playing with one of those little Zen sand gardens. Notice the difference the charcoal has made in the second picture. I love the way the charcoal makes the trees and hills pop.

 Mixed media art collage

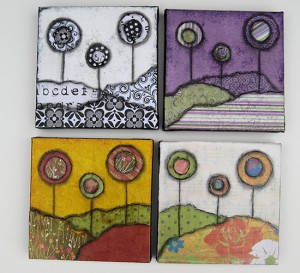
Here are a collection of circle tree collages in different colors.

Mixed media art collages by Debbie Davis

~*~*~*~*~*~*~*~*~*~*~*~*~*~*~*~*~*~*~*~*~*~*~*~*~

My name is Debbie and I live in Morton, Illinois (USA). I’m happily married and have a wonderful family that includes a daughter, son, son-in-law and 2 of the sweetest grandchildren ever!

What I love most about mixed media art is that you don’t have to be an expert at anything to create beautiful art. It is a great way to recycle found objects. Art is such a wonderful stress reliever. I just wish I had more time to play!

I have a shop on Etsy called Artful Explorations where I place some of the art I have created for sale.
~*~*~*~*~*~*~*~*~*~*~*~*~*~*~*~*~*~*~*~*~*~*~*~*~
.
.

.
What to do with Doodles

This article is written by Francesca Albini

I am a doodler. I doodle on a dedicated sketchbook while watching TV, I doodle on scraps of paper when I’m talking on the phone or writing notes. When I buy a new pen or marker, or I see one lying around, I just have to pick it up and make squiggles, cartoony faces, trees, eyes, noses, whatever comes to mind. I also do digital doodles on my mobile phone.


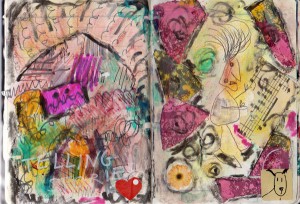
And I hate throwing my doodles away – they are free, spontaneous, funny. Let me share with you some ideas of what you can do with your doodles. You can rip them up randomly, glue them to your journals, adding glazes of watercolour and other marks to form an interesting, almost abstract, background. You can scan them and turn them into digital brushes (do a search for “custom brushes” to see how to do it in different programmes). For instance, I print patterned paper using my doodle brushes in different colours, opacity and sizes.

I also print borders for my pages. I stick strips of masking tape on a transparency or vellum paper that I can run through my printer, and use the decorated masking tape to make borders or attach photographs. I also scan some coloured doodles and print them on white or transparent adhesive paper to make stickers.


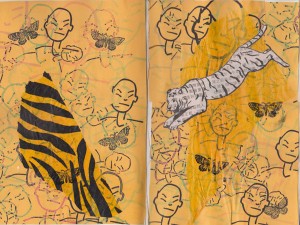
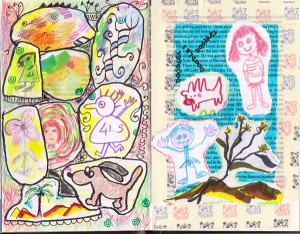
Or I simply cut the originals with scissors and arrange them into a collage. Here are some examples from my journal pages. I hope they will inspire you and make you think twice before chucking your doodles away. They too can find a place in your art.

mixed media art
~*~*~*~*~*~*~*~*~*~*~*~*~*~*~*~*~*~*~*~*~*~*~*~*~*~*~*~*~*~*~
Francesca is a visual artist using pretty much everything she finds around her to record and relive feelings and memories of places and emotions. She collages, paints, draws, photographs.

Francesca loves mixing modern technology, such as mobile phone apps, with the simplest of tools such as glitter glue, crayons and other children’s art supplies.

You can see more of Francesca’s work at www.franvisions.net

~*~*~*~*~*~*~*~*~*~*~*~*~*~*~*~*~*~*~*~*~*~*~*~*~*~*~*~*~*~*~

.

.

Mixed Media Christmas Tag

This article is written by M. Carmen Sánchez (aka Cuchy) of La Almohada

Christmas is approaching and with it, a huge list of expenses: the presents,
the big meals, the decorations…

If we add some expensive art supplies to that list…. our budget bursts

With a cost-cutting on mind, I want you to realize how many “art supplies”
we all have within reach and with no cost at all.

I bet you have all these everyday objects in your room. All of them can be used
as art supplies in our mixed media projects.

– Toilet / kitchen paper
– Toilet / kitchen paper tubes
– Any kind of lids
– Plastic wrap
– Paper wrapping from the presents
– Embellishments from the presents
– Bubble wrap
– Cardstock / cardboard
– Newspapers / magazines / old books
– Tissue paper
– Combs to give texture
– Sponges
– Buttons / ribbons / lace /
… and so on

Creativity has nothing to do with money. I would say… the less you have
the more creative you become 🙂

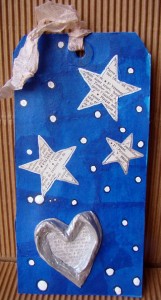
Let see how we can make a cool mixed media Christmas tag with
“almost nothing”

We will need a tag, coloured tissue paper, toilet paper, pva glue, a book page,
white and black markers, trim or ribbon and a bit of paint

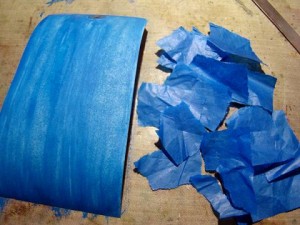
Start painting the tag in a color that matches your tissue paper colour (you can
use white tissue and once dried, paint it with another colour if you want). Let it dry.

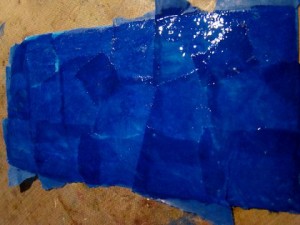
Tear the tissue paper in pieces and glue them to the tag in a random manner using
the pva glue, both underneath and over the paper pieces. Let it dry.

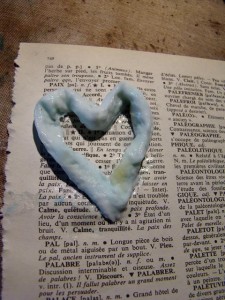
Now take a couple of sheets of toilet paper and -making a roll- soak it on a mixture
of water and pva glue at 50%. Make a heart shape over a piece of a book page.
Let it dry thoroughly.

Paint the heart and cut it out once dried. Glue it to the tag and punch or cut some stars
out of a book page. Finish the tag with some white/black dots and a ribbon.

That’s it! A cool tag to go with one of your presents this year. Easy and cheap.

I hope you like it and you give it a try. I would love to see what you come up with.

**************************

M. Carmen Sánchez – Cuchy

A mainly self-taught mixed media artist who loves to play with textures and layers
Member of the Kuretake’s Design Team -manufacturer of writing supplies- Design
Team Instructor of Stampers Best -american manufacturer of rubber stamps and
cling cushion mounting foam- and contributor and guest designer in various
Spanish and international blogs, she taught several workshops in Madrid and
Barcelona and loves to teach from her own experiences, and encourage the students
to think outside the box and put their inner self in everything they create, to achieve
a personal and unique result.

You can find more on her blog , her facebook page, or watch her broadcasting live
on her Livestream channel

******************************************************************************
.
.

Jewellery Skills ~ Jump Rings

Jump rings are those round metal findings that are used to connect all sorts of elements together in your mixed media artwork and jewellery projects. They come in a huge variety of colours and sizes.

The key to using jump rings is how to open them; the skills for using a jump ring are easily learnt and make your life much easier when adding jewellery elements to your work.

~*~*~*~*~*~*~*~*~*~*~*~*~*~*~*~*~*~*~*~*~*~*~*~*~*~*~

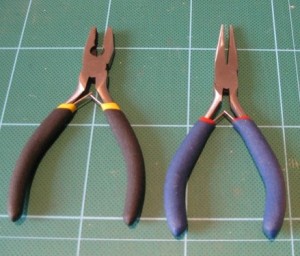
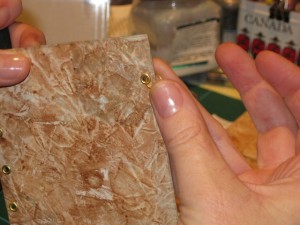
1. To easily open, insert and close jump rings, we need both flat nosed pliers and pointy nosed pliers.
mixed media jewellery elements

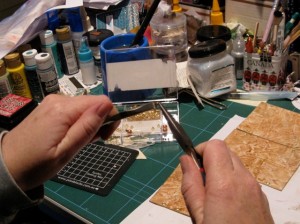
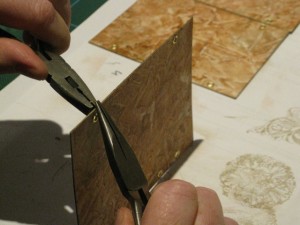
2. Hold jump ring with flat nosed pliers, with split close to end on pliers
mixed media jewelleryUse pointy nose pliers to hold other side of ring. Look closely; the ring tends to already be slightly open, to one side. Twist ring open in this direction.
mixed media jewelry
We are opening the ring with a sideways motion; NOT opening up the ring – it must be sideways; this gives us the best chance to being able to close the ring again and not deform the ring out of shape.

3. Now ring is open, you can thread it through eyelet.
mixed media jewelry

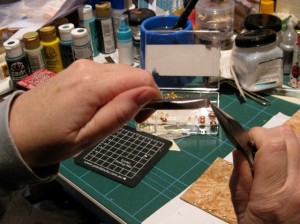
4. To close the jump ring, take hold with flat nosed pliers again. Use the pointy nosed pliers to bend the ring back the way it came. You may need to over bend the ring to allow for the springback in the metal. Check the ring; if is still isn’t closed, bend a little further and check again.
mixed media jewelry

I hope this helps you to get started with playing with jump rings and jewellery elements. We will be featuring a project soon that will bring together all you have learnt about using jewellery elements in your mixed media art.

Happy creating!

.

.

.