Make your Own Faux Metal Embellishments

~ * ~

This article is written by Ann Strecko Koeman

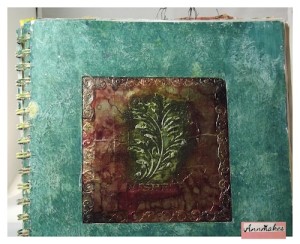
Making your own mixed media embellishments for your crafting and art making can be satisfying to one’s creative soul and also to one’s wallet!  In this article I am sharing my mixed media technique tip on how to make some of your own Faux Metal embellishments with your glue gun and some cardboard.

faux metal mixed media embellishments

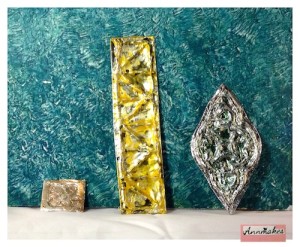
The examples I have to show you are rustic looking which is what I like when making such embellishments.   I like the look of old and worn even rusty metals and sometimes I want to add such a piece to one of my projects but I find myself limited by certain constraints.  If I do not have such a piece in my studio stash and I am pressed for time then I will make something up.  Also, sometimes I may have a piece of real metal but it is just so heavy that it would not be supported properly on my project.  So here again is when making something light weight comes in handy.

faux metal mixed media

One of the ways I make such mixed media embellishments is by stamping an image such as this one in the picture, of a decorator’s foam stamp intended for painting on walls, but I use ink and cardboard.  Once the ink has dried I heat up my glue gun, add a stick of glue and trace over the design with the hot glue.  I try to make the glue design fairly thick.  Once the glue has cooled and is hard I spread some PVA or Tacky glue onto a piece of kitchen aluminum foil (cut to about twice the size of my stamped image).  I also cut the cardboard around the stamped image to the desired shape and size.  Then, I place the glue coated foil over the dry and hardened glue tracing and press into all the cavities.  I start from the centre of the image and rub with my fingers and the eraser end of a pencil the foil so it sticks to the cardboard.  Aluminum foil is thin and may tear but that is okay because another piece can be patched over any tears.  Colouring the foil afterwards will also hide any imperfections.  Once I am satisfied with the adhesion of the foil I let the piece dry completely.  Once dry, I have fun with inks, paints, embossing powders and more to achieve the look I want.

The process is pretty simple and yet can give such intricate designs!  These light weight faux metal decorations can be used on so many different types of surfaces and will not add too much weight to your project.

~*~*~*~*~*~*~*~*~*~*~*~*~*~*~*~*~*~*~*~*~*~*~*~*~

Ann Strecko Koeman is a busy mom and artist trying to stay warm in the cold cold winters of Canada!  To stay warm she creates something just about every day.  Whether the creation is a painting, a sewn project, a written article for this site, a post for her blog, and even making videos on Youtube!  She is often found with her hair up in a twist , her hands stained with inks, and her clothes with paint splatters underneath her long goose down parka!  She even owns gloves that have flaps so her fingers are free to type away and there is a warm mug of hot beverage close by to warm up those digits.  For more of Ann’s craftiness you can visit her blog here: annmakes.blogspot.com

~*~*~*~*~*~*~*~*~*~*~*~*~*~*~*~*~*~*~*~*~*~*~*~*~
Composition for Mixed Media Art

~ * ~

This article is written by Marilyn Harris Mills

Here is the third installment in Marilyn’s Good Design and Composition. You can read the first installment here: Good Design and Composition for Mixed Media Art, which covers the elements of a good design. You can read the second installment here:  6 Principles for Composition in Mixed Media Art and here we cover six principles of design.

Finally we look at a few principles of design that I threw into the mix myself: Emotions, Confidence and Remembrance.

Emotions/Moods

So many times I’ll view artwork and think to myself…well gee, I could have come up with that idea! What is it about a certain piece that evokes an emotion within us…or creates a type of mood we feel? Peacefulness, tranquility, craziness, loveliness, loneliness, encouragement? Design elements need to contribute to creating a mood or an emotion within the viewer. To do this successfully the elements all need to work together to evoke a certain mood or emotion the artist wishes to convey to the viewer. Think of this principle when viewing art. What do you feel? What is the artist trying to get you to feel?

i.e. Valentine’s Day…love is the mood when you’re creating a greeting card for someone special.

Confidence

Does your artwork speak confidently to the viewer? Are you certain of what you were trying to convey when you were creating? Did you feel wishy-washy with your approach to your painting? Were you confident with the techniques you employed? If you’re not confident while painting, this relational aspect will be noticed and felt by the viewer. Make sure you know the reason behind choosing the subject matter that you used. Make sure you paint with confidence, it will show in your final art piece and the viewer will be appreciative of your artistic art message.

Remembrance

Have you ever looked at a photograph and it was so striking to you that you remembered it days later? This would be considered a good piece of art. The photographer has captured his subject well. So too should your art piece….be remembered. Creating an art piece that will be remembered is hard to accomplish….we’re not Da Vinci. We have to “work” at our art, research, learn new techniques so that we can create our own style.

A style that will be captured in each of your paintings so that your art will be remembered. Think of visitors to your home…they will remember the way you decorated if you’ve chosen to emphasize a certain theme using a particular colour palette with complementary drapery, accessories etc. Be different than other artists. Create in your own unique style…then both you and your artwork will be remembered.

A successful art work will encompass all of these elements and principles of design. Don’t expect to get it right the first time. Trial and error. I have more canvases sitting in the “oh…that didn’t work” bin than I do canvases that did work. I have kept every yucky canvas…it helps me to remember what I did wrong and what I still need to learn. Any art journey is all about learning, creating, adjusting and first and foremost applying the principles of design.

Some artists tend to paint on a flat surface whereas other artists may paint on a variety of three dimensional surfaces. No matter the surface, composition refers to the overall arrangement of all the parts of the design, the six elements. How do we put these various elements together to create a good composition within the painting?

Composition

Now, let’s talk about composition briefly here. Composition refers to the arrangement of all the elements of a design. You can arrange the pieces in a few different ways. First though, you must choose a focal point….a point of interest or what I like to refer to as the “meat” of the painting….what is the most important part? Oh and the centre of interest is not in the centre of the painting….its slightly off-centre.

To help create a centre of interest, artists use The Golden Mean, a mathematical formula used by the Greeks and Romans to determine the most pleasing aesthetic proportions. To find the Golden Mean, divide your substrate into thirds vertically and again horizontally to make nine equal parts. The four center points at which the lines intersect are considered the best locations to place the focal point of your painting thus ensuring a successful composition. I encourage you to search the internet to learn more about the Golden Mean.

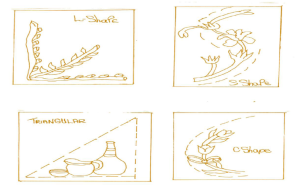
Here’s a few classic layouts for good composition dependent on your subject

elements of good composition

So that’s about it….the elements and principles of good design and composition. Learn all this first and then you can go about breaking the rules!!!

Stay ARTistically Inspired…

Maer

Read Part One: Good Design & Composition for Mixed Media Art

Read Part Two: Six Principles for Composition in Mixed Media Art

~*~*~*~*~*~*~*~*~*~*~*~*~*~*~*~*~*~*~*~*~*~*~*~*~
Marilyn Harris Mills, aka Maer, is a Published Artist, Teacher and Designer, in Ottawa Canada.

You can read about Marilyn at Maer’s Muses. Her art has been published in “Creating Time: Using Creativity to Reinvent the Clock and Reclaim Your Life”

“I work in whatever medium likes me at the moment”-Mark Chagall

~*~*~*~*~*~*~*~*~*~*~*~*~*~*~*~*~*~*~*~*~*~*~*~*~
Using Scrap Papers to make Mixed Media Art Tags

~ * ~

This article is written by Tamara Dinius

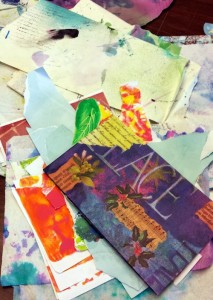
Mixed Media Art Tags are created using scraps of papers, old art work, music sheets, and other items that add texture and depth to the tags.

Assorted papers and paraphernalia used in our tags.

Apply papers and other scraps haphazardly onto your manila folder

Add the assorted scraps to an old manila folder. I have used a legal size folder and Mod Podge. Any type of adhesive medium will work. Add the scraps to your manila folder in a haphazard manner. Once dry, layer a glaze of paint over the top to tone down the first layer (I used Titanium white).

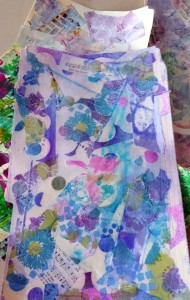
contrasting acrylic paints and stencils

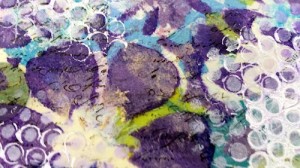
The next step is to use a stencil and acrylic paint to create additional depth and interest to your tags. Use a paint color that is dominant in your scraps of paper. In my example I have used purple, white, and a teal blue.

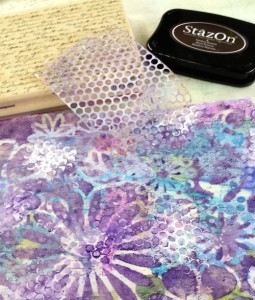
third layer

Using your favorite stamp and ink pad add additional interest by stamping your project. At this time, you can also add acrylic paint using stencils or other items. I have used a brown ink pad, script text rubber stamp, white acrylic paint, and sequin waste.

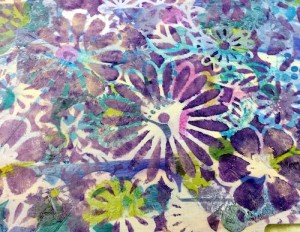
Close-up of our layering techniques

This shows a nice close-up of the depth and texture of the tags. Notice the nice contrasting colors that add interest.

final project completed

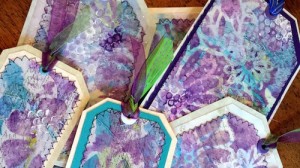
To finish, I have used additional fabric and papers to back the tags. Using a zigzag stitch, sew around the perimeter of the tag. Punch a hole and add your ribbon. Your tags are now ready to use as luggage tags (I laminated mine before sewing), gift tags, decorative tags, or other item. These Mixed Media Art Tags are a great way to use your scraps and experiment with color schemes.

Hugs, Tammy

~*~*~*~*~*~*~*~*~*~*~*~*~*~*~*~*~*~*~*~*~*~*~*~*~
Tamara Dinius lives in the Pacific Northwest with her husband and chocolate lab. She has two grown daughters who make her life meaningful. They support her, ground her, embrace her, and are amazing people in their own right. Her love for mixed media has taken over most aspects of her creative journey. She believes mixed media allows for a broad range of styles and anyone can find success in this form of artistic expression.

You can find more of Tamara’s work, and on her website countrycraftersusa.comEtsy shop,  or via her Facebook

~*~*~*~*~*~*~*~*~*~*~*~*~*~*~*~*~*~*~*~*~*~*~*~*~
.

.

Encaustic and Origami Collage

~ * ~

This article is written by Vicki Ross

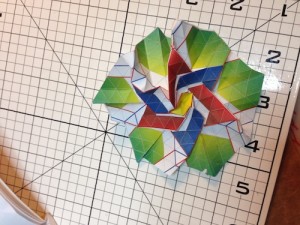
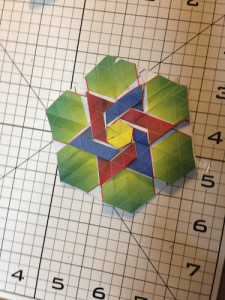
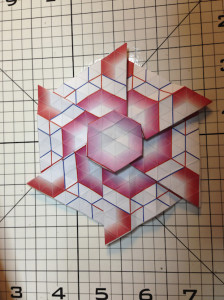
Love our local thrift store, Helping Hands in Bentonville, AR. Found an origami kit that followed me home. Since I like to see how I can incorporate these types of treasures into my regular art (I think that’s an oxymoron…my regular art 🙂

Anyway, I tried folding paper. MUCH harder than it looks. And, of course instructions were not the best. I had to fudge a few folds.

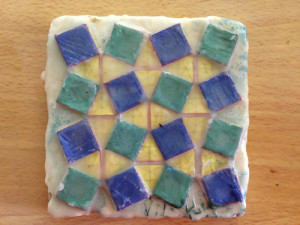
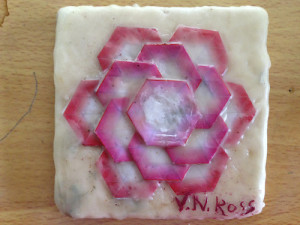
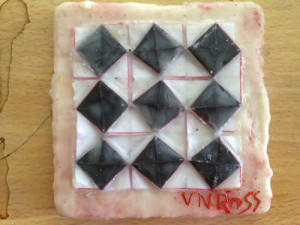
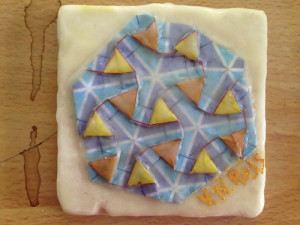
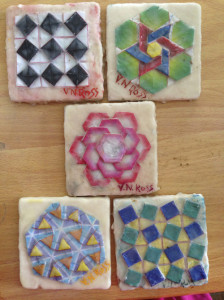
encaustic tiles with mixed media collage

encaustic tiles with mixed media collage

encaustic tiles with mixed media collage

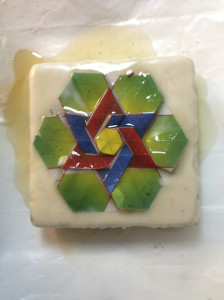
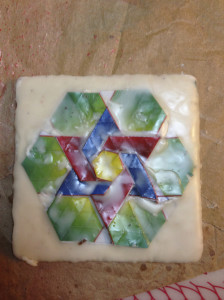
Next, I took 4″ square tumbled marble tiles and coated them with a couple coats of plain encaustic medium (beeswax and damar resin, I make my own). Yup, visit all those flowers and bring the pollen home to my web. Shoot, my colony. Then, off to Madagascar to drain sap out of the damar tree. (I made that up, FYI)

encaustic tiles with mixed media collage

encaustic tiles with mixed media collage

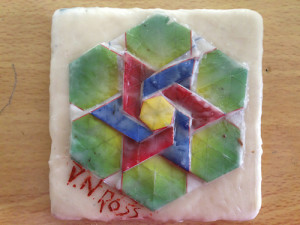
Each gets a pour because I wanted to keep the three dimensional look of the folded paper. After two pours, fusing, I took a brush and made sure all crevices were filled. When cool, I scraped back as far as I could, again maintaining the 3-D look.

encaustic tiles with mixed media collage

encaustic tiles with mixed media collage

encaustic tiles with mixed media collage

encaustic tiles with mixed media collage

encaustic tiles with mixed media collage

When I declared victory, each was signed…not an easy process on such smalls. Here is the group.

encaustic mixed media collages on tiles

all images © V.N.Ross

~*~*~*~*~*~*~*~*~*~*~*~*~*~*~*~*~*~*~*~*~*~*~*~*~
Vicki Ross is focused on sharing her journey to art and how life events can shape us through creativity www.Axully.com. Vicki has always been involved deeply in the creative arts, from professional soft crafts publications (knitting/crochet/needlework) to French Hand-sewing, stenciling to macramé, oil painting to encaustics. Whatever your leaning, she believes in the healing power of creating.

You can see more of Vicki’s work at VickiRossArt or via blog posts at Axully – Solid. Useful. Beautiful

~*~*~*~*~*~*~*~*~*~*~*~*~*~*~*~*~*~*~*~*~*~*~*~*~
.

.