Mixed Media Canvas With Copics

~ * ~

This article is written by Kim Kelley

Today I am going to show you a canvas I made using a digital image and Copic markers. I love to create a canvas that has not only texture but depth to it as well. Adding a digital image or a stamped image that has been “stamped” several times and layered allows me to do this.

Using Copic Markers with a mixed media canvas

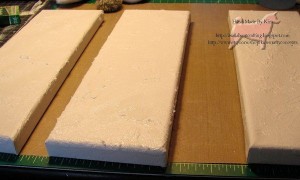
I started with 3 3” x 12” canvas’ and applied some matte gel medium all over, including the sides.

Copic Markers add cold to a mixed media art canvas

Canvas with medium

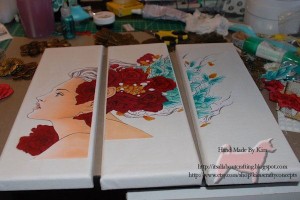
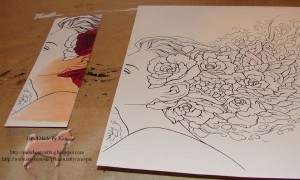
I chose “Beloved” from Aurora Wings.  I chose a digital image that I could blow up enough and would not become pixelated. And one that was large enough to expand across the 3 pieces of canvas. I printed it 4 times so that I could have my layers. I colored the images with Copic markers trying to make sure each section was similar in coloring so that it would flow after I added it to the canvas.

Copic Markers add cold to a mixed media art canvas

Printed digital image

After figuring out I wanted the canvas pieces to be offset I laid my image across the canvas’ to get the right measurements and cut it. I adhered it to the canvas with more matte gel medium and let it dry for a few hours.

Copic Markers add cold to a mixed media art canvas

Image on canvas

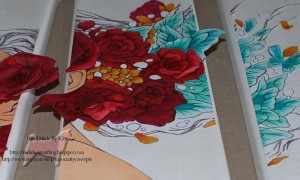
After the drying process I started adding my extra layers. I chose to pop up some of the flowers and butterflies. And had some of the pieces even extend over the edge. I glued them on with Tombow glue.

Copic Markers add cold to a mixed media art canvas

I decided I wanted to have a big contrast between the background and the image, so I mixed some black acrylic paint, iridescent acrylic paint and matte gel medium together for my background. Using a sponge I added the mixture, even going over the edges of the image a bit, leaving some of it in peaks. After that dried I added some stars using Stickles and added a jewelled flower that I cut in half.  I felt that is needed a few more flowers so I cut a few more out and added them. Then using some Mod Podge I sealed the entire project, adding some glitter sprinkled around.

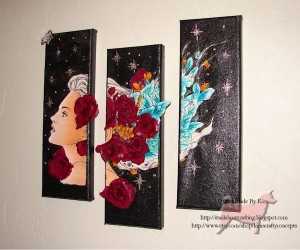
Using Copic Markers with a mixed media canvas

Finished project

Couple of tips:

  1. When doing layers, color the back of each layer as well.
  2. When adding an image you color the edges.
  3. With flowers, you can use a pen or stick to curl the petals.

Life is short, do something creative every day!

~*~*~*~*~*~*~*~*~*~*~*~*~*~*~*~*~*~*~*~*~*~*~*~*~

Kim Kelley is borderline obsessive about her crafting and her art. She loves mixed media art because you are free to go beyond your comfort zone, using your imagination and exploring an anything goes mind set. Kim loves to learn and explore new techniques and hopes that any art she creates leads someone to find their inner creative artist!

Sites: itsallaboutcrafting.blogspot.com and www.facebook.com/kimscraftyconcepts

~*~*~*~*~*~*~*~*~*~*~*~*~*~*~*~*~*~*~*~*~*~*~*~*~

.

.
Dr. Ph Martin’s Bombay India Inks

~ * ~

This article is written by Anjuli Johnson

Being an art supply junkie is something I think all of us reading this can relate to.  The act of creation can be fairly difficult without anything to create with.  We can’t make something from nothing.  So the quest to find different and creative ways or organizing different materials into art is a constant, never ending adventure, and if you’re anything like me, becoming proficient in using a few materials over and over again isn’t satisfying enough- new materials need to be found and experimented with until we become proficient in using them, and we continue to find new things to work with.

This past week my new material was Dr. PH Martin’s Bombay India ink set.

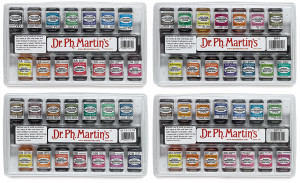
Sets of India Ink

I used to think that India ink was only available in one color- black.  Nope, these different sets of inks come with as many as 12 colors, all vibrant and versatile.  I decided to try a few different techniques to see just how versatile they are.  Here are a few of the ones I tried.

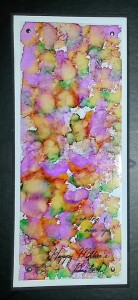
India and Alcohol ink on clear acetate

Card

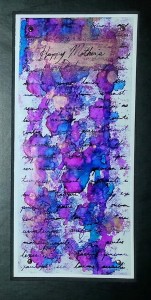
India Ink and Alcohol ink on clear acetate

I made these cards for Mother’s Day.  Black and white cardstock with clear acetate attached to top with brads.  I colored the acetate using alcohol inks and india ink.  I tried it two different ways- india ink first, followed by alcohol ink, and vice versa.  It worked both ways.  Even thick drips of alcohol ink had no effect on the india ink once it was dry.  As long as I didn’t rub it really hard, the ink stayed fast.  I’m going to be using this technique a lot. 

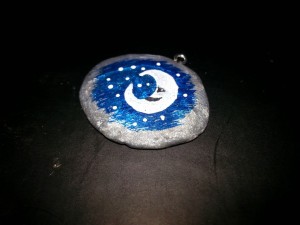
Clay pendant

This is a really simple polymer clay pendant I made.  I baked the clay before I painted it, but once the ink dries, it’s permanent.  Anyone who makes polymer clay jewelry, charms, or even art journals- this adds another dimension to the possibilities open to you.

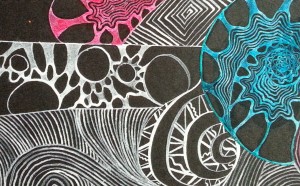
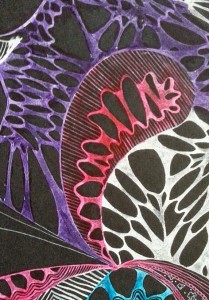
Sketch with white and colored inks on black paper

Sketch with white and colored inks on black paper

These are from a sketch I made in my black journal.  I was curious to see how these inks worked on black paper.  Though the colored inks soaked in and didn’t show that well, the white is amazing on the black.  You can even dilute it a little bit.  These inks are pretty intense, and adding a little water can make them last longer and go further without taking much away from their brilliancy.  Once I was finished with the white, I used some of the other colors on top so they would stand out.  A little more work, but it’s a way to be able to have all the colors stand out against a black background.  So fun!

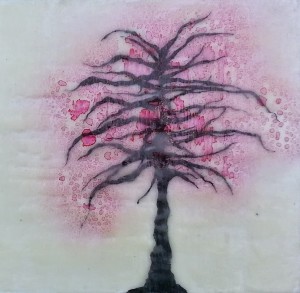
Tree drawn directly onto encaustic wax

This is an example of a sketch directly onto encaustic wax.  You can sketch onto tissue or rice paper and add it on top of the wax, but I didn’t want to see the edges of the paper.  I used my calligraphy tips to sketch and color in the tree, then I added a couple layers of wax before I spritzed some diluted red ink onto the branches, as a way to add leaves without drawing them individually.  Once again, when the ink dries, it becomes permanent and you can leave it as a top layer, or use more wax layers on top.

So, these are some of the things I’ve tried this week with my new india inks.  I’ve found a few tutorials in addition to these techniques that sound amazingly fun. Here’s a quick list with links so you can try them yourself-

Gouache painting with India Ink- www.craftsy.com

Masking fluid resist- www.alenahennessy.com

Shellac sprayed with India Ink- www.littleblackjournal.com

India Ink with bleach- arteascuola-miriampaternoster.blogspot.ca

Watercolor and India ink- www.youtube.com

So, now you have another supply set to add to your growing list of must-try art supplies.  Go have some fun!

~*~*~*~*~*~*~*~*~*~*~*~*~*~*~*~*~*~*~*~*~*~*~*~*~

Anjuli Johnson is a Mixed Media Artist from Raleigh, NC.  She began her art career as a scrapbooker, and it’s been an evolutionary process ever since.  She loves all things mixed media- paper, paint, pens, wire, gears, clay… the list goes on and on.  She is constantly trying to push through her fears to discover and develop her talents, meet new people, and learn from those around her.  To see more of Anjuli’s art and techniques, check out her website at www.thefarpavilion.com, her blog at www.thefarpavilion.blogspot.com, and like her Facebook page TheFarPavilion

~*~*~*~*~*~*~*~*~*~*~*~*~*~*~*~*~*~*~*~*~*~*~*~*~

.

.
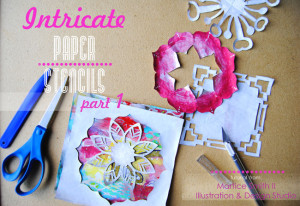
Intricate Paper Stencils, Part 1

~ * ~

This article was written by Martice Smith II

Martice Smith II shares a tutorial on how to make intricate, paper stencils using phone book paper

I love creating my own backgrounds for my illustrations and art journal pages. But sometimes, when I’m learning a new technique, I can go through a stack of papers and I don’t want to necessarily throw them away and then, I’m left searching for more paper to use up. So, the next best thing is to re-purpose them by creating something entirely different!

For this tutorial, I will show you how to use pages from a phone book to create these intricate, paper stencils.You can even use up all of those ‘unsuccessful’ gelli prints and breath new life into them with this easy tutorial.

Let’s get started!

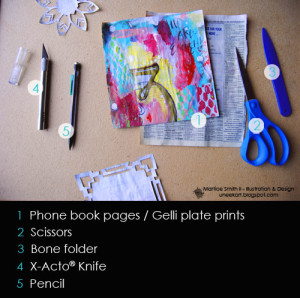
Gather Supplies & Tools

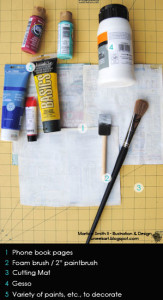
Gather supplies and tools

Old Phone book (pages will be torn out)

You can, certainly, use any kind of decorative paper you like for this tutorial. I’m just using up what I already have around the house and adding my own flair to it! Using something old to create something new…

Glue & Gesso

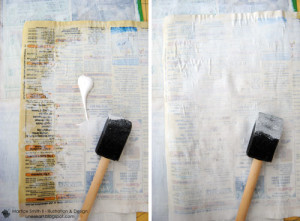
Apply gesso to phone book paper

Supply needed: Glue (not pictured)

I felt that one page of phone book paper was too thin, so I glued two pages together for a little more stability and strength. (The final stencil will still appear delicate.)

Next, use a foam brush or a 2 inch brush to apply 2 light coats of gesso to one side of the phone book paper.

Tip: I like to use a foam brush because it applies an even coverage. I like how the words and numbers peek through the gesso. This will give more depth to the final stencil.

Paint & Decorate

Add color and decorate the phone book paper. Gelli plate prints can also be used!

**If you’re working on pre-designed paper, you can skip this step and proceed to the next step, ‘Create the stencil’.

Make sure you grab the supplies listed in the photo.

Now let’s paint our gessoed phone book pages with acrylics, watercolors, oil pastels- whatever we want! Keep in mind, though: the more layers of paint added, the heavier/sturdier the final stencil will become.

Create the stencil

It really doesn’t matter if your paper is right (paint) side up or wrong side up. Personally, I like to fold the paper with the ‘wrong side’ facing up, simply, because I can easily see the lines I’ll need to draw.

Fold. 

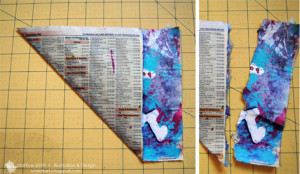
For this particular design, I will need to start with a square sheet of paper.

Since phone book pages measure 7 inches (18 cm) wide by, approximately, 9 inches (22.5 cm) in height, I’ll have to trim the excess.

Take one corner and bring it up, diagonally. Line up the top edges.

Folding paper to make a square

Be sure to crease all folds with a bone folder.

Phone book pages are rectangular so I’ll need to trim off the excess paper, after I make my fold.

Note: There will be a leftover strip that measures, approximately, 2 inches (5 cm) wide by 7 inches (18 cm) in height.

Cut or tear off the strip on the side.

Set this strip to the side, for now. (Later, you can make mini-stencils from this same strip.)

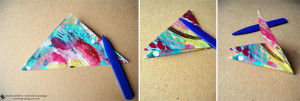
Fold paper

Now your page should look like a triangle.

Fold this triangle in half, twice, in the same direction. Remember to crease every fold with the bone folder.

Now, we’re ready to add our design!

Mark. 

Let’s first visualize what kind of shapes and lines we want our finished stencil to have. There’s no need to measure anything- just go with the flow and enjoy the unique and organic line quality coming from your hands!

Draw a design onto the triangle.

Place the fold on your right hand side. Draw your design onto the paper triangle.

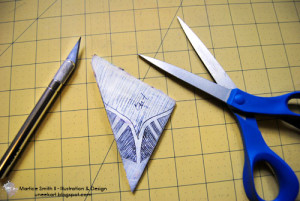
To avoid cutting the wrong lines, shade in the areas that need to be cut away.

Cut out your lines. 

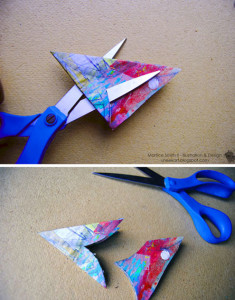
Look for the largest area that needs to be cut away. This particular design calls for me to use scissors, first.

Use scissors to cut out the largest area(s).

Next, determine if you need to continue using scissors to finish cutting out the design. A sharp X-Acto® knife would be a better choice for those narrow, hard to reach areas.

Next, determine if you'll need to use scissors or an X-Acto® knife to cut out the remaining areas.

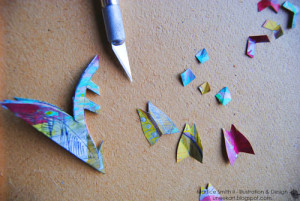
Use an X-Acto® knife for narrow, smaller, and hard to reach areas in your design.

Tip: When you cut out the smaller areas, DO NOT throw them away! If you’re like me, you love to keep small bits of paper because, who knows? You might want to add them to your next collage! These small pieces can add some much needed color or texture to that ‘unsuccessful’ gelli print you have laying around.

You’ll thank me later for this tip 😉

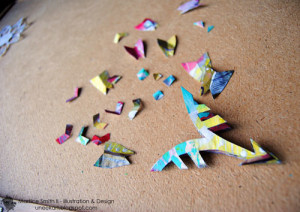
Look at those beautiful bits of paper! DO NOT throw them away…

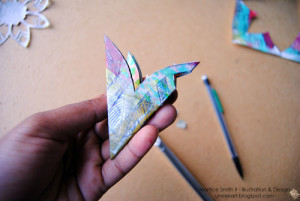
This is what the stencil looks like after cutting away a few areas. Don’t worry, we’re not done yet! Small things pack a big punch…you’ll see.

Open

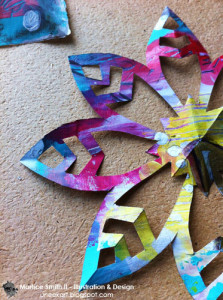
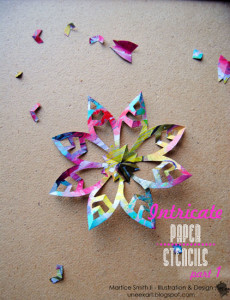
Once you’ve cut out your design, slowly and gently open your intricate paper stencil. Whoa! Isn’t it beautiful?!

: Very slowly and gently, open up your paper stencil.

You can add finishing touches with distress inks, more paint to accent certain areas, embellish with textured stamps or add some glitter, bling bling!

An example of an intricate paper stencil, made from phone book paper.

Did you enjoy this tutorial? If yes, don’t miss Part 2! Look for Intricate Paper Stencils, Part 2: Gift Wrap! I will show you how easy it is to make your own gift wrap using your beautiful, phone book paper stencils.

Until then, have fun and keep creating!

~*~*~*~*~*~*~*~*~*~*~*~*~*~*~*~*~*~*~*~*~*~*~*~*~

Author bio:

Mixed-media illustrator and designer Martice Smith II

Martice Smith II is creative director of Martice Smith II – Illustration & Design Studio, based in Kansas City, Missouri and owner of Uneek Art Boutique. She established herself as a freelance Illustrator and graphic designer after receiving her Bachelor of Arts Degree.

Martice also contributes as an article writer for the Creating Mixed Media Art website.

You can see more of her work via her Facebook page or her blog. She invites you to join her monthly newsletter, Uneek Art Letter,  for art biz tips, advice and free digital goodies!

~*~*~*~*~*~*~*~*~*~*~*~*~*~*~*~*~*~*~*~*~*~*~*~*~

.

.
5 Easy Ways to Make Your Own Tape

~ * ~

This article is written by Sandra Parés

I love mixed media because it allows me to create my own decorations and customize to my personal style. Today we will see how we can make our own washi tape in an easy and simple way to incorporate it into our scrapbooking or mixed media projects.

The supplies I will use are the following: masking tape or repositionable and transparent tape (with transparent tape, at the end our tape will have more transparency), some Silks Acrylic Glaze , some permanent markers like Promarker, acrylic paint, heat gun, templates, some stamps, black permanent ink like Stazon, paper figures punched and 1 piece of baking paper.

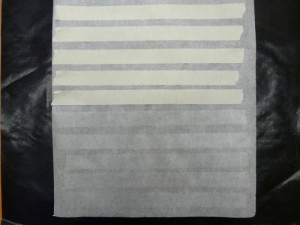
Before we start, we have to prepare our tape. We cut a piece of baking paper and paste it a few strips of masking tape or repositionable tape. You will see that the tape isn’t paste good on the baking paper. The advantage is that we can work well with paints and, in addition, the tape retains good its adherence so then we can stick it right in our projects.

Put strips of tape on the baking paper

1st way

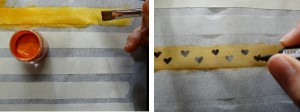
We choose a color of Silks Acrylic Glaze and with a brush we paint the whole tape to give it a basic background color. Silks Acrylic Glaze gives us a good transparency and they add a nice shiny appearance to the tape. When the paint has dried (Silks dry very fast) with a permanent marker we draw a continuous pattern in our tape. And our first whasi tape is ready!

Painting with Silks Acrylic Glaze and draw with Promarker

2nd way

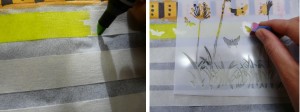
We choose a Promarker color to paint the background of the tape. The Promarker pen also paints with transparency so it is ideal for quick backgrounds in our handmade whasi tapes. When we have our background ready, we choose a template and we can stencil a pattern with acrylic paint throughout the tape. When it dries, we already have another type of whasi tape.

Painting with Promarker and stenciling onto stencil with acrylic paint

3rd way

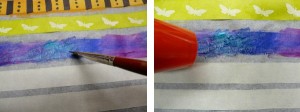
For me one of the easiest and funniest! This time we will use different Silks Acrylic Glaze to paint the background. We have to paint with a large quantity of paint in the tape, and we can mix the colors. It is important that we create paint lumps, I mean, we need areas where we have an accumulation of paint. Before the paint dries, we use the heat gun over the paint, we put the hot air very near the paint lumps. Then you will see that paint makes bubbles and when it dries (and it dries quickly) it has a very original texture.

Painting with Silks Acrylic Glaze and warming lumps of paint with heat gun.

4th way

In this case we also do a background with paint or permanent marker. After it dries, we stamp a stamp with a permanent ink making again a pattern throughout the tape.

5th way

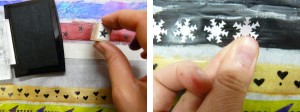
And in the last easy way to make a whasi tape, again we do a background with paint or permanent marker. And in this case we paste small paper figures (mine are made with die cutting shapes) in our tape with matte gel medium.

Painting with Silks Acrylic Glaze, stamping and pasting a paper figure.

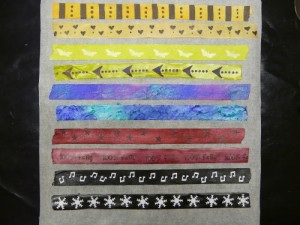
And here you can see the final result:

Paper tape decorated with mixed media

~*~*~*~*~*~*~*~*~*~*~*~*~*~*~*~*~*~*~*~*~*~*~*~*~

Author bio: Sandra Parés loves working with mixed media! The colors and textures leave her amazed and she enjoys creating and getting their hands dirty with paint and gesso! On her site My mixed media you can find a mixed media online store, mixed media workshops in Spanish, tutorials, ideas and mixed media techniques.

~*~*~*~*~*~*~*~*~*~*~*~*~*~*~*~*~*~*~*~*~*~*~*~*~

.

.