Soft Pastel, Collage and Encaustic

This article has been written by Vicki Ross

After months of studying and researching encaustic techniques, collecting the supplies, and setting up a workstation in my studio, I was ready to ease into some serious play! Being an analytic person by nature, I always work from information to play, rather than play and learn-as-you-go. I made my first batch of encaustic medium (beeswax + damar resin) and ended up with 20 or so mini-muffin shaped cakes of medium. Won’t do that again in a mini-crock pot because it had three legs and was full- wax all over my counter. Miss Brain did everything right, down to micro-managing the measurements, but forgot a piece of newspaper on top of the counter. DUH! Did a few small 7″x7″ experimental pieces on watercolor paper mounted on foam core (materials on hand). A few got scraped off, and the used medium saved into a ball for later use…too precious to waste.

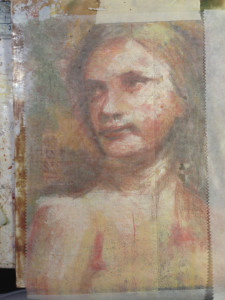
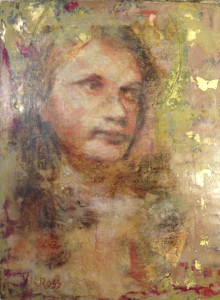
Encaustic and Pastel 12” x 9”

Encaustic, Pastel, Collage, and Gold Leaf

Now I felt like something larger…

Materials:

  • 12″x 9″ Luan panel
  • R&F encaustic gesso
  • Deli Paper (thank you mixed media artists)
  • soft pastels
  • gold leaf
  • encaustic medium
  • Razor Blade
  • Ranger Tacking Iron
  • Heat Gun

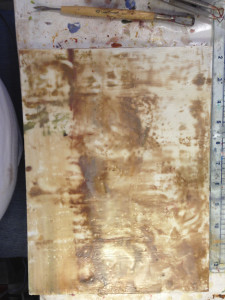
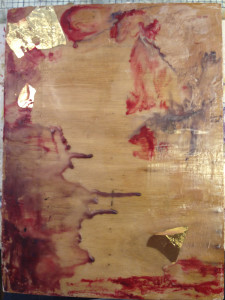
Prime the panel with two coats of clear medium, fusing each with heat gun. To get the surface as smooth as possible, alternate a Ranger tacking iron, scraping with a razor blade, and fusing with the heat gun. Next, I laid on a layer of tinted medium (melted with scrapings from the early pieces. To achieve an aged look, I  placed the panel on the heated surface of the griddle until the wax was moving.

Preparing the panel

Preparing the panel

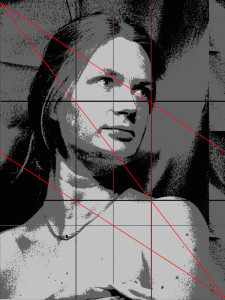
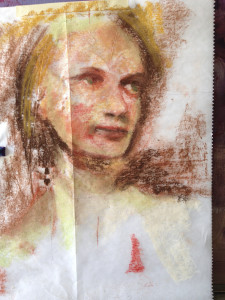
In photoshop, I planned the position of my portrait (reversed), and made the same composition lines onto a piece of deli paper. With soft pastels, I painted the portrait on the paper, continuously checking my drawing.

positioning of the portrait

Painting the portrait

Gently heating the prepared panel with the heat gun, align and place the deli paper pastel side down, and burnish it carefully and thoroughly.

Polishing the portrait on panel one

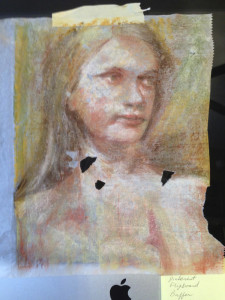
Carefully remove the deli paper from the panel. If any non-burnished areas show, lay paper back over that spot and re-burnish. If the paper tears, begin peeling it from another direction.

Remove the deli paper from the panel

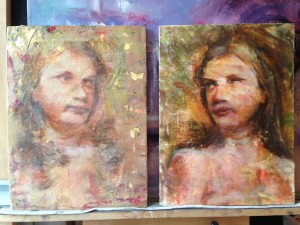
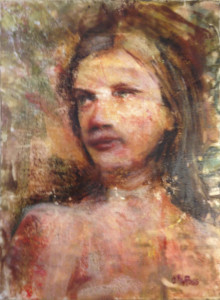
As with the first panel, gently warm the surface with the heat gun. Carefully position the deli paper with the ghost image pastel side up this time, creating a mirror image. With the heat gun again, warm the paper. The underlying layers of encaustic medium will encapsulate the paper, rendering it almost invisible. Carve a circular halo, add more touches of gold leaf, and voilå! Katherine and Katherine Reflected.

Katherine and Katherine reflected image

~*~*~*~*~*~*~*~*~*~*~*~*~*~*~*~*~*~*~*~*~*~*~*~*~

Vicki Ross is focused on sharing her journey to art and how life events can shape us through creativity www.Axully.com. Vicki has always been involved deeply in the creative arts, from professional soft crafts publications (knitting/crochet/needlework) to French Hand-sewing, stenciling to macramé, oil painting to encaustics. Whatever your leaning, she believes in the healing power of creating.

You can see more of Vicki’s work at VickiRossArt or via blog posts at Axully – Solid. Useful. Beautiful

~*~*~*~*~*~*~*~*~*~*~*~*~*~*~*~*~*~*~*~*~*~*~*~*~

.

.
Urban Flair: How to Create Your Own Handmade Graffiti Sketchbook

~ * ~

This article was written by Martice Smith II

Martice Smith II shares her process of how she creates her popular handmade, graffiti sketchbooks

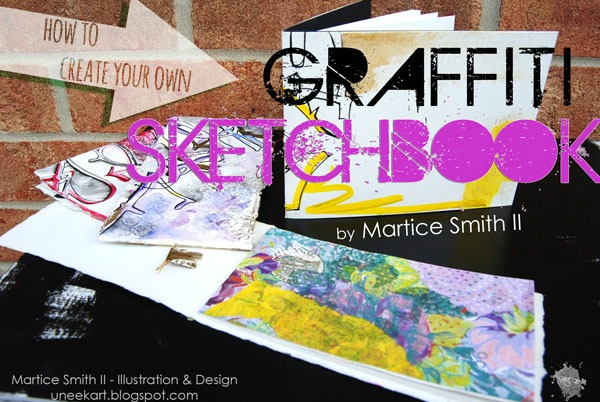
Attention art journalers and doodlers! Do you want a dynamic, eye-catching book cover? If so, learn how to add some ‘urban flair’ to your sketchbook covers. Try your hand at creating a popular graffiti-infused sketchbook, inspired by mixed media artist Martice Smith II.

Learn how to incorporate your hand-lettering as a graffiti style that’s sure to impress. This tutorial is inexpensive and at the end, you will have created your very own, handmade graffiti sketchbook, in as little as 30 minutes. This creative project will urge you to have the courage to experiment with graffiti-styled lettering, inspired by your own personality.

As the great Dr. Maya Angelou states, ‘We come from the Creator with creativity’.

We all have that innate desire to be heard and seen. Here’s your chance! Be bold- make your mark and let YOUR light shine!

~ * ~

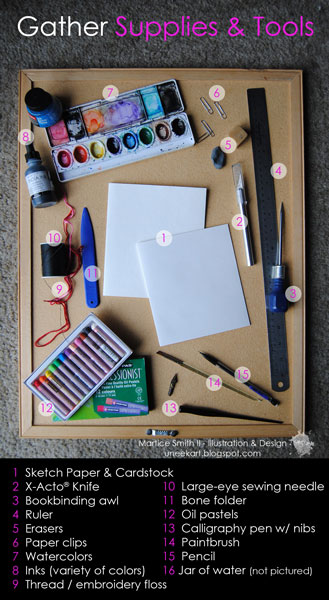
Gather Supplies & Tools

Since this project is inexpensive, you probably already have these supplies and tools on hand. If not, substitute by using what you have!

Gather supplies and tools to create your own graffiti sketchbook

Instructions

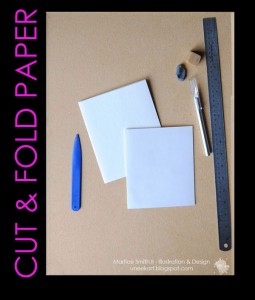
Cut and Fold Paper

Cut and fold paper for the sketchbook

The construction is very basic: heavy cardstock folded in half (for the cover) with 10-12 pages of lightweight drawing paper for the inside, bound with a simple Pamphlet stitch. Here’s what you’ll need:

1 sheet of card stock or heavy duty paper (My favorite is Rives BFK)

10-12 sheets of drawing paper (slightly smaller than the cover dimensions; these will be the inside pages) 

Instructions to Cut and Fold Paper

Start out by measuring and cutting your paper. (Should be double the size you want for the finished sketchbook.)

Using a bone folder, fold the cardstock cover and all 10-12 sheets of drawing paper, individually. Match up the corners and fold the paper to make a good crease.

Nest all 10-12 sheets, spine (the fold) on spine on spine inside of the cover. This creates one signature. (There should be equal amounts of cardstock showing at the top, bottom and right of the signature.)

FYI: Folding a sheet in half yields a “folio”. A “signature” is a compilation of two or more loose folios. In this technique, the cover and signature are sewn at once.

Use an eraser to clean any smudges or pencil lines.

Designing the Cover

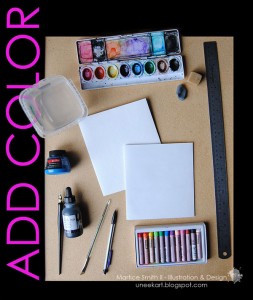
Add your design to the cardstock paper

Think about the elements of art and principles of design before designing your graffiti-styled cover.

Line is the most basic element of art and one of my favorite elements to use when building a composition.

Bold and thick; squiggly and thin; lines that taper at the ends; any combination of above. When grouped together, lines can convey texture, rhythm, and density. My signature style is characterized by the use of vibrant colors and loose, energetic marks- accompanied by phrases and or quotes. How wild can you get?!

My writing is not always legible. Sometimes, I want the viewer to know exactly what I’m writing and other times, I keep it more personal by using it as a design element. Be willing to practice free-style lettering until it feels like second nature to you.

Tip: If you’d don’t have a calligraphy pen, try a marker with a chisel-tip. Do not to use your finer tip pens because you don’t want to risk ruining them when drawing over paint, oil pastel and modeling paste.

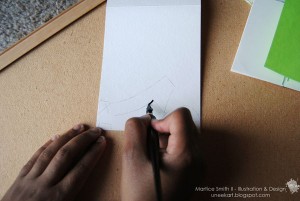
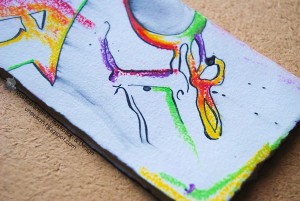
Designing the cover of the sketchbook, using a calligraphy pen and ink

You can draw a sketch of your composition, very lightly, or you can free-hand the lettering. For this tutorial, I’m doing both!

Draw and write intuitively- don’t hold back! If you start mixing uppercase with lowercase letters, that’s perfectly fine! This is your invitation to show off your unique personality. Go ahead, add your charm to the surface!

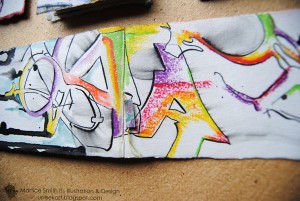
Cover of the sketchbook, featuring oil pastels, calligraphy pen and ink

Rhythm– just like music, art can also have rhythm. It can be seen as repeating shapes or colors. Showing a variety of lines, moving in different directions, helps lead the viewer’s eye around the composition. Add oversized letters diagonally across the paper and try overlapping to give a sense of depth.

Sewing the Graffiti Sketchbook

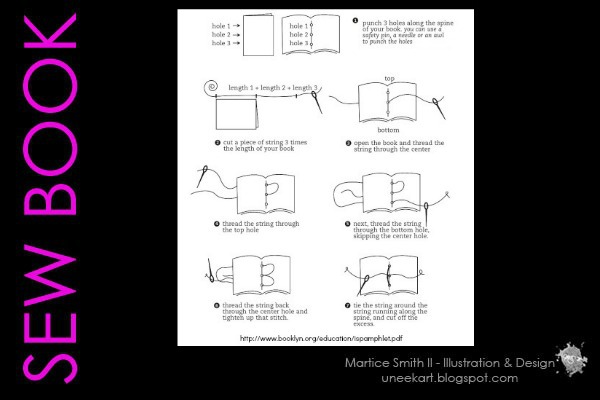
3-hole Pamphlet Stitch technique

This diagram shows you how to bind your book using a simple Pamphlet Stitch.

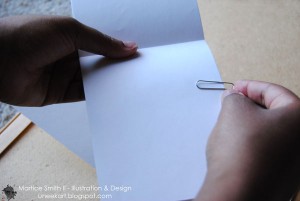
Keep drawing papers in place with paper clips

Grab a couple of paper clips. Neatly stack the signature, spine to spine, inside the cardstock cover. Secure them in place.

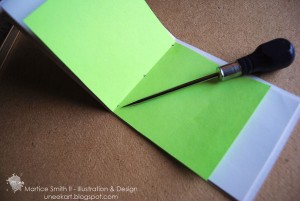
Mark holes and pierce them, using an awl

Using a ruler and a pencil, measure and mark the center of the spine.

Mark two more places: measure 1/4 inch from the top and mark. Next, measure 1/4 inch from the bottom and mark.

Using the awl, slowly and carefully, pierce thru each mark. (You should be piercing through the drawing sheets AND the cover.)

Having trouble? See diagram, here. Also, refer to this diagram for binding your book using a simple 3-hole Pamphlet Stitch.

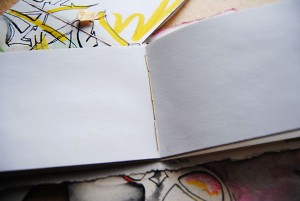
Opened view of sketchbook, showing thread

Your sewing should look straight and taut. Check the center of your sketchbook.

Varnish Cover

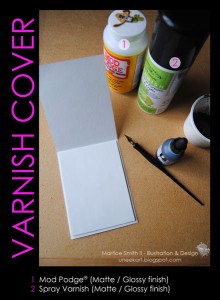
 Varnish cover of graffiti sketchbook

For the final stage, we need to protect the cover of our handmade graffiti sketchbook. I like using spray varnish for the first two coats. Note: dirt from fingertips, dust and wear and tear will create a unique worn-in appearance. If you want to prevent this from happening, apply 2-3 even coats of Mod Podge (after spraying varnish). Important: every coat of varnish needs to completely dry before applying another coat. Usually takes 5 minutes to dry.

Varnish cover of graffiti sketchbook

Admire!

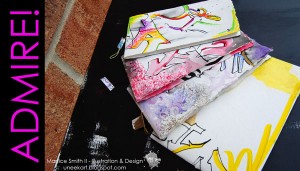
 Admire your creation and share

Finally, your new handmade, graffiti sketchbook is complete!

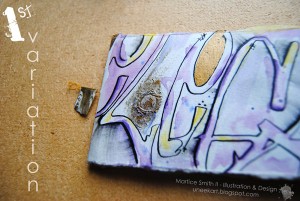
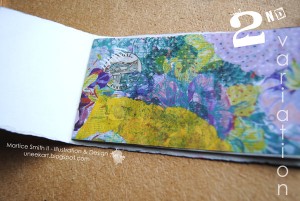
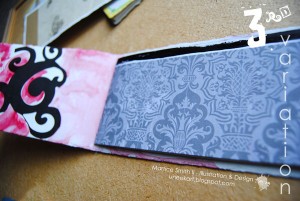
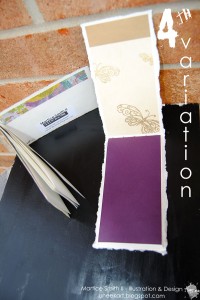
Add more “urban flair” with these four variations

Design your cover with patterns, textures, overlapping shapes and complementary colors that help bring the design together in a cohesive way. Add words, phrases, quotes or expressive writing in various areas. Try metallic paints and modeling paste, like I did here. Use up your scraps of cardstock and paper ephemera by gluing them to the inside of the sketchbook 

Take a look at these four variations, from my collection:

Add texture and some metallic paint and modeling paste!

 ~*~

 Use up your scraps of cardstock and paper ephemera by gluing them to the inside of the sketchbook

  ~*~

Use up your scraps of cardstock and paper ephemera by gluing them to the inside of the sketchbook.

~*~

For a more natural, unrefined look, create a deckled edge

Make more of these sketchbooks, just to practice different styles. Take the leap- experiment with creating graffiti-styled lettering. Your new sketchbook can be your safe and comfortable place to play, invent, explore, and make mistakes.

When you fill your journal and flip through the pages, you’ll begin to have a deeper connection with your own handwriting, as it has morphed into something spectacular!

With some practice and patience, your own handwriting is easily transformed into creative, graffiti-infused creations, full of your own personality. Who wouldn’t love to see more of YOU?!

I hope you have fun with this tutorial. Be bold and let your personality shine!

~*~*~*~*~*~*~*~*~*~*~*~*~*~*~*~*~*~*~*~*~*~*~*~*~

Martice Smith II

Martice Smith II is creative director of Martice Smith II – Illustration & Design Studio, based in Kansas City, Missouri and owner of Uneek Art Boutique. She established herself as a freelance Illustrator and graphic designer after receiving her Bachelors of Arts Degree.

Her stunning illustrations reveals her love for fashion, typography and wildlife- using a combination of analog and digital techniques. Martice also contributes as an article writer for the Creating Mixed Media Art website.

You can see more of her work via her Facebook page or her blog.  She invites you to join her monthly newsletter, Uneek Art Letter, for art biz tips, advice and free digital goodies!

~*~*~*~*~*~*~*~*~*~*~*~*~*~*~*~*~*~*~*~*~*~*~*~*~

Encaustic and Glass Mixed Media Mobile

~ * ~

This article is written by Anjuli Johnson

Every once in a while, I slip away from my usual style of work and am inspired to create something drastically different from anything I’ve ever done before.  Whenever this happens, it’s always very exciting and terrifying at the same time.  I think one reason I tend to stay within my practiced range of techniques is that I know what I’m doing- doing something different means a necessary amount of experimentation and trial and error, which may work, or it may not.  Terrifying though it may be, it’s so important to experiment with new techniques, because obviously that is how we learn and develop our artistic talents, especially if you are self taught.

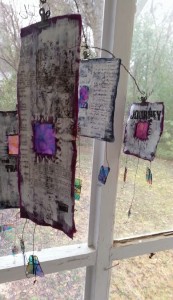
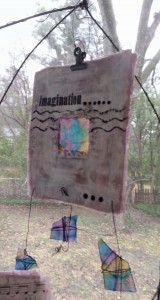
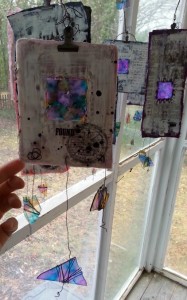
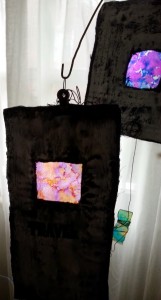
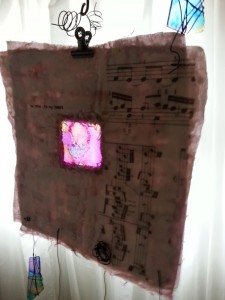
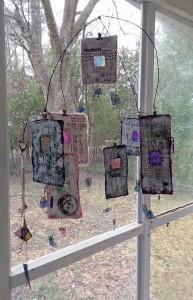
I have worked with encaustics before, but never on fabric, so I knew bringing my mobile idea to fruition was going to be tricky.  I used brocade as my base, not only for its beautiful colors and designs, but because I could leave the edges frayed or burn them smooth.  You can see I chose frayed for some, and smooth, burned edges for others.

I cut 2*2 inch squares of glass for inside my encaustic pieces and random broken pieces to hang from them.  Alcohol ink is what I used to give them a stained glass effect.  You need to use Krylon acrylic coating as a sealant so the ink doesn’t smear.  I used the cut glass squares as a template to stitch squares into my layers of fabric.  I cut out the squares of fabric, leaving an edge that the glass would sit inside once I finished working with the wax.

There are some things to be aware of if you’re going to attempt a similar project- first, the surface you are working on.  Make sure that it’s clean.  My art table is covered with paint drips and old glue, so I improvised another surface to work on.  The other thing is that for my squares of stitched fabric, I wasn’t painting on just one side as I would do when painting on wood.  Both sides of my pieces would be seen in this mobile format, so I knew I would be painting with wax on both sides.  If you’re not careful, working on one side can cause the wax on the opposite side to stick to the surface of your table and peel away.  I found it easier and less messy to work until I was nearly finished adding all my wax and embellishments on one side, and then begin work on the other side.  You need a heating tool to heat the wax between layers so they fuse together- when I finished working on one side fusing the wax, I would lay it on the other side to begin painting, and hold it loosely in my hand to fuse it rather than lay it on the table to fuse it.  This keeps the wax on the fabric rather than peeling away and sticking to the table.  Be careful using your heat gun while you do this- you don’t want to burn yourself.  But I was able to do this quite easily and it worked much better.  Of course, encaustic is a very forgiving medium.  If something goes wrong, don’t fret.  There are always ways to fix mistakes or mess ups, so it’s really the perfect medium for experimentation.

I used around 6-7 layers of wax on each side, and it’s with the last couple that I added most of my embellishments.  (You can use as many as you would like, as long as you fuse between each layer.)  I used stamped and drawn images on rice paper, Tim Holtz patterned tissue paper, rub-ons, metal objects like keys and gears, and india ink stamped and drawn right onto the surface.  You’ll need to add a layer

of wax over any paper or metal embellishments you add, but if you are stamping or drawing with india ink, you can let it dry on the top layer without needing to add any more.

There are countless encaustic techniques you can use on a project like this.  One of my favorite resources is a book called “The Encaustic Studio” by Daniella Woolf. Of course, there are seemingly endless resources on pinterest and youtube, as well.  Check them out, but as I said before, don’t be afraid to experiment and try new things.  They may work, they may not, but I have found that any art experiments you try are well worth the risk!

My biggest risk was building my own mobile frame- fun, but tough.  I’m definitely going to need to practice my mobile-making skills.  The best part was adding the       wire around the glass and the frame- the swirls of dark metal give the whole piece a rather whimsical quality.

So, that’s my venture into the unknown!  I made mistakes, fixed them, had to scrap a few of my original ideas when they didn’t work, but I’m pretty happy with how everything turned out.  Not only that, but I feel like I have a little more courage stored up for the next random idea that pops into my head.  What new things are you going to try this week?


Each of us must face our fears and try new things if we’re going to continue to grow as artists.

~*~*~*~*~*~*~*~*~*~*~*~*~*~*~*~*~*~*~*~*~*~*~*~*~

Author bio:  Anjuli Johnson  is a Mixed Media Artist from Raleigh, NC.  She began her art career as a scrapbooker, and it’s been an evolutionary process every since.  She loves all things mixed media- paper, glue, paint, canvas, pens, wire, gears… the list goes on and on.  She is constantly trying to push through her fears to discover and develop her talents, meet new people, and learn from those around her.  Check out Anjuli’s Facebook page to learn more about her.

~*~*~*~*~*~*~*~*~*~*~*~*~*~*~*~*~*~*~*~*~*~*~*~*~

.

.
Happy 3rd Birthday to Us!!


Can you believe that we are celebrating our 3rd birthday?!? How exciting!

I love how our community has grown and our love for mixed media art has developed over the last 3 years. We started with one little article [What is Mixed Media Art?] and have now features dozens of artists and tutorials and projects, all aimed at fulfilling your inner need to create, while NOT spending a fortune on the latest colours or products. We can be creative with a few simple supplies, a little know-how and giving ourselves permission to play and create art! It’s as easy as that!!

And for those of you who still don’t believe me (or in yourself) check back to our article on Dispelling the “I can’t do it” Myths of Creativity!

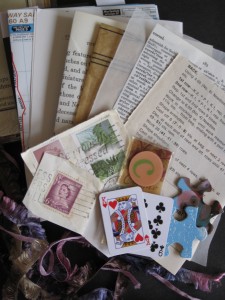
To celebrate our birthday, I have 3 ephemera kits to give away. To be in the running, leave a comment, telling us how your mixed media art has changed over the last 3 years. My favourite 3 will receive an ephemera kit in the mail.

Mixed Media art ephemera

Comments will close Fri 30 November 2012! Please make sure I can contact you.