Last-minute Gift Card Wrappers

~ * ~

This article is written by Katja Blum

It took me a while to like gift cards. In my family, gift cards, certificates and all kinds of “pick your own” gift promises were seen as an afterthought, proof that the giver didn’t remember until the last minute or put much thought into your gift. I don’t think that’s true. In my mind, a gift cards says “I think you deserve a treat, please pick exactly what would make you smile right now”. Whereas very sensible and frugal people might use a check or cash to do sensible and frugal things, a gift card is fun. It doesn’t look like “real” money, and it’s perfectly okay to spend it on something entirely frivolous.

Hurray for gift cards – but let’s be honest: Sometimes we do buy them at the last moment. So here are a few ideas for some mixed media flavored presentation ideas for holiday gift cards.

General tip: You shouldn’t glue, staple or otherwise directly attach a gift card to anything, because you might damage the strip on the back. Many cards come with a small envelope anyway.

If you have a day

If you still have a day, anything is possible! How about making a collage or mixed media painting and using the envelope as part of the background? Just affix it to whatever paper or canvas you are using and paint, stencil and decorate right over it. Just make sure you have the flap facing out, so the card can be inserted and removed without ripping the envelope off the painting. And don’t glue the flap shut with gel medium. Or make your own simple card pocket by gluing a piece of paper, card or fabric to the piece on three sides, leaving the top open. While painting, you can slip a piece of freezer paper into the pocket to avoid pasting it shut.

If you have a few hours

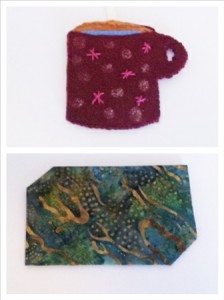
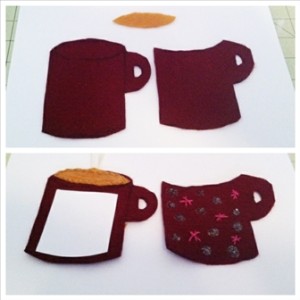
I like felt ornaments. They are easy to make – and felt can be decorated with anything. The coffee shop card I’m giving this Christmas is going in a little mug ornament, which I plan to slip on the recipient’s tree, so she can find it later.

Cut out parts of the felt ornament

  1. Cut out the mug shape and oval “coffee”. Use the shape as a template to cut out the mug again, but without the top. This will be the pocket for the gift card. You can do this with any shape. If you want to make a snowman, for instance, just cut out the bottom snow balls. Or you could cut out your ornament and put a rectangular pocket on the back – but I like the card peeking out in the front.
  2. If your ornament is a bit on the big or your felt is on the thin side, you can make it less floppy by gluing a piece of cardstock to the base ornament.
  3. Sew the coffee to the bigger mug shape, also attaching a ribbon loop for hanging, and decorate the front pocket – beads, embroidery, paint, glitter glue … The back of the pocket won’t be visible later, so it doesn’t have to be super neat.
  4. Sew the front pocket to the mug base. If, like me, you are not very good at sewing, thin thread in a similar color and a regular sewing needle works best, as your stitches will not be very visible.
  5. Place the card in the pocket. Give away.

If you have an hour or less

The second item on my art to-do list for 2015 is “Learn origami”. I’m fascinated by the possibilities, especially in combination with fabric. If you are really pressed for time, a simple origami envelope can be folded in minutes. Almost any kind of rectangular paper works for the envelope here – and you can, of course, decorate it as much as time allows. Using a piece of fabric gives an unexpected twist – lightweight to medium fabrics work best, my favorite is quilting cotton.

The fabric needs to be stiffened to hold the creases better. You can spray it with a thin coat of varnish or laundry starch. The one thing I always have in the house is white glue, so I dunked the fabric rectangle in a solution of two parts water and one part white glue. Smooth the fabric out on a sheet of freezer paper or plastic. It will peel off when dry. The fabric is going to be stiff, but can still be decorated with needle and thread, if desired.

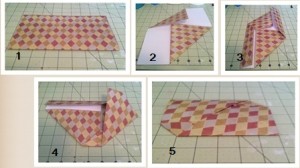
I used paper to demonstrate the folding steps – a rectangle of about 8″ x 11.5″ makes an envelope big enough for most cards.

Folding steps for the origami envelope.

Folding instructions:

  1. Fold the paper in half, make a sharp crease and unfold.
  2. Fold the top right and bottom left corners down to the center crease.
  3. Fold the top left and bottom right sides inward so that they meet the vertical triangle edges.
  4. Turn the paper 90° and fold the right side down to meet the bottom edge. Tuck the edge into the flap at the bottom.
  5. Fold the left side to the top edge and tuck it into the flap as well.

Slide the gift card into the slit in the center. The envelope has two layers of folds. Slip the card into the bottom layer, because the short sides are open in the layer above.

Finished ornament and fabric envelope

Enjoy giving a gift card to someone special this holiday season!

(Oh, and just in case this article is giving my family some festive ideas – remember the mantra, guys: books, crafts, coffee!)

~*~*~*~*~*~*~*~*~*~*~*~*~*~*~*~*~*~*~*~*~*~*~*~*~

Katja Blum is a writer and translator from Tulsa, OK. As an artist, she started with yarn, fabric and papier mache (rarely together), branching out into collage and other paper arts about ten years ago. Her latest obsession is making soft stuffies and art dolls – to the delight of her toddler. She also likes to find creative solutions for ugly or broken things around the house – to the delight of her husband.

You can see more of her work with fiber, paper and words at www.thewaywardsheep.com

~*~*~*~*~*~*~*~*~*~*~*~*~*~*~*~*~*~*~*~*~*~*~*~*~

.

.
Studio Tables Revealed

This article is written by Michelle G. Brown

Seth Apter, Mixed Media Royalty and All-round Nice Guy, is exposing our Studio Tables – you can see tables from around the world here: Studio Table: The Reveal.

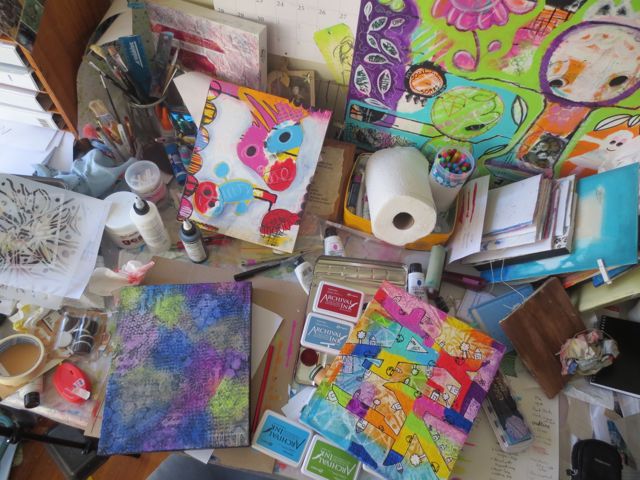
And here’s my table / desk:

Michelle shows off her studio table

I am slightly horrified that I can see (at least) six projects that are currently being worked on. I’m playing with the Ranger Dina Wakely paints and working on three canvases to show three different styles across the range of colours. You can read about my play with the paints here: Painting with Dina Wakely Paints!

I am pleased that it’s colourful! And proof that lots of creating has taken place this week. (And I haven’t left any paint brushes sitting in water overnight!)

Thanks for stopping by! Happy Creating!

~*~*~*~*~*~*~*~*~*~*~*~*~*~*~*~*~*~*~*~*~*~*~*~*~

Michelle G. Brown is passionate about mixed media art and enjoys sharing her knowledge and techniques with you to allow you to express your own creativity. Michelle understands that many of us have an inner need to create. By learning a few basic techniques the amazing world of mixed media art is accessible to everyone!

Michelle lives with her husband and two boys in Melbourne, Australia.

~*~*~*~*~*~*~*~*~*~*~*~*~*~*~*~*~*~*~*~*~*~*~*~*~

Merging Arts: Mixed Media As Thought Bubble And Mind Pictures

~ * ~

This article is written by Leeanne Oschmanns

A strange title? Perhaps, but this is the way that Mixed Media Art found a place in my heart. For many years I dabbled with painting and drawing in singular mediums, usually acrylic or coloured pencil. Sometimes I played around with water colour too. There was always a problem for me though. I am a writer and most particularly, a poet. Poetry has always been my soul escape.

My way of shedding light on the things that seemed darkest or most beautiful. Those small things that make every day a unique event to grasp and run with. So a craving for harmony and balance in my creativity led me to a need to express my poetry in more than words. Merely drawing or painting a picture didn’t work. It was too stifling and usually limited the expressive elements to one aspect of the poem. It also tended to intrude on the imagination of the reader. The beauty of poetry is that it is many things and something different to each person. The same can be said of mixed media. A single piece can be interpreted in ways that are meaningful to the beholder and their unique experience.

The power of symbols and the beauty of texture and medium render a flexibility that is more difficult to achieve in styles of singular medium and subject. That is not to say that a mixed media piece can’t also be specific to a subject, because it can. A single image or many symbols, all have their place in this beautiful art form. Mixed media then,is versatile and diverse. It can be metaphor, craft and soul expression. Sometimes a thought so profound that it should not pass can be symbolised and articulated with visual richness and subtle suggestion.

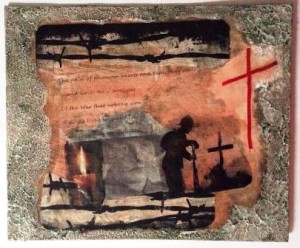
Recently in Britain, the public were encouraged to contemplate the 100th anniversary of The Great War by burning only a single light, preferably a candle, in the darkness. I felt moved to express my thoughts around this in a poem. From the poem, a series of images emerged in my mind, and I set about bringing together some specific symbols that represented my perspective on this very profound historical event which complemented the poem.

Creating “A Light To Remember”

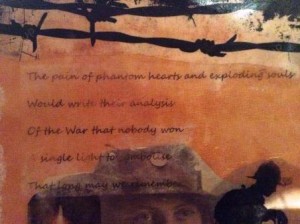
The piece I wanted to create for this article was an expression of a poem I wrote in commemoration of the Anniversary of World War One. The central image of a woman from a local family (their great grandmother who served) is quite haunting, so that became my initial focal point. After finding a few appropriate pics, I made photocopies and  then created transfers of the soldier and the cross, and the candle as symbols of remembrance. For the transfers, I used the simple technique of burnishing the copy onto clear contact, soaking and then rubbing off the paper. This allowed me to merge the elements. I also made a transfer of some poignant lines from my poem,  A Light To Remember

Leeanne Oschmanns creates a mixed media piece

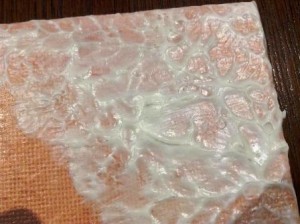
After covering the canvas board in a muted wash, I set about composition and placement. Due to this piece being a visual representation of a poem, I wanted to integrate and overlay the elements. Each element was a powerful symbol of war, as can be seen. Once I was happy with placement, I then used gel medium to stick them in place. In many ways, remembrance of our war dead and wounded has powerful spiritual and religious connotation. I chose to reinforce this with the symbolism of the cross for which I used ribbon of poppy red  (of the red poppy fields), and which was also echoed in the image of the soldier. I added texture to the piece with a border using relief paste which I stippled with a brush.

Leeanne Oschmanns creates a mixed media collage

This is beautiful to work with and is quite forgiving of reworking.  Once the border was done, I applied a clear glaze in readiness for an antiquing wash. The border framed the piece as though looking through a window in a dream. I decided to put a smoky night-time wash over it to give the impression of looking through the ‘mists of time’.

14Sep_LO_MergingArts-Pic3.1

~*~*~*~*~*~*~*~*~*~*~*~*~*~*~*~*~*~*~*~*~*~*~*~*~

About Leeanne – I write about life and ponder a lot. I see stories and poetry in many things. Personal growth and understanding are my passion, but people and animals complete my experience of what it is to be human. This world is beautiful. Only people make it ugly. I am a tamer of teenagers, freelance writer, and I make my art as an expression of my writing and the little montages of life that confront me on my journey

~*~*~*~*~*~*~*~*~*~*~*~*~*~*~*~*~*~*~*~*~*~*~*~*~

.

.
Crafting through Crisis with a Creativity-in-Case-of-Crisis Kit

~ * ~

This article is written by Ann Strecko Koeman

Artists are human and not immune to facing challenges and crisis in their lives that can range from health, financial, family, work and a myriad of other difficulties. Sometimes it is through these challenges that great works arise and there are times when a crisis just overwhelms and consumes every ounce of energy we have. How to survive and how to even thrive as an artist through all of life’s ups and downs takes persistence, perseverance and I believe preparedness.

crafting through a crisis

One idea is to have portable crafting or art making kits ready to go at a moments notice. We may already have emergency preparedness kits to survive 72 hours in the case of a natural disaster, or we may have an emergency kit with a spare tire in our cars in case of a roadside emergency, so why not have a Creativity-in-Case-of-Crisis Kit?

As a mother I used to haul around a diaper bag filled with everything I would need when I was out and about with my babies. As they grew I made them their own portable activity bags to keep them occupied. I learned that I too needed to have my own activity bag to keep me busy as I eventually had to be the one waiting around for my kids during their own obligations. Having to spend great amounts of times in Doctor’s waiting rooms, and hospitals with my children for their needs and then my own health problems made it so a lot of time was being lost. By having a small project bag to keep my thoughts preoccupied for sure made the time go by faster but also alleviated any stress I was feeling.

crafting through a crisis

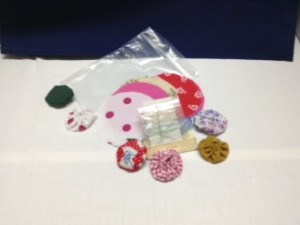
Some kit ideas I have and use are small sewing projects. For example, in a small baggie I have a dozen pre- cut fabric circles, and a small sewing kit which consists of some thread and needles. I use any waiting time to sew up some fabric yo-yo’s that I later use as embellishments in my projects. The kit is one of the smallest I carry around very easily in my purse.

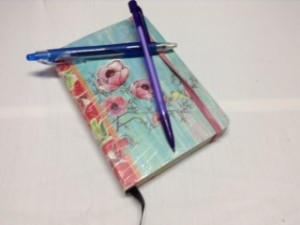
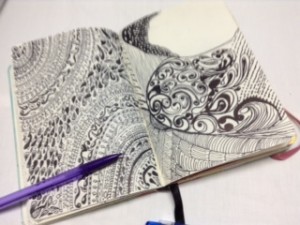
I always have pen and paper in my purse as well. I always need to jot something down anyways. But on days where I know I will have to wait a little longer I bring a very small sketch book and a couple of pens or pencils. I find this down time to be good for writing article ideas or simply making a quick sketch. One time I found myself making Zentangles out of the patterns I saw in the floor pattern in the Hospital waiting room.

Then I was inspired by the ceiling tiles as I lay on a gurney in an observation room and awaited for test results! Sometimes it is the conversations going on around me that give me inspiration for an interesting quote to use in my art journal when I get home, in the meantime I jot it down in my little journal.

crafting through a crisis

In my own experience I have found that in times of great stress that even though I felt that I had no energy or time to spend on a creative project it is exactly what I ended to do to get me through this challenge. By forcing myself to just even scribble on a piece of paper almost instantly switches gears in my brains and for a very brief moment the fact that I am thinking of something positive like sketching relieves a tiny bit of stress from my mind and body, and that is a good thing.

~*~*~*~*~*~*~*~*~*~*~*~*~*~*~*~*~*~*~*~*~*~*~*~*~

Ann is a Mixed Media Artist in Ottawa, Canada who enjoys many many types of crafts and art making. She spends way too much time in waiting rooms, but is grateful for small size sketch books and mechanical pencils.

~*~*~*~*~*~*~*~*~*~*~*~*~*~*~*~*~*~*~*~*~*~*~*~*~

.

.