Organizing Our Mixed Media Collections

~ * ~

This article is written by  Ann Strecko Koeman

In a previous article I contributed to turning some of you into enablers of the collecting (NOT hoarding) kind (see “Are we Collectors or Hoarders?”).  Today I am presenting to you some of the ways I choose to organize my massive collections of art supplies and materials.  May this be of help to you and may the force be with you as you partake in some spring cleaning in your own studios.

One of the many items I collect are ribbons and trims.  I include cords and other long fibres in this category.  I find new ribbons, trims, yarns, cords, and threads in a variety of places such as Dollar type, department, grocery, hardware, fabric, craft and other stores.  I tend to buy all things on sale or in clearance bins.  I also visit and purchase from thrift stores, flea markets, garage sales and  ebay.  Finally there is all the free stuff I find through friends and family, Free Cycle, and any thing that enters my home and can be recycled such as string, shipping bands, rubber elastics around the vegetables, and old clothing unfit for donating but fine for recycling.

organizing studio supplies

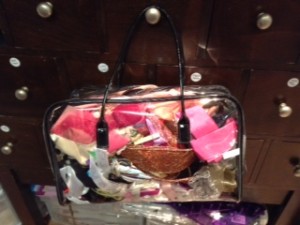
Now putting away the new items is fairly simple, as I just store them with other like minded items in my studio in designated  and labelled drawers, shelves and bins.   When it comes to the items I get second hand, these I deal with slightly differently.  First, if the new/old item is unused I just store it with other like minded materials.  However if the items are used or come in tangled messes of pieces then I need to tackle and conquer.  Usually I just dump these treasures into a big see thru purse that I found at my local thrift store.  The bag hangs from one of the drawers in my studio until I am in need of just a small bit of something for my project.  Once in a while I dare to plunge into the treasure bag and do some organizing by retrieving the longer pieces, wrapping them around some cardboard and storing them in a designated bin.

organizing studio supplies

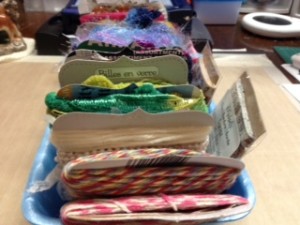
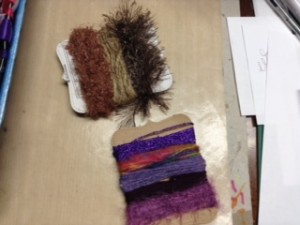
As I have a larger then necessary collection of fibres I find that keeping just a sample (of 3 metres) or so wrapped around a piece of recycled and die cut cardboard easier to store in my crafting area, while the bulk of my yarns, and such are stored in a storage closet.  I made some cards with the help of some cardboard taken from the recycling bin that I die cut into large labels.  I cut pieces of each yarn I own and wrapped them around the card.  I also took the time to colour coordinate my wrapped cards to make it visually appealing.  I find that by having a bin with most of my trims in sight makes it more likely that I will use them, as I tend to forget what type of goodies I have.  This system also makes my ribbons, trims, etc a lot more portable to classes and events.

organizing studio supplies

~*~*~*~*~*~*~*~*~*~*~*~*~*~*~*~*~*~*~*~*~*~*~*~*~

Ann is a Mixed Media Artist working in the capital of Canada.  She is surrounded by wild life inside her home (she has teenagers) and outside her country home.  All this nature is inspiring in her art work.  More of her work can be viewed on her blog Annmakes at annmakes.blogspot.com

~*~*~*~*~*~*~*~*~*~*~*~*~*~*~*~*~*~*~*~*~*~*~*~*~

.

.
Inspiration Word Blocks

This article is written by Melanie Statnick

My mother is a Tole Painter of over 20 years. I watched her carve out time for her art from work and motherhood. Each night she would spend long hours painting on wood, tin and more. Painting folk art on everything she could alter. She sold her art at bazaars and gave them as gifts to friends and family. She was an inspiration to me growing up. My Father who worked with wood by trade would make what she couldn’t find or needed more. The art and carpenter gene was pasted down to me. I adore working with word and altering objects.

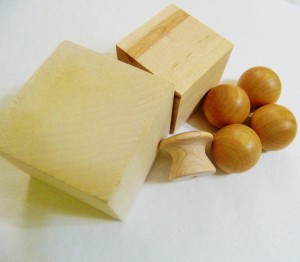
Woodblock, knobs, and balls

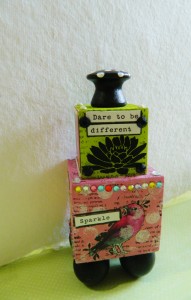
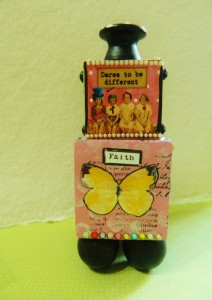
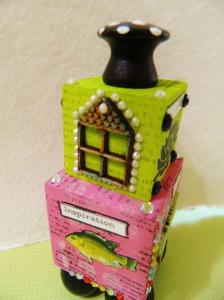
I have drawers full of wood blocks, knobs, balls, and cut images. I wanted to share with you what I created. These word blocks are inspiration for art friends, family or gifts.

Materials Needed:

1 Large wood block

1 Small wood block

1 door knob

4 wood balls with flat edge

Acrylic paint

Collage images/words

Wood glue

Gel Medium

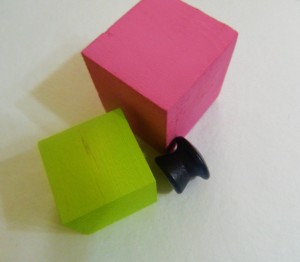
Start by painting all four sides of wood blocks, knob and wood balls for the bottom. Have some creative ideas in mind before you start gluing your images down. You can be as simple or elaborate as you’d like. Make sure you have some word rub’ ons or stickers you’d like to use.

Stamp, stencil or glue paper to four sides of your square blocks.

Wood blocks, knob and wood balls with different paints

Once you have all your sides painted the way you like you can begin to glue your collage images down to the sides for your blocks. Leave two sides open for a top and bottom with both blocks. Once satisfied with your design use the wood glue to glue your smaller block onto your large one.

You will also need to glue your door knob on top of the smaller block. On your large block follow the same direction leaving a top and bottom open for the small block and “feet” that are the wood balls. Glue your small block on to the large block and glue your wood balls to the bottom of the large block. Glue your knob on last. Leave plenty of drying time.

Blocks with collage images

 Blocks with collage images

Blocks with collage images

Embellish your word blocks with your intuition. Use the words you’ve chosen as inspiration to help you complete your blocks. I used gem stones, stamps, and outlined my images. So many possibilities for these. Use different shapes for the knobs and feet. Get creative and have fun!

~*~*~*~*~*~*~*~*~*~*~*~*~*~*~*~*~*~*~*~*~*~*~*~*~

Author bio:

Melanie Statnick is a Canadian Mixed Media & Collage Artist out of North Carolina. Melanie creates art daily from her private studio. You can see her artworks at her website www.melaniestatnickart.com. Her style is fun, whimsy and eclectic. Melanie is also an Art Instructor for local venues and community colleges for students of all ages.

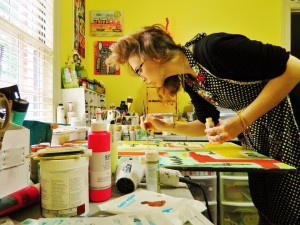
Melanie Statnick in action
.

.

Creating your Own Mixed Media Birdhouse

This article is written by Shari Welch

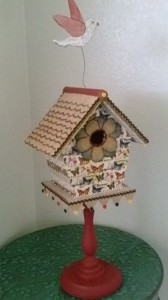
Have you noticed the decorate your own birdhouses at your local craft store? Are you tired of just slapping paint on them? I will show you how you can make a unique, one of a kind birdhouse using mixed media materials.


I decided on creating a decorative indoor birdhouse.

Here are the materials I choose to use and how I incorporated them into my project.

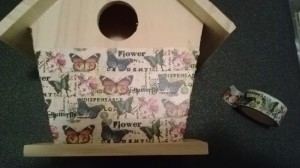
I wanted to try something new with my washi tape.

It worked perfect for the outside.

adding washi tape to the birdhouse

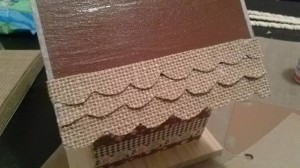
I cut out a series of scalloped shaped strips for the roof, a flower for the opening, and a banner using burlap paper.

adding scalloped burlap strips to roof

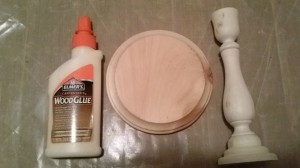
I didn’t want it to just sit on a table. I purchased a wooden candlestick and a round disc of wood. I glued them together and then attached them to the bottom of the house.

gluing candlestick to base and then to birdhouse

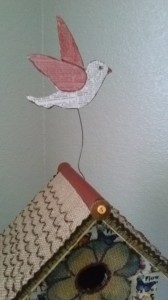
I attached a wire to my roof, and then to a decoupaged wooden bird with E6000 glue.

glue the wire on the bird and birdhouse

To finish, I added 2 types of buttons,small rick rack, shaded the flower and roof-line with Memento Dew Drop Dye Ink Pads and markers.

Now I have a decorative piece for my small table!

Now I have a decorative piece

~*~*~*~*~*~*~*~*~*~*~*~*~*~*~*~*~*~*~*~*~*~*~*~*~

Author bio:

Shari Welch is a mixed media artist living in Denton Texas. She is known for using reuse and recycle materials in her artwork. She volunteers for SCRAP Denton where she is on the education committee, teaches workshops, and performs art demos. She is passionate about mixed media art and loves helping bring creativity into the lives of others.

You can follow Shari and her mixed media art at www.facebook.com/my.altered.life
.

.

Illuminated Letters for Mixed Media Artists

~ * ~

This article is written by Katja Blum

Illumination is the art of embellishing individual letters or symbols on a page of written text. The letter, usually the first letter of a page or particularly important passage is decorated with patterns and may contain intricate symbolic drawings or a miniature. The word “illuminate” means “to fill with light”, and the art derived its name from the technique of filling parts of the letter or background with gesso – not the acrylic primer, this stuff involves boiling rabbit carcasses – and covering the raised area with gold leaf.

Illumination has been around since 1500 BCE, when scribes began to illuminate Egyptian Books of the Dead. In the Middle Ages, artists created incredibly beautiful illuminations of sacred texts all over Europe and Asia. Famous examples are the Lindisfarne Gospel and the Book of Kells. As the printing industry progressed, illuminations became too labor-intensive and fell out of style. In the late 19th century, the illumination work of English artist William Morris led to a brief revival of the art form. Today, many calligraphers create commissioned illuminations, often as monograms for special occasions.

As a mixed media artist, focusing on the shape, form and symbolic value of a single letter can bring an extra dimension to your artwork. While it is very rewarding to create within the rules of traditional illumination (maybe minus the rabbit sizing), you can create fascinating effects if the letter is the centerpiece of the work, not just enhancing but completing or even replacing text – either carrying the whole piece or adding a layer of meaning to the work.

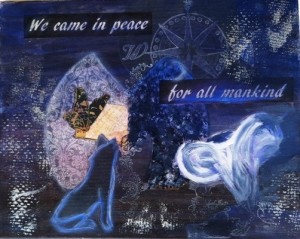
Illuminated letter collage “We Came In Peace” focusing on the letter M

For “We Came In Peace”, I started with free association about the moon. This is the part where the illuminated letter concept gets to be big fun. Do a brainstorm and run with your ideas. You definitely don’t have to be literal; perhaps you have personal associations with the letter or concept that will surprise both you and the beholder.

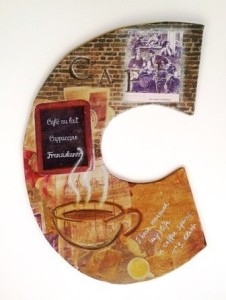
Illuminated letter shape “Coffee”

Two- and three-dimensional letter shapes are trending right now, and I’m a fan! Exploring different letter shapes as the basis of your work lets you play with space and contours and takes you far away from the ever-present rectangular boundaries of paper and canvas. “Coffee” is about my love for old-fashioned coffeehouses and pretty much any caffeinated concoction. The color palette in this piece sort of designed itself – and also goes great with our kitchen wallpaper.

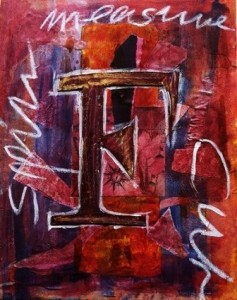
Illuminated letter collage “Fates”

With “Fates”, I moved away from concrete images, concentrating on lines and textures instead. Again, the letter is not the first of any word I used, but refers to the overall idea instead. There is actual illumination, even though I replaced the raised gold leaf with mica powder.

Explore the possibilities of illuminated and embellished letters in mixed media artwork, combined with text, imagery or standing alone. Following your imagination ‘to the letter’, you will discover more creative potential of mankind’s most powerful invention – the alphabet.

~*~*~*~*~*~*~*~*~*~*~*~*~*~*~*~*~*~*~*~*~*~*~*~*~

Katja Blum is a writer and translator from Tulsa, OK. As an artist, she started with yarn, fabric and paper mache (rarely together), branching out into collage and other paper arts about ten years ago. Her latest obsession is making soft stuffies and art dolls – to the delight of her toddler. She also likes to find creative solutions for ugly or broken things around the house – to the delight of her husband.

You can see more of her work with fiber, paper and words at www.thewaywardsheep.com

~*~*~*~*~*~*~*~*~*~*~*~*~*~*~*~*~*~*~*~*~*~*~*~*~

.

.