Basic Encaustic – Part 1: FAQ’s about Encaustic Painting

~ * ~

This article was written by Elaine Brady Smith 

A lot of people are fascinated by encaustic painting. I meet so many that say…”oohh, I’ve always wanted to learn how to paint in encaustic!” And I love to hear that kind of enthusiasm for this medium. However, getting started in encaustic painting can seem like a daunting task, especially when you don’t even know yet if you will like it or not.

I’d like to help take the mystery out of “getting started” with encaustic painting and show you how to gather tools and equipment in an easy and economical way in this 3 part series. Yes, there is a lot of information to relay, but I want you to be thoroughly informed so you will have fun with this exciting medium. Here is what will be included in each of the articles:

  1. July – Encaustic Basics-Part I-FAQs about Encaustic Painting
  2. August – Encaustic Basics-Part II-Preparing Substrates, Fusing Methods, Adding Color
  3. Sept – Encaustic Basics-Part III-Adding Collage and Embedding Objects

Learn how to do encaustic painting. Learn how to paint with beeswax. Set up your own encaustic studio and learn the basics of getting started in encaustic painting.

What Does Encaustic Mean?

“The word encaustic originates from the Greek word enkaustikos which means to burn in, and this element of heat is necessary for a painting to be called encaustic.” Wikipedia.com

Encaustic painting is an extremely versatile medium with techniques and styles that are as individual as the artists who use them. There are numerous techniques to use in encaustic painting that can produce a wide range of results from a smooth flat finish to very textural surfaces. Encaustic can also be used to add collage and assemblage elements to your work and surprisingly it is also a superb sculpting medium. I am always amazed at how different artists approach encaustic with similar techniques and get such varied results. It’s really incredible!

There are many artists using plain beeswax for collage art and that is perfectly okay provided it is done on a stable surface and fused properly. I will be discussing “encaustic painting” here, which uses a medium made of beeswax and damar resin and the paint (color) made from encaustic medium and powdered pigments.

Learn how to do encaustic painting. Learn how to paint with beeswax. Set up your own encaustic studio and learn the basics of getting started in encaustic painting.

What is Encaustic Medium?

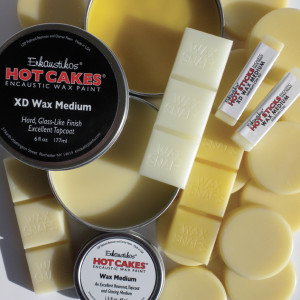
Encaustic medium is made with beeswax melted with Damar resin. I usually purchase refined beeswax and Damar resin from Swan’s Candles to make my own medium.

The ratio between the beeswax and damar resin can be 5:1 up to 10:1. I prefer the 5:1 ratio for hardness and shine factor. It is not recommended to ever use bleached beeswax for encaustic painting. And if you have a local beekeeper who can supply you with beeswax, that is fine to use too. Just know that there will still be a good amount of pollen suspended in the beeswax, which acts as a pigment and darkens the color of the wax.

It is less expensive to make your own encaustic medium than to purchase ready-made medium; however, ready-made medium is as clean and pure as you can get for clear coverage and bright colors. I make my own medium to economize, but I also love using ready-made encaustic products for their convenience and consistency.

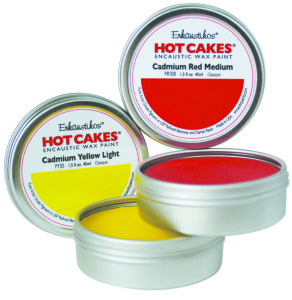
Milled, powdered pigments are added to the medium to make colored pigment cakes that are used as your paint. You can make your own pigment cakes with medium and powdered pigments, but it is labor intensive and extreme safety precautions must be taken when handling the dry pigments.

Learn how to do encaustic painting. Learn how to paint with beeswax. Set up your own encaustic studio and learn the basics of getting started in encaustic painting.

Learn how to do encaustic painting. Learn how to paint with beeswax. Set up your own encaustic studio and learn the basics of getting started in encaustic painting.

For beginners, I recommend purchasing medium and pigment cakes from Enkaustikos. They are one of my favorite companies and the quality vs. cost of their products is outstanding. They have made encaustic painting affordable with convenient product sizes and pricing. Go to their website to find a retailer near you to purchase their products. There are also many online sources for Enkaustikos products like The Fine Art Store.

What Substrates Can I Paint Encaustic On?

Wax will adhere to a variety of surfaces. The most important thing to remember is that the surface must be absorbent and porous. If it is not absorbent and porous, the wax will eventually crack and flake off the surface.

Some excellent choices are: Birch Plywood, Regular Plywood, Unfinished Pine, Un-tempered Masonite, MDF, and Cradled Panels. The wax can be painted directly onto most unfinished wood surfaces, but by preparing the surface with Encaustic gesso or Bristol paper, the look of the piece will be enhanced and give brighter color results. I’ll cover prep of wood surfaces in the next article.

Stretched canvas is not a good surface for encaustic work. It is too flexible and the give is too unstable over a long term. Most paper is absorbent and porous and does provide a good surface for encaustic monotype and printing. It does not, however hold a great amount of wax and will become saturated at some point.

There are many surfaces available for purchase from retail artist supply companies that are perfect for encaustic art. More and more companies are making products that are compatible with encaustic work. I often purchase ½” unfinished pine boards from the lumber yard and have them cut into convenient sizes. Many hardware stores like Home Depot or Lowe’s (in the US) will cut the wood for you, but I like a bit more control over my sizing, so I usually ask a friend to make the cuts for me. You can also purchase unfinished wood painting panels from many art stores and online.

What Equipment do I need for Fusing?

Each layer of wax that you brush onto your painting surface cools very quickly and hardens almost immediately as you work. As you add additional layers of wax they each become individual layers, one on top of the other. If you were to leave them as separate layers, they would eventually become unstable and begin to flake off over time. And you wouldn’t want that to happen after you have worked so hard on a piece!

It is necessary to fuse, or add heat to each and every layer in encaustic painting. This may seem tedious at first, but it is a necessary part of the process. As you fuse, each layer becomes one with the previous layer. As you add layers and fuse after adding each layer, your work becomes one solid layer of wax. This will make it strong and last many lifetimes.

Fusing is the process of adding heat to the surface until you see a slight shine, then remove the heat and allow the wax to cool. It is possible to fuse very large areas with a heat gun or acetylene torch, and it is possible to fuse very small areas with a small butane or crème Brule’ torch or a mini quilting iron. As you practice with different heat sources, you will begin to know which you prefer and which to use for different techniques.

I prefer a heat gun that has low/high settings so I can control the amount of air when fusing my layers and I believe the heat gun is the best heat source for beginners. There is no flame involved and that alone eliminates much fear when you are just learning. The torches are great for large works of art and to experiment with, but I recommend getting used to the basic process of encaustic before using them!

Inexpensive heat guns are available at many hardware stores. I purchased one for $15 at Harbor Freight. I have used many other more expensive heat guns, but this by far my favorite!

Learn how to do encaustic painting. Learn how to paint with beeswax. Set up your own encaustic studio and learn the basics of getting started in encaustic painting.

Can I do Encaustic Painting in my House?

You do need a bit of space to work on encaustic, and just like many other art mediums, in an area of your house that you do not have to worry about the mess. You should have a sturdy table to work on, be close to electric outlets and have sufficient ventilation. My work station is in my basement studio near a window and I have a fan sitting in the window to draw the air out of the room. As long as your area is well ventilated and your wax in not heated at too high a temperature, you will be fine. The proper temperature for melting encaustic medium and encaustic pigment cakes is between 170 degrees and 200 degrees. If anything starts smoking, you know your temps are set too high.

What Equipment do I need for Encaustic Painting?

You will need a palate on which to melt your medium and pigment cakes. Many encaustic artists start out using a pancake griddle, which is an easy item to find. I checked on Amazon.com and for $25-30, there is a huge variety of pancake griddles so I won’t recommend a specific one. I would however, recommend getting one with a numbered temperature gauge to control the heat setting. If you have a griddle that has low/high heat settings, then I would recommend getting a flat surface thermometer. There are commercially made encaustic electric palettes with anodized aluminum surfaces that are great, however I would recommend starting with an inexpensive pancake griddle until you find what suits your needs.

Learn how to do encaustic painting. Learn how to paint with beeswax. Set up your own encaustic studio and learn the basics of getting started in encaustic painting.

What Other Tools do I need for Encaustic Painting?

In addition to a heat gun (or other heat source) and pancake griddle (palate), you need tools to apply the wax to your surface. Cheap bristle brushes are great for this and can be purchased at the hardware or craft store. Don’t use synthetic brushes, as the heat will eventually melt them. And once you’ve used a brush with pigmented wax, it is best to dedicate the brush to that color, as it is difficult to completely clean brushes once they are used with wax. In fact the tools I use for encaustic are all dedicated to just encaustic work. You will also need metal containers to hold your medium and paints. I used aluminum or tin cans. It’s a great way to recycle cat food or tuna cans. Just make sure they are very clean and dry before putting your encaustic paints in them.

So this is basically what you will need to get started in encaustic painting. Of course there are many more tools that you might collect to use in your encaustic work, but this is a basic list to show you that it is not that expensive or difficult to get started. You can begin to collect your tools and equipment and next month we will discuss how to prep your substrates, fusing methods and adding color to your work. There is a lot more to talk about. We are just beginning to have fun!!!

 ~*~*~*~*~*~*~*~*~*~*~*~*~*~*~*~*~*~*~*~*~*~*~*~*~

Elaine Brady Smith loves creating acrylic mixed media and encaustic collages. Key ingredients in her work are vintage papers and her own collage papers made with repetitive marks, simplistic shapes and transparent layers.  She also enjoys other art mediums such as art journaling, oil painting and colored pencil drawing in addition to writing, teaching and spending time with her family. Find more on her website: elainebradysmith.com and on Facebook: Elaine Brady Smith Art

~*~*~*~*~*~*~*~*~*~*~*~*~*~*~*~*~*~*~*~*~*~*~*~*~

.

.
Choosing Paper for a Substrate

~ * ~

This article was written by Marilyn Harris Mills 

Recently, the market has been flooded with all types of surfaces for all types of media.  Whether you’re using watercolour pencil, acrylics, oils or simply gluing and pasting, there’s a substrate for everything.  How does one go about making sense of it all? Remember, even though the various companies market substrates for specific purposes, you are not confined to their suggestions.  Explore and have fun.

I’ll outline here various choices and you can decide what is best for both yourself and the choice of media you will be using.

Let’s first start with watercolour paper with so many choices.

Hot-pressed Watercolour paper (HP)

– the smoothest of all w/c  papers

– requires a great deal of control especially when using more water. It isn’t   porous, which causes pigment to puddle on the surface.

– excellent for detailed paintings with crisp sharp edges

Choose this type of paper if you like working with wash techniques or you want to concentrate on work that requires small amounts of paint applied in a controlled manner.

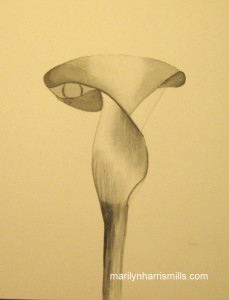
Marilyn Harris Mills talks about papers

Cold-pressed Watercolour paper (CP or NOT)

-medium tooth

-absorbs more water (more porous) than hot-pressed paper

-produces paintings with a looser style and look

-liquefied pigment can be removed from these papers by “scrubbing” with water and a brush

– will stand up to a fair amount of re-wetting and re-working

Choose this paper if you want a reliable general all-purpose paper that will suit most techniques and subject matter.  This paper is good whether you want to work with lots of control and detail or in a much more spontaneous manner.

Rough Watercolour Paper

-has even more tooth than cold-pressed paper and will hold up to repeated applications of water and pigment removal. This makes correcting mistakes easier than with any other watercolour paper.

Choose this paper for broad expressive work in which texture is important as well as other techniques such as dry brush, broken washes, lifting out and scratching back.

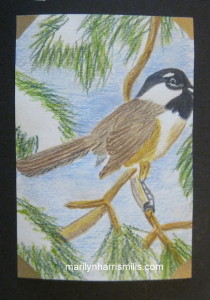
Marilyn Harris Mills talks about papers

Weights of Watercolour Paper

The weight of a watercolour paper describes its thickness. A paper’s weight is determined by how much a ream (500 sheets) of the particular paper weighs. Thickness will vary slightly from paper to paper, because some have different densities and moisture content. The most popular weights for watercolour papers are 140 lb. (300gsm) and 300 lb. (640gsm) it’s safe to use 140 lb. for paintings that require less water. Just be aware that it may buckle under even moderate applications of water. Although more costly, 300 lb. paper is a better choice for more serious watercolour painting projects. As a beginner, 140 lb. paper is a good choice.  Look for paper that is acid free because this means the paper does not contain chemicals that will degrade the sheet and cause yellowing later on.

Paper can be purchased in sheets, blocks or pads.  The choice is yours. Spiral pads are super for travelling.  Sheets of paper need to be cut/torn into the size you want but they are much cheaper to purchase than any other form. I might as well tell you now how to tear a piece of w/c paper.  Yes you can simply cut it…but if you want a torn edge, which is so becoming, then take a good fat round brush filled with water and stroke it along the paper.  Do this several times for the water to absorb.  Then either pulling the paper toward yourself or away from yourself you’ll get a beautiful torn edge.  Try both methods…..tearing toward yourself and tearing away from yourself.  A different effect both times.  Watercolour paper also comes in a block format.  The paper’s edges are glued on three sides, thus forming a block of paper.  One side is usually left unglued for easy removal from the block.  I love working with blocks, more expensive yes but I don’t need to use tape to secure to the placemat (dependent on the size of the block). Should you decide to purchase sheets of paper, cut to the size you wish to use, or a pad of paper in a specific size, then you will always need to use painter’s tape to adhere the paper to your placemat, otherwise the paper will buckle from water absorption.

With most watercolour papers, there is very little difference with the surface texture of one side and the other side. Traditionally, with embossed and watermarked papers, the correct side is the one on which the watermark appears the right way round.  Other papers will have a “mold” side.  If you hold it up to the light, you will notice that it has a more regular surface texture than the other side.  It is a matter of preference as to which side you choose.

Watercolour paper is a good choice for acrylics, charcoal, markers, pen, and especially for mixed media because of its weight.  Great for journals since it’s easy to fold.

Boards

There’s art boards, illustration boards, bristol boards, multi-media boards and speciality boards.  Basically they are boards with different types of surfaces, they are chosen according to the media chosen. Bristol Board provides two working surfaces, front and back. The better quality bristol boards are archival. Illustration Board is only finished on one surface. An illustration board is intended as a surface for creating artwork that will be scanned or reproduced onto other mediums. Art boards are a fine art paper mounted on an acid-free museum board, ready for framing or mounting.

Marker paper

If using markers, pens, ink, paper, then marker paper is a good choice. It’s smooth, non-bleeding and translucent. It responds well with colour with both permanent and watercolour markers.

Mixed Media Paper

This is my favourite when working with lots of different media in one painting. It has the characteristics of watercolour paper but the nice smooth finish of a drawing paper. I also like the weight of the paper thus holding up to many mediums. It is heavily sized for both wet and dry applications. It also erases well and blends easily if that is what you need.  Acrylics, charcoal, watercolours, inks, pastels, markers can all be used on this mixed media paper. Canson has just brought out a spiral bound book of this paper type – look for it – it has a blue cover and has fast become my favourite substrate if I want to work small. I like this paper for journals too since it folds well.

Vellum Paper

This paper is extra smooth and very translucent. It’s resistant to scratching and erasing so it might not be viable for mixed media is those are the techniques you use. It’s a beautiful paper though for tracing, design, penned calligraphy and even drafting.

Paper Terminology

The texture of the surface substrate is a determining factor when working with different media.  Texture is also a personal choice.  When I’m using my watercolour pencils I may use cold  pressed watercolour paper, but when using lots of mediums for my mixed media journals, then I’ll use a heavy hot pressed watercolour paper or the mixed media paper specially made for this. Choice depends on whether you want the substrate to be smooth or rough.

Marilyn Harris Mills talks about papers

Archival

This is a durable acid-free paper that is also PH balanced. Simply put, non-archival means that it will discolour as well as changing the composition of the substrate.  If you want your colours to maintain their richness, choose archival papers.

Sizing

Sizing is the process of adding water-soluble gelatin or starch to the paper when the paper is being made. The amount of sizing used determines how absorbent the paper is. It’s similar to when you purchase a new brush, each brush has sizing in it to protect the brush hairs when travelling.  One must wash out the sizing in the brush before using. Sizing in the paper controls how water, and other media penetrate the surface.

To learn more and to view selections, Dick Blick has some great information here http://tinyurl.com/n9wve96

~*~*~*~*~*~*~*~*~*~*~*~*~*~*~*~*~*~*~*~*~*~*~*~*~

Marilyn Harris Mills, aka Maer, lives in Ottawa, Ontario, Canada and is passionate, creative and eccentric..at least that’s what her girlfriends tell her!. Marilyn a professional and published artist, designer and teacher. She journey through life with her dogs Lucy and Mozart. Practicing yoga, journalling, meditating & walks in the forest nourish and excite her. Some days she tries to knit but that’s not quite working out! One of her favourite quotes is this one because it so her!”I work in whatever medium likes me at the moment!” (Marc Chagall)

You can see more of Marilyn’s work at her website – Marilyn Harris Mills

~*~*~*~*~*~*~*~*~*~*~*~*~*~*~*~*~*~*~*~*~*~*~*~*~

.

.
Don’t Be Afraid To Texture

~ * ~

This article was written by Kim Kelley

In this age of technology we have sites, blogs, tweets and Pinterest making all sorts of suggestions to use their brand of paste or gel; even sites on how to make your own paste. There are so many choices that it can be overwhelming. 

Kim Kelley tried three different types of texture paste

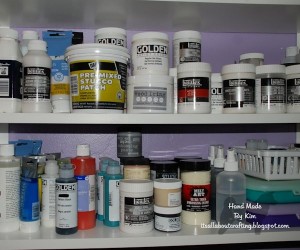
In this project I decided to use 3 name brand products; Wood Icing by Stencil Girl, Stucco Patch (from local hardware store), and Gloss Gel by Golden. The Wood Icing cost me $12.99 but had $12.00 shipping, whereas the Stucco Patch cost $5.99 and we were going to the store anyway! The Gloss Gel I purchased a few months back at Michael’s and used a coupon, so it probably cost me just under $5.00 but it is about half the size of the Wood Icing and ¼ the size of the stucco.

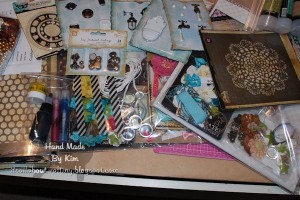
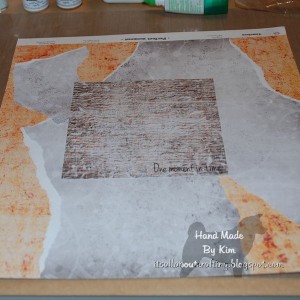
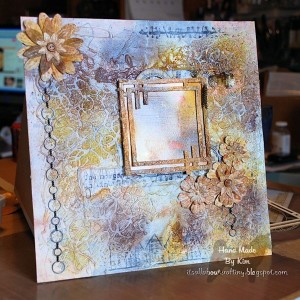
I am going to make a layout that can be used as a scrapbook page, framed art, or just wall decor. This is a kit that I purchased from Scrapbook Diaries consisting of papers, frames, flowers, sprays and even micro beads.  This is the first creation I actually made on paper, rather than canvas or wood.  So we will all be surprised at the result. 

Kim Kelley tried three different types of texture paste

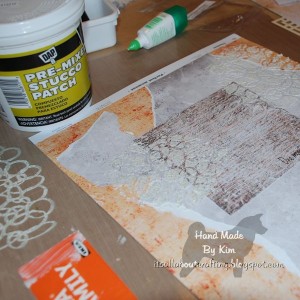
 After getting my papers layered and glued where I want them, it is time for texture. I decided to use my “circles” stencil and started with the stucco. First thing I noticed was the texture! No pun intended. It is rougher, having almost a concrete feel. I used it in both top corners of my project.

Kim Kelley tried three different types of texture paste
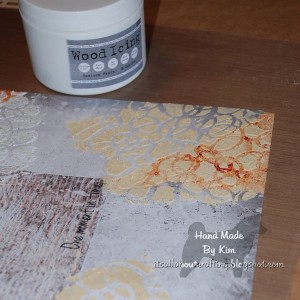
The lower two corners I used the Wood Icing. My only problem with this is it has a brown tint to it. The way to get past the color issue is to add gesso over it before adding any paint, spray or color technique. The feel and thickness you achieve is perfect, so for me it is worth it to use.

Kim Kelley tried three different types of texture paste
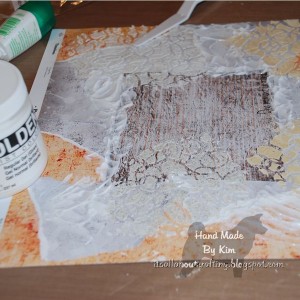
Next I added the regular gloss gel, really just dabbing it anywhere on the page with my palette knife. Then added micro beads to give it some texture, since it dries clear and the beads are clear it really shines. You can buy the medium with the beads already mixed in, but you are stuck with the color and consistency. If you add your own beads you can change the color of them and add as many as you want. You can even change the size of the beads that way.

Kim Kelley tried three different types of texture paste
Now for some color. The kit comes with Amber and Dark Brown Chalk spray. The colors are very pretty but I really wanted and added pop…so I used some sprays from Lindy’s Stamp Gang. These gave it the sparkle and shine that was needed.

Kim Kelley tried three different types of texture paste
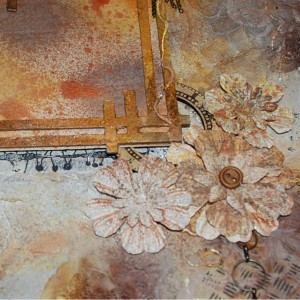
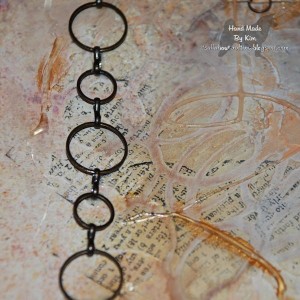
Once I was happy with the colors, I started on some embellishments I wanted to add. I colored a chipboard frame with sprays, paints and crackle gel. I attached this to a piece of paper that was also colored the same…this way someone can slip a picture right behind the frame. I had to add some flowers, chain, stickers and some chipboard. Then I used a few Tim Holtz stamps to add not only color but some dimension.

Kim Kelley tried three different types of texture paste
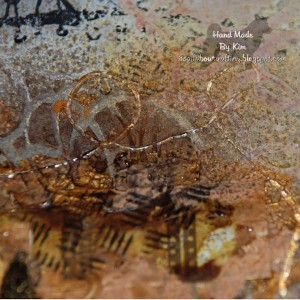
Now for the fun part and something I had never tried before…glue gun goop…yes that is a technical term! (ok- ok one I made up but still technical) For this you take your glue gun and make swirls, circles, loop de loops; whatever you want to create and let it dry right on your project. You can paint or spray over it for added color or leave it clear and shiny. I did both.

Kim Kelley tried three different types of texture paste
The final step is putting it all together. Whatever you feel looks right, is right. That is the best part about Mixed Media Art, there is no wrong or right way to end a project. Here is the end result.

Kim Kelley tried three different types of texture paste
I did add some gloss Mod Podge over the top; it seals it as well as gives it that glorious shine!

~*~*~*~*~*~*~*~*~*~*~*~*~*~*~*~*~*~*~*~*~*~*~*~*~

Kim Kelley is borderline obsessive about her crafting and her art. She loves mixed media art because you are free to go beyond your comfort zone, using your imagination and exploring an anything goes mind set. Kim loves to learn and explore new techniques and hopes that any art she creates leads someone to find their inner creative artist!

Sites: itsallaboutcrafting.blogspot.com and www.facebook.com/kimscraftyconcepts

~*~*~*~*~*~*~*~*~*~*~*~*~*~*~*~*~*~*~*~*~*~*~*~*~

.

.
Top Tips for Storing your Mixed Media Art Materials

Part of practising you mixed media art skills is to get out your collection of tools and materials and use them on a regular basis. There is nothing more frustrating than not being able to find something you are SURE you have bought or found and put somewhere “safe”; so safe that you can’t remember where it is. Here are my top tips for storing your mixed media art materials.

1. Good Papers

These are the beautiful sheets of paper that you do intend to use at some stage but for now they are just too pretty to use. I store mine in folders with plastic pockets so I can leaf through them. They are grouped into paper types (vellum, metallic etc).

2. Small Papers

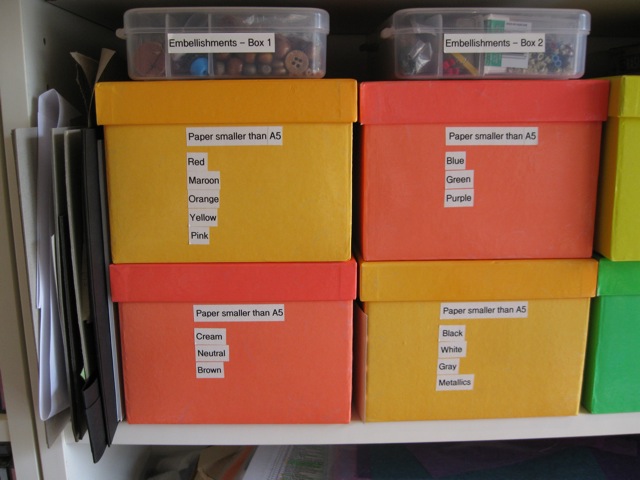
Once a larger sheet has been used up and you want to keep the off cuts, these can be stored in boxes and sorted in colour groups.

3. Embellishments

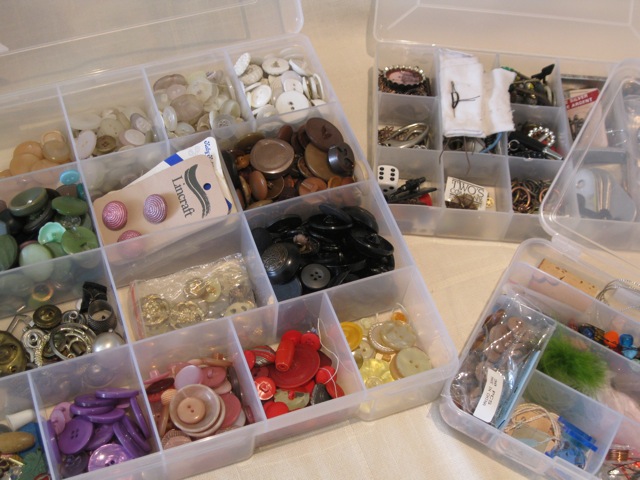
Buttons, shiny things, beads and stickers are all fantastic items to use as embellishments but without keeping them in neat storage, you will have lots of trouble finding just the one you want.

4. Other stuff

For everything that’s left, large boxed are great to putting those odds and ends into. Don’t forget to label each box to make things easier to find.

.

.