My Favourite Materials – Part 5 Embellishments

It’s no secret that at Mixed Media Arts we love to create. We want to use materials that we have at hand, or are fairly cheap and easy to buy, as compared to corporate lines of specialty papers and embellishments where you need to buy something from the entire range as the colours don’t match with anything else. It can be very frustrating.

Today we will look at what we need to add those finishing touches to our mixed media artwork.

Part 4 – Embellishments and Found Objects

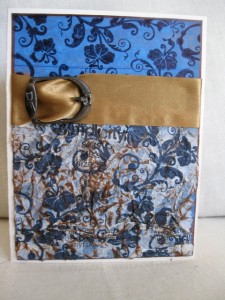
Another of my favourite mixed media materials is everyday objects to use as embellishments, adding that finishing touch or element of gold to complete your piece. I collect all sorts of metal and found objects as you never know when one may come in handy. This greeting card is embellished with an old sandal buckle and ribbon.

Mixed media collage greeting card

Metallic paint to add in touches to the backgrounds will make a great highlight. Or glitter glue that comes with a fine nozzle makes adding features or highlights by hand easy. (like this Stickles™ Glitter Glue Silver By The Each)

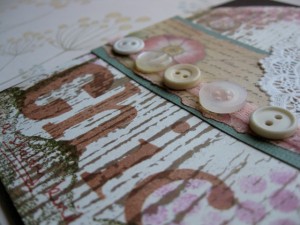
Use buttons as embellishments, reused from old clothing or spare ones from sewing friends or project.

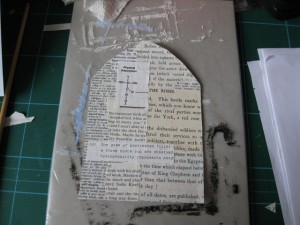
mixed media art arch

Brads or eyelets are fun to use but we don’t need lots of colours; stick to basic black or gold. Then if you need to change colours, you can paint them, change colour with alcohol inks or metallic leafing pens. By using these in your work as well, it ensures the colours will match. It is amazing how many shades of gold there are and you will be forever trying to match odd ones if you have collected too many over the years.

By using paint to colour your embellishments as well as in your background, your colours will always match.

Using punches is also an economical way of creating embellishments. After the initial outlay of the punch, you can use papers to match your background or paint with the same colours. Circle punches are my favourite!

mixed media art greeting card

I hope you have enjoyed our mini-series on our favoutire mixed-media materials.

Happy Creating!

.

~*~*~*~*~*~*~*~*~*~*~*~*~*~*~*~*~*~*~*~*~*~*~*~*~*~*~*~*~*~

Here are other materials that I like:

My Favourite Materials – Part 1 Cardboard

My Favourite Materials – Part 2 Text Ephemera

My Favourite Materials – Part 3 Painting Tools

My Favourite Mixed-Media Materials – Part 4 Plastic Sheeting
Some further reading…

.
My Favourite Mixed-Media Materials – Part 4 Plastic Sheeting

It’s no secret that at Mixed Media Arts we support everyone who has an inner need to create. We want to use materials that we have at hand, around the home as much as possible, or are fairly cheap and easy to buy, as compared to corporate lines of specialty papers and embellishments where you need to buy something from the entire range as the colours don’t match with anything else. It can be very frustrating.

This article highlights some further uses of the humble cereal box.

Part 4 – Plastic Sheeting

Cereal boxes were mentioned in an earlier article to use as a source of cardboard. It also provides us with the inner bag or lining, that can be carefully opened along the seams to create a fantastic protective sheet that can be laid out on your table to protect the surface when painting. Or it can be cut into smaller pieces to use as layering between pieces to stop the glue from transferring when weighed down to flatten out, if they have buckled when gluing.

Mixed Media Art

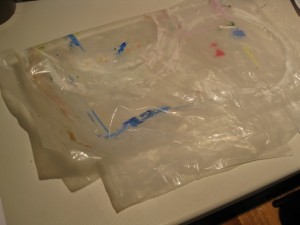
Here you can see a few I have already used. I have a store of them on stand-by that I have collected as the cereal is finished. I open the bag carefully along the seams and rinse them under the kitchen tap and allow them to dry. Then I fold them into a manageable size and store them under my craft table.

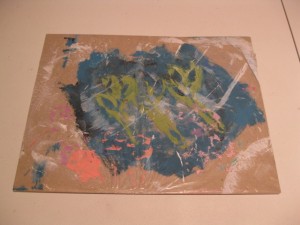
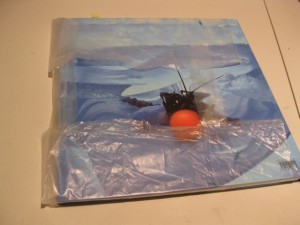
Another use for this plastic is to create smaller board covered with cereal box lining. This can be used if you have inked up a smaller piece, or have glued a few pieces that you want to set aside to dry. The plastic won’t stick to your work and it is easy to move out of your way, from your main work area. Use a few while juggling your work space.

Mixed Media Art

Note: don’t apply heat to this plastic without good ventilation. If you need to use a heat gun to speed up the drying process, remove it from the backing board first.

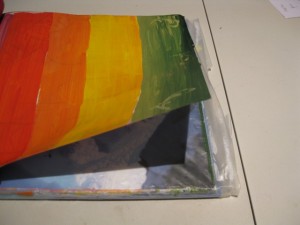
Any plastic sheet can be used in the same way – I like to reuse the cereal box lining instead of throwing it away. It also comes in useful with altered books. A sheet can easily be wrapped around the other pages of the book so that paint doesn’t transferred to a layout already complete or yet to be started.

Mixed Media ArtMixed Media Art

As you can see, creating Mixed Media Art allows us to see everything in a new light and always wondering what else we can do with the things around us.

Happy Creating!

.

~*~*~*~*~*~*~*~*~*~*~*~*~*~*~*~*~*~*~*~*~*~*~*~*~*~*~*~*~*~

Here are other materials that I like:

My Favourite Materials – Part 1 Cardboard

My Favourite Materials – Part 2 Text Ephemera

My Favourite Materials – Part 3 Painting Tools

My Favourite Materials – Part 5 Embellishments
See what others have done with their recycling and art…

.

.

.

My Favourite Materials – Part 3 Painting Tools

It’s no secret that at Mixed Media Arts we support everyone who has an inner need to create. We want to use materials that we have at hand, around the home as much as possible, or are fairly cheap and easy to buy, as compared to corporate lines of specialty papers and embellishments where you need to buy something from the entire range as the colours don’t match with anything else. It can be very frustrating.

This post will focus on the tools I have around my desk when painting and creating backgrounds.

Part 3 – Painting Tools

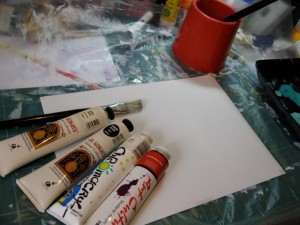
Adding colour using cheap paints is a great way to add colour and mood to your mixed media piece. But I don’t use expensive tools; cheap paint brushes will be fine as you are starting out. Rinse them well before using them, to get any stiffness out of the bristles and then dry them on an old cloth (that can become your painting cloth) to remove any loose brush hairs.

mixed media art painting can use a variety of tools

A paint water pot can be a plastic container or reused jar; it needs to be solid, so that won’t tip over too easily when paint brushes are in them. Also don’t over fill them with water – it is better to change the water over frequently. Make sure you have a cloth on hand for water spillage (take care not to have your water pot and cup of coffee too close together in case you try to put your paint brush into your coffee!)

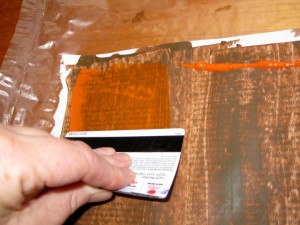
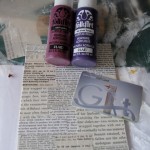
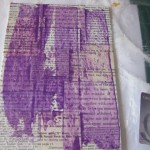
Another tool I use for adding paint layers is old credit card or store cards, use for paint scraping.

mixed media paint scraping

This technique was used in creating many of the backgrounds I have posted across the site, including the small canvas from the ephemera kit.

small mixed media art canvasmixed media art canvas

And if I need a paint pallet, which I don’t use very often, I re-use a polystyrene meat or vegetable tray. These can be reused further, as long as you take the time to wash them out after you have finished with them.  More often that not, I won’t use a paint pallet; I will mix the paints or add water directly onto the artwork or canvas, but this method isn’t for the faint hearted, only the lazy!

I hope this encourages you to have look further around your art area and see what else you have lying around that you can use.

Happy creating!

Here are other materials that I like:

My Favourite Materials – Part 1 Cardboard

My Favourite Materials – Part 2 Text Ephemera

My Favourite Mixed-Media Materials – Part 4 Plastic Sheeting

My Favourite Materials – Part 5 Embellishments

.

.

.

My Favourite Materials – Part 2 Text Ephemera

It’s no secret that at MMA we support everyone that has an inner need to create, using materials that we have at hand, around the home as much as possible, or are fairly cheap and easy to buy, as compared to corporate lines of specialty papers and embellishments where you need to buy something from the entire range as the colours don’t match with anything else. It is very frustrating.

This short series of articles will highlight some of my favourite materials.

Part 2 – Text Ephemera

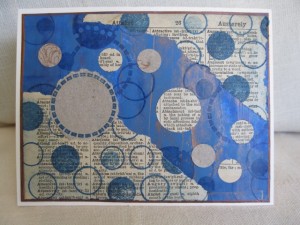
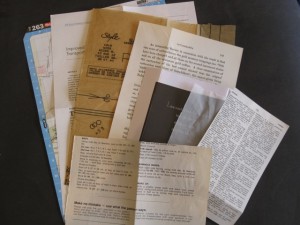
My favourite method of creating visually textured backgrounds is to use various text pages that come from old books, magazines, conference proceedings, knitting patterns, dressmaking patterns. While this doesn’t seem like likely mixed media arts material, once you start really looking at them, you will see a huge variety of different paper textures, fonts, type sizes.

mixed media art

Together they do create a form of art in themselves. All of these put together make a great background, as your eyes search out meaning in the words and letters. You may even find sketches or diagrams in these materials that also add to the background layering. Start with cheap materials and never use a book of value.

mixed media art ephemera

Using old books creates many many pages. The covers can then be used as substrates for future projects, or even as covers for altered books.

Also use as papermache to hold the box or shrine together, providing strength and interest at the same time. Also use the words to add meaning, inference and a story to our mixed media work.

mixed media gift box

I hope this has given you some ideas.

Happy Creating!

Here are other materials that I like:

My Favourite Materials – Part 1 Cardboard

My Favourite Materials – Part 3 Painting Tools

My Favourite Mixed-Media Materials – Part 4 Plastic Sheeting

My Favourite Materials – Part 5 Embellishments

.

.

.