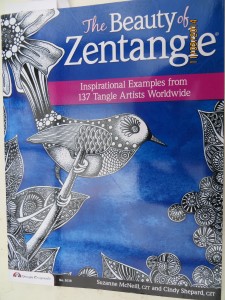
The Beauty of Zentangles

~ * ~

This Book Review was written by Anne Maslin

“The Beauty of Zentangle” is published by Design Originals.

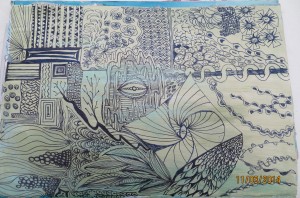
Oh what freedom! Oh what joy! Just doodle with a pen. No rules, no focal point, no reason or meaning. Just do it. Make mistakes, no one will know. Copy the patterns given in the book or develop your own using the given ideas. Put the Zen into Zentangles, it’s an experience that is liberating, relaxing and therapeutic. ‘The Beauty of Zentangles’ shows you how.

Book review of the Beauty of Zentangles

Take this book on any level you want. Inspiration, instruction, a jumping-off board. Overcome those blank page blues, just doodle. The two authors of  ‘The Beauty of Zentangles’, Suzanne Mc Neill and Cindy Shepard provide a comprehensive overview of possibilities. Suzanne has applied her extensive experience in art and design to taking the commonplace doodle to an art form in its own right. She has received a ‘Designer of the Year award and CHA gave her a ‘Lifetime Achievement Award’, not earned lightly. Cindy loves experimenting with mixed media, showing that Zentangles can be applied to any surface – ceramics, wood, quilting, birdhouses, even boots.  She has developed her own rubber stamps using her zentangle designs. Both authors are CZT (Certified Zentangle Teachers) but anyone can do a zentangle, especially after reading their book.

Book review of the Beauty of Zentangles

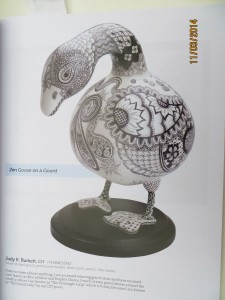
Decorate anything. The book gives some gorgeous examples of applying zentangle designs to any surface. The authors use and acknowledge the work of many artists and include illustrations, some in colour, to showcase how zentangles can be incorporated into the design on paper and 3D objects.  The illustrations are accompanied by a little note from the artist, explaining their picture. The ‘Goose on a Gourd’ by Judy Burkett is attention-grabbing and would take its place in any art gallery.

Book review of the Beauty of Zentangles

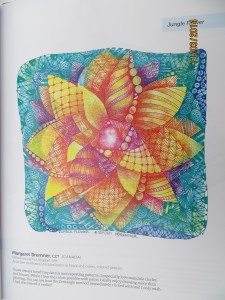
Colour it.  The zentangle lends itself to the simplicity and the elegant impact  of black and white.  But some love to colour a space; the zentangle is so inviting  and takes the doodle to another level. Any medium: pens, paints, crayons, markers can be used. The authors selected the work of many artists who coloured their zentangles. For example the ‘Jungle Flower’ by Canadian artist Margaret Bremner. Margaret describes how she loved to draw but not paint. The zentangle style allowed her to add colour and she wished she had discovered it earlier.

Need instructions? The authors have included the specific designs of some artists, who demonstrate how they developed the design. Some of these instructions are easy to follow, some need a bit of working out. But hey, by making mistakes, new tangles emerge. So never run out of ideas again!

Book review of the Beauty of Zentangles

I have not read this book from front cover to back. I concentrated on a few pages and studied them closely.  But that leaves more delights to come. It was a lot of fun tracking the development of designs. This book is very comprehensive and is highly recommended as a resource, especially when faced with a daunting blank page.

You can read more about Zentangles on their website: Zentangle Blog

~*~*~*~*~*~*~*~*~*~*~*~*~*~*~*~*~*~*~*~*~*~*~*~*~

Anne Maslin lives in Melbourne Australia

~*~*~*~*~*~*~*~*~*~*~*~*~*~*~*~*~*~*~*~*~*~*~*~*~

.

.
“Flavor for Mixed Media” by Mary Beth Shaw

~ * ~ 

This article was written by Michelle G. Brown

Mary Beth Shaw has put together “Flavor for Mixed Media – a feast of techniques for texture, colour and layers” with the mixed media artist who loves to get stuck in and set her hands dirty in mind. Published by North Light Books in 2011, Mary Beth brings her talents and those of 15 of her artist friends together for this feast of mixed media projects.

Mary Beth Shaw Stencil Girl

The key theme of Mary Beth’s book is to combine the skill and flavours of cooking with those of art, highlighting that “Art and food: Two of life’s most sensory pleasures and certainly two of my favourite things”. As I am NOT a particularly skilful cook, I did find the two themes clashed a little awkwardly at first but as I continued to feast on the wonderful colors and layers in Mary Beth’s projects I began to understand how the two themes could be used side by side.

The chapters run us through Preparation and making sure our artistic “pantry” is properly stocked. Then we run through Color, Texture, Layers, Flavors and Combinations. Each chapter includes three guest artists and three projects, so not only do we hear form 15 very different mixed media artists, we also have 15 projects to sink our teeth into. Mary Beth also offers alternatives to consider when one of the key “ingredients” is missing. Many of the guest artists also provide real recipes which adds a real element of tying the cookbook and art book together.

Flavor for Mixed Media Mary Beth Shaw North Light Books

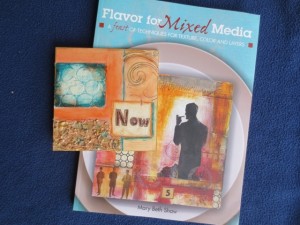
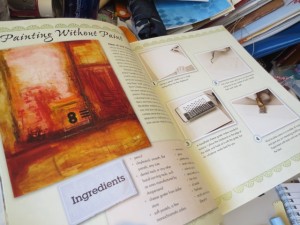
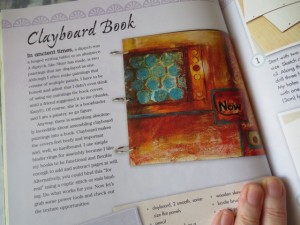
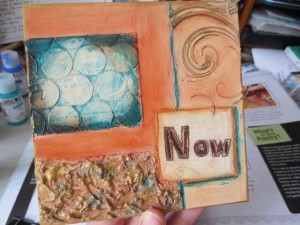
My attention was captivated by two projects; the “Painting without Paint” piece (p.16) and the “Clayboard book” (p.38). I loved the colors used and the texture and depth of layers in the final pieces. As I had actually bought some clayboard on a recent trip to the US, I was eager for a project that guided me through how to get the best out of the product and not just use it as another variation of canvas.

Flavor for Mixed Media Mary Beth Shaw North Light Books

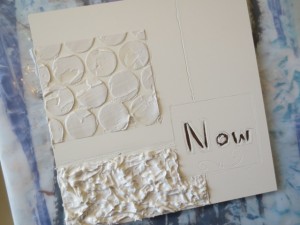
Claybord(™) is made by Ampersand and has a wood backing with a “Ultra-smooth clay surface” across the top. Mary Beth had us start by sketching out a rough layout and then scratching into the clay surface to add the first layer of texture. Mary Beth put her Dremel to good use here; I used an awl and stamp carving tools (probably not the proper way to use them!) to make my marks. Then I used Impasto medium with sequence scrap to add the circles. I used post-it notes to mask the areas around where I wanted the texture added. Mary Beth used Glass Bead Gel to add more texture – I added some seed beads into the Impasto medium – not quite the same effect but in the spirit of “making do” I ploughed on! I left the piece to sit over night so the Impasto medium could dry completely.

Flavor for Mixed Media Mary Beth Shaw North Light Books

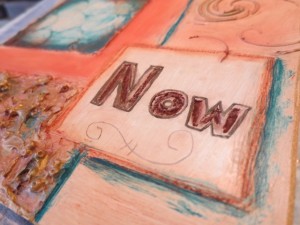
Next I combined the “Painting without Paints” technique with the Clayboard project colours by using artist pastels and chalks. I really had no idea how these soft mediums would go onto the clapboard but I was very brave and kept going! It was BLISS! The chalks went on SO smoothly and they were easy to blend and add depth and shading. It was easy to remove some of the colour as well. Some of the lines weren’t as fine as I would have liked as the pastels were thick, but I liked the end result. I used the Golden paint teal to add the color that goes so well with the earthy browns.

Flavor for Mixed Media Mary Beth Shaw North Light Books

I highlighted the “Now” letters with a brown marker and added highlights with gold acrylic paint on a dry brush. Once the paint was dry I coated the whole piece with spray glass varnish. When this was dry the pastels and chalk were sealed and now won’t rub off.

Flavor for Mixed Media Mary Beth Shaw North Light Books

I was very pleased with the results.

Overall Verdict

Overall such a fun book, especially for those ready to advance your mixed media skills or those fearless artists who are quite willing to jump straight into the deep end of the mixed media techniques pool. The combination of 15 artists and 15 projects certainly provides a wide range of different styles.

~*~*~*~*~*~*~*~*~*~*~*~*~*~*~*~*~*~*~*~*~*~*~*~*~

Michelle G. Brown is passionate about mixed media art and enjoys sharing her knowledge and techniques with you to allow you to express your own creativity. Michelle understands that many of us have an inner need to create. By learning a few basic techniques the amazing world of mixed media art is accessible to everyone!

Michelle lives with her husband and two boys in Melbourne, Australia.

~*~*~*~*~*~*~*~*~*~*~*~*~*~*~*~*~*~*~*~*~*~*~*~*~


~*~*~*~*~*~*~*~*~*~*~*~*~*~*~*~*~*~*~*~*~*~*~*~*~

Disclosure: This book was bought with our own money.  All opinions are that of the MixedMediaArt team. Some links on this page may be affiliate links and any purchases help to support the ongoing work by MixedMediaArt.
.

.
All-Purpose Inks by Tsukineko

~ * ~

Imagine Crafts distribute craft products across the USA and when I was approach to review some of their products, I was very excited.

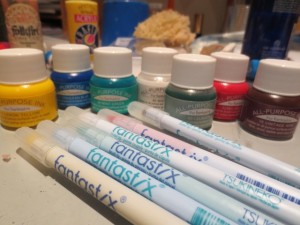
Artist inks and ready to use applicators

At first, I did not know what to make of these 7 little ink bottles – what was I going to DO with them? I had seen Donna Downey use inks in her art journal layouts, so that was a starting point, but when I realised that the Fantastix, which I also had a packet of, were made to go with the inks (says so on the bottle – note to self: always read the labels!!) a bunch of ideas jumpers out at me!

These All-purpose inks actually come in a range of colors, which you can see over on the Tsukineko website

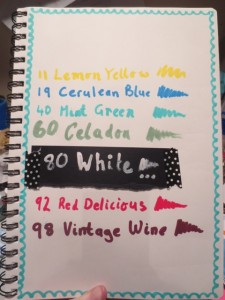
First things first, I needed to test the colors, so out came my handy art journal

Watercolored paper is a great surface for Tsukineko All-purpose Inks and Fantastix applicators

The inks are quick drying on the art journal pages and didn’t run.  The white ink is opaque on the place paper when applied thickly.

The Fantastix applicators are perfect for using with the inks; it almost turns them into pens and allows me to control the application of the inks easily.

“Life” Art Journal Layout

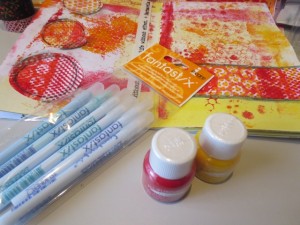
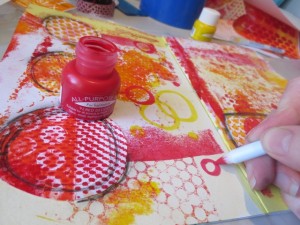
The art journal spread already had a bright background of reds and yellows, so it was a good fit for those colours

Add colour with All-Purpose inks to mixed media art journals

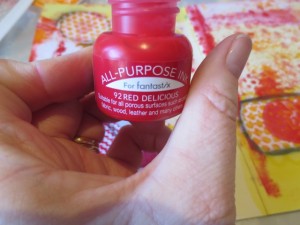
I used the 92 Red Delicious ink to draw circles straight onto the water coloured paper

Add colour with All-Purpose inks to mixed media art journals

Add colour with All-Purpose inks to mixed media art journals

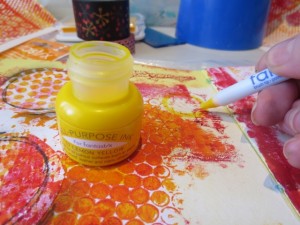
I used the 11 Lemon Yellow to add more circles

Add colour with All-Purpose inks to mixed media art journals

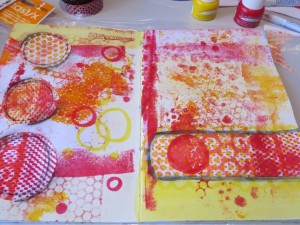
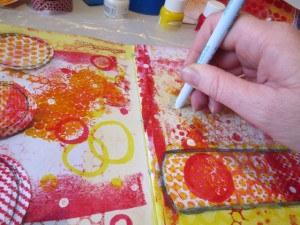
Looking good so far – the circles on the left hand side and the bar across the right were torn from Gelli printed papers and then highlighted with charcoal pencil

Add colour with All-Purpose inks to mixed media art journals

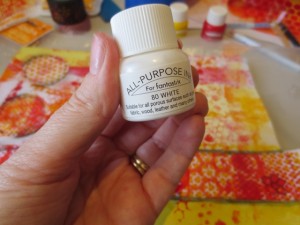
Then I added some 80 White ink

Add colour with All-Purpose inks to mixed media art journals

I was trying to go for the Donna Downey ink spatter here but the Fantastix isn’t the tool for that, so I added some random white dots. Some of the ink dots were thick and needed to be left overnight to dry completely.

Add colour with All-Purpose inks to mixed media art journals

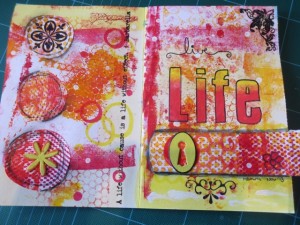
I finished the page with rub-ons, painted chipboard keyhole and flowers and lettering. The “live” text was written in with charcoal pencil. The “life” lettering was done with the technique shown in the “Create” art journal layout instructions

Add colour with All-Purpose inks to mixed media art journals

~ * ~ * ~ * ~ * ~ * ~ * ~ * ~ * ~ * ~ * ~ * ~ * ~

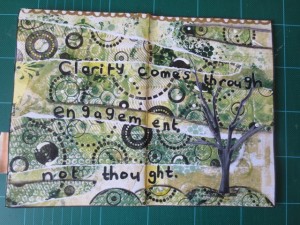
“Engagement” Art Journal Layout

This art journal page also began with some acrylic paints added into a water-colour paper art journal.

Use All-Purpose inks to add highlights and writing to mixed media art journals

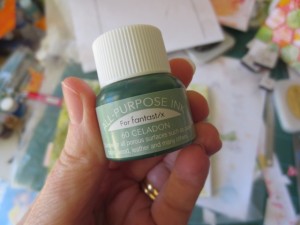
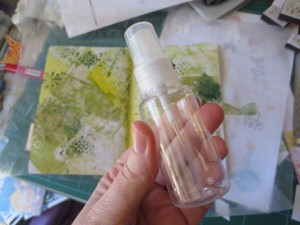
Here I decided to use the 60 Celadon, a dark green and wanted to apply it with a spray bottle

Use All-Purpose inks to add highlights and writing to mixed media art journals

Use All-Purpose inks to add highlights and writing to mixed media art journals

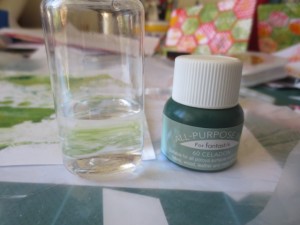
So I filled the spray bottle with some water

Use All-Purpose inks to add highlights and writing to mixed media art journals

and added some green ink.

Use All-Purpose inks to add highlights and writing to mixed media art journals

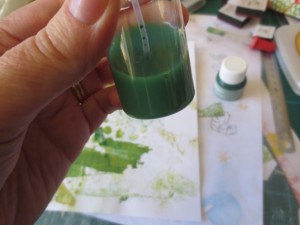
This was WAY too watery – You don’t need to dilute think ink when using it with a spray bottle *learning an important lesson* so I tipped the diluted solution out and just added the green ink. I sprayed the ink over sequence scrap, of varying sizes

Use All-Purpose inks to add highlights and writing to mixed media art journals

I also removed the pump from the spray bottle and dripping bits off the end of the tube.

Use All-Purpose inks to add highlights and writing to mixed media art journals

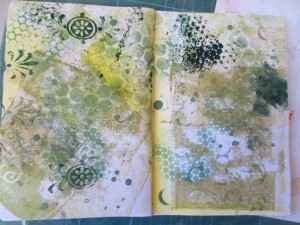
I finished off this art journal layout with matching gelli print paper and wrote the quote (from Marie Forleo) with a paint marker.

Use All-Purpose inks to add highlights and writing to mixed media art journals

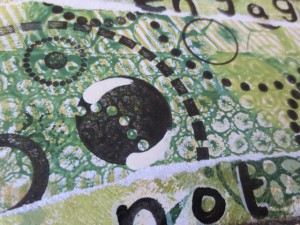
I used the white and yellow inks to highlight some of the stamped shapes

Use All-Purpose inks to add highlights and writing to mixed media art journals

Use All-Purpose inks to add highlights and writing to mixed media art journals

~ * ~ * ~ * ~ * ~ * ~ * ~ * ~ * ~ * ~ * ~ * ~ * ~

Gelli Prints and Ink Stencilling

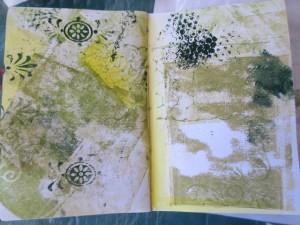
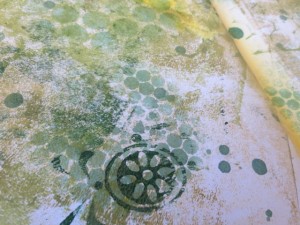
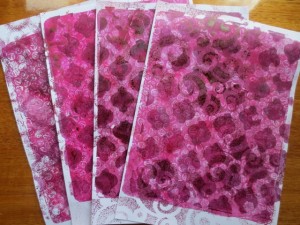
To add a third layer to these gelli plate prints, I added the 98 Vintage Wine ink into another spray bottle (undiluted) and used my Cosmic Swirl stencil, by The Crafters Workshop, to add to create a pattern with the ink.

Ann’s Arts and Crafts

I really liked how these pages came out!

What I liked about the products:

Especially when used with the Fantastix these inks re a great way to add another element of colour and design to our mixed media artwork. The fantastic come with individual lids and while they have dried to from their initial ink application, they are still pliable and more ink can easily be re-applied for subsequent use.

What I didn’t like about the products:

Initially I thought the colour pallette was limited but have found our since that these All-Purpose inks are available in many other colours

For more information:
..

~ * ~ * ~ * ~ * ~ * ~ * ~ * ~ * ~ * ~ * ~ * ~ * ~

Disclosure: These products have been provided by ImagineCrafts for the purpose of review. All opinions are that of the MixedMediaArt team. The links on this page are affiliate links and any purchases help to support the ongoing work by MixedMediaArt.

.
.
Monoprinting with Gelli Arts Gelli Plates

Monoprinting has been around in many forms for a long time. One alternative was to make your own printing plate using gelatine but this was a messy and time consuming activity, so the clever girls over at GelliArts have created a non-perishable alternative to gelatine plates – the Gelli Plate.
Michelle shares her gelli plate printing process

The Gelli plates are made from a polymer that provides the same feel as a gelatine plate but is non toxic and will last for many prints. They are available in three sizes: 6″x6″ , 8″x10″ and 12″ x 14″. Today we will be using the 8″x10″ one, which works well with A4 sheets of paper.

Setting up

Gather together all of your materials and tools and make sure you have plenty of space.

I have a large sheet of glass (with rounded, smooth edges) that I have sat over the protective cloth on our dining room table (hence the pretty maroon and fruit prints table cloth!) I also like to lay out a few cereal box plastic sheets on the floor so I can sit all of my prints out flat to dry.

You will also need:

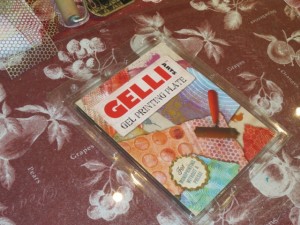
1. A Gelli plate

Michelle shares her gelli plate printing process


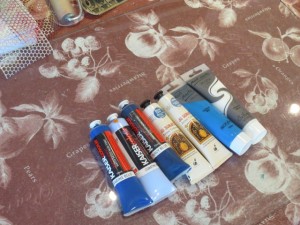
2. Acrylic paints

Michelle shares her gelli plate printing process with these materials

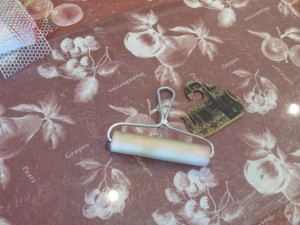
3. A brayer and other mark making tools (this is a surfboard wax comb)

Michelle shares her gelli plate printing process with these materials

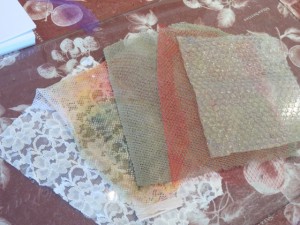
4. Netting, lace, bubble wrap and cloth for making marks

Michelle shares her gelli plate printing process with these materials

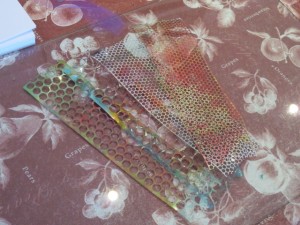
5. Sequence scrap

Michelle shares her gelli plate printing process with these materials

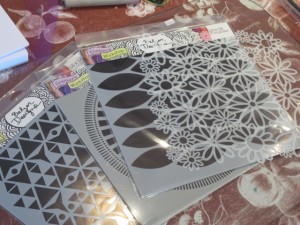
6. Stencils

Michelle shares her gelli plate printing process with these materials


Monoprinting Gelli Plates Style

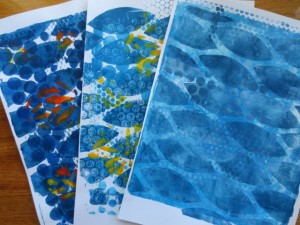
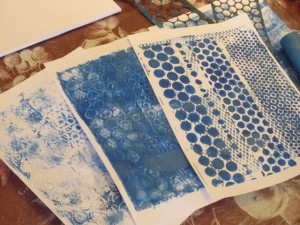
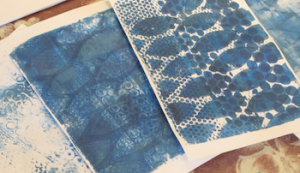
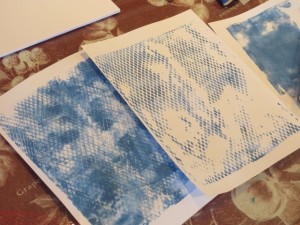
Here you can watch Michelle run through the process she used for creating this series of blue mono prints


Layer 1 – light blues with orange bag netting

Michelle shares her gelli plate printing process with these materials

Layer 2 – medium blues with sequence scrap

Michelle shares her gelli plate printing process with these materials

Layer 3 – darker blues with Crafter Workshop Blazonry 12″x12″ stencil

Michelle shares her gelli plate printing process with these materials


Add a Little Contrast

I decided to add a little contrast to my blue mono prints by adding a little yellow and orange, with the Crafter Workshop Flower Frenzy 12″x12″ stencil

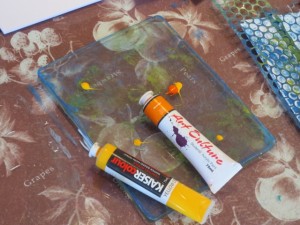
Added a little paint

Michelle shares her gelli plate printing process with these finishing touches

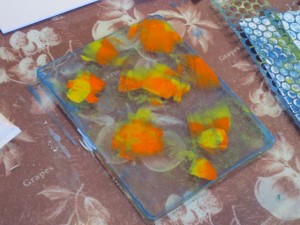
Rolled it out, not covering the whole Gelli plate

Michelle shares her gelli plate printing process with these finishing touches

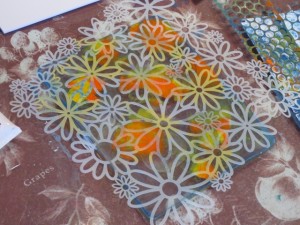
Sat the flower stencil on top

Michelle shares her gelli plate printing process with these finishing touches

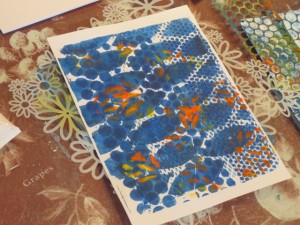
Added the darker mono print, adding highlights in yellow and orange

Michelle shares her gelli plate printing process with these finishing touches

~*~*~*~*~*~*~*~*~*~*~*~*~*~*~*~*~*~*~*~*~*~*~*~*~

I am having SO much fun with my Gelli plate. I also LOVE looking on the internet to see what others have created – please share your Gelli plates print successes: link to your blog in the comments below!

To read more about some of the things you can actually DO with all of these Gelli prints, Michelle has put together these five projects – What to do with Your Gelli Plates Prints

Happy creating!

art journal gelli plates prints

.

.