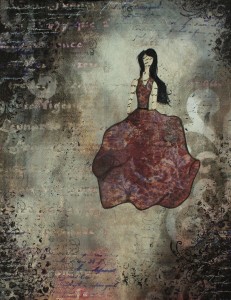
Review of Janelle Nichol’s online mixed media class “Fashionista”

~ * ~

This article was written by Anjuli Johnson

Mixed Media class, Fashionista

I wanted to give myself a big break before writing this review, because I find when I allow myself time, I hold on to the main parts I took away from the class, and forget the rest.  What did I really learn from Janelle Nichol?  Was it more than just a fun class? Is it something that I’ll continue to draw on as I keep creating?  Giving myself a month to write this has made me understand that yes, it was more than a fun class.  Her techniques and instruction have influenced my work and made me a better artist.  I go back to what I learned often and am so grateful I took this course.

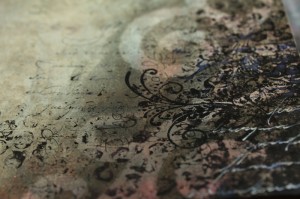
mixed media art background with flourish stamping and calligraphy from mixed media class.

The main thing I took away from the Fashionista class was how she pushed us to keep going, keep working and see what happens, especially when working abstractly and with backgrounds.  I tend to add two layers at most, because I get so attached to the elements I’ve added and I want them all to show on my pieces.  I came into this workshop with the same attitude.  I began by saying “Ok, this is more than I usually do, but I have to follow the directions…” which progressed to “Dang, this is a lot and I’m kind of tired of working on this background.  Can’t we just stop now?”  to finally saying “Wow, I can’t believe how awesome this looks… I need to do this more often!”  I found that when I followed Janelle’s instructions to keep working, my backgrounds took on a depth that they’ve never had before, and that experience has carried over into the work I’ve done since, including some commissioned pieces.

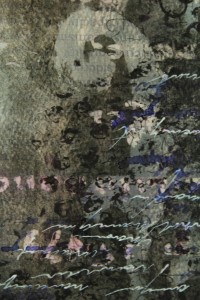
mixed media class review, using layers of paint, stamping, text, calligraphy, and stencils.

I loved this workshop because it was detailed, encouraging, and Janelle was very knowledgeable; but I especially loved how it pushed me to do things I was uncomfortable with.  It’s a long class, but Janelle has split it up into several parts, so it’s easy to take breaks and come back if you need to.  She gives a full list of supplies and carefully explains what she’s doing and using, which makes it easy to follow exactly, or substitute other supplies in if you don’t have something or want to use something else.

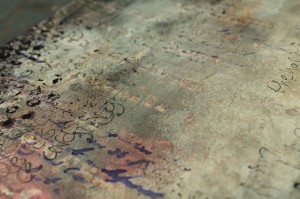
hand written calligraphy as an added layer in the mixed media grunge background for Janelle Nichol’s mixed media class, “Fashionista”.

I would definitely recommend Janelle’s classes.  She’s an artist that I am proud to have learned from.

You can find Janelle’s Fashionista Class here on SkillShare

~*~*~*~*~*~*~*~*~*~*~*~*~*~*~*~*~*~*~*~*~*~*~*~*~

Anjuli Johnson is a Mixed Media Artist from Raleigh, NC.  She began her art career as a scrapbooker, and it’s been an evolutionary process every since.  She loves all things mixed media- paper, glue, paint, canvas, pens, wire, gears… the list goes on and on.  She is constantly trying to push through her fears to discover and develop her talents, meet new people, and learn from and inspire those around her. Facebook.com/TheFarPavilion

~*~*~*~*~*~*~*~*~*~*~*~*~*~*~*~*~*~*~*~*~*~*~*~*~

Disclosure: Access to this course was supplied by Janelle Nichols for the purpose of review. All opinions are that of the MixedMediaArt team. Some links on this page may be affiliate links and any purchases help to support the ongoing work by MixedMediaArt.
.

.
How to make a Small Gift Bag

This article is written by Sandra Parés 

Today I am going to show you an easy way to make a small gift bag, an ideal bag to cover a gift for someone special on the Christmas day.

Small Gift Bag

Here are the materials:

  1. 1 recycled tetra brik that we will have cleaned before
  2. Scissors
  3. Black gesso
  4. Sponge
  5. Acrylic paint: Acrylic Glaze Silks, in my case I will use the violet colour of Irresistible Iridescence
  6. 1 Brush
  7. An adhesive tape, like washi tape or colored tape. I will use a white adhesive tape
  8. A regular white acrylic paint
  9. 1 template
  10. Crop-a-dile or some tool to make holes.
  11. Ribbon to make the handles.

Small Gift Bag

Step 1 – We start cutting the tetra brik. We cut the tetra brik in a half and we get a small bag. We can make it larger or smaller according our personal idea.

Step 2 – Then, with a sponge, we will cover the whole outer surface of the tetra brik with black gesso. If you want, you can also cover it with white gesso, depends on the type of paint you will use after and the result you want to obtain. In my case, as I will use the Silks Acrylic Glaze Irresistible Iridescence to colour the bag, I prefer the black gesso. The Irresistible Iridescence paint works good on dark backgrounds and gives a beautiful bright.

Step 3 – Once gesso is dry, we can paint the whole surface of gesso with the acrylic paint. The colour I choose is a metallic violet with a very nice metallic shine.

Step 4 – When the paint is dry, we can polish the edges of the tetra brik with the adhesive tape.

Small Gift Bag

Steps 5 & 6 – Then we take a template to add a picture on the bag. In this step we will stencil the template with a sponge onto one side or both. If we stencil onto both sides, we have to wait to have the first side dry before to stencil onto the other side.

Step 7 – And we only need to make some holes with the crop-a-dile to get a place where we can put a ribbon to make the handles

Step 8 – add ribbon to make handles

With this simple way we will have a beautiful small bag for a gift for this Christmas!

Small Gift Bag

~*~*~*~*~*~*~*~*~*~*~*~*~*~*~*~*~*~*~*~*~*~*~*~*~

Sandra Parés loves working with mixed media. The colors and textures leave her amazed and she enjoys creating and getting their hands dirty with paint and gesso. She lives near Barcelona and works in her art workshop. On her site My mixed media you can find a mixed media online store, art and craft products, mixed media workshops in Spanish, tutorials, ideas and mixed media techniques.

~*~*~*~*~*~*~*~*~*~*~*~*~*~*~*~*~*~*~*~*~*~*~*~*~

.

.

ATC Holder

~ * ~

This article is written by Anjuli Johnson

My youngest sister begins high school next year.  Part of her curriculum as a member of our church will be what’s called early morning seminary.  It’s a religious class where high schoolers study the scriptures for about an hour before school.  Intense, I know, but it’s actually pretty fun, too.  One thing they’ll be doing is memorizing 25 specially chosen scriptures throughout the year.  It’s called scripture mastery, and all the students are encouraged to reach this goal.  As I was thinking about my last sister joining the ranks of early morning seminary students, I thought I’d mark this milestone by making her something extra special to help her with her scripture mastery.  An ATC card holder, with 25 separate slots for 25 scripture cards seemed the perfect idea.

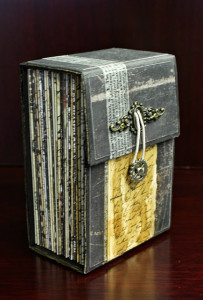
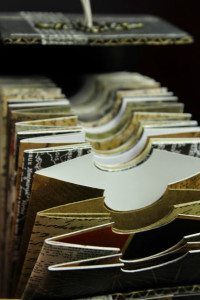
ATC Holder made with Prima’s Archivist paper line.

I have been working on the cards gradually and have a few completed, but I knew the holder would be the most important part.  If I’m successful and she ends up really liking it, she might carry it with her to seminary on a daily basis, so I knew it couldn’t be too fancy.  It had to be sturdy and easy to work with, and hold the cards well so nothing would fall out or get lost.  I found this tutorial on pinterest, and after tweaking the size and measurements, I made the perfect size holder for 25 cards.

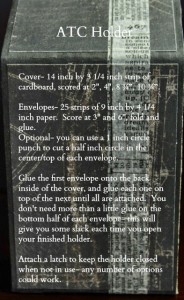
I began by making the individual envelopes.  I knew I’d be using thick paper (prima’s archivist line of patterned paper- love it!!) and that I’d have more envelopes than the tutorial called for, so I wanted to see how thick the envelopes together would be so I would make the cover the right depth to fit them all.  Using my paper trimmer, I cut strips of paper 9” by 4 ½”  and scored them at 3” and 6”. Folded and glued each envelope was 3” by 4 ½”.  I did this 25 times.  I also used a circle punch to put a half circle cut into the top of each envelope.

Each envelope will hold one ATC card or tag.

My cover is also a bit different than the original tutorial.  She says you can use cereal box cardboard- I knew that wasn’t going to be thick enough if I wanted my sister to be able to use this every day, so I decided to use thick box cardboard.  I needed my cover to be able to hold more than the original, too- after seeing all my envelopes together, I knew I needed the cover to be 2 inches thick to comfortably fit them all.  My modified cover measurements ended up being 14” long and 3 ¼” wide, with scored lines at 2”, 4” 8 ¾”, 10 ¾”.  This is the point to decorate the cover, before anything goes into it.  I painted the cardboard black and added some paper and tissue tape for a cool but clean and simple look.

Next, add in the envelopes.  I glued them in one at a time, starting at the back of the cover and then one on top of the other.  When you open the holder the envelopes fan out like an accordion, so I only glued the bottom half of each envelope, to make sure there was some slack when the holder is open.

The latch for the cover was the trickiest part- I didn’t want the long string wrapped around a button like in the original tutorial, so I used some metal findings to create a knob for a loop of elastic to fit around.  A bit of metal glue later, and it’s a great closure that will keep all my cards snug and secure.

So there you have it!  A perfect little hide away for any special ATC’s you have or want to make- flashcards, memory cards, picture cards, tags- the possibilities are endless.  And I would love to hear all your ideas!!  Please share in the comments what kind of cards you would stock your ATC holder with.

Measurements and components of this ATC Holder

~*~*~*~*~*~*~*~*~*~*~*~*~*~*~*~*~*~*~*~*~*~*~*~*~

Author bio: Anjuli Johnson is a Mixed Media Artist from Raleigh, NC.  She began her art career as a scrapbooker, and it’s been an evolutionary process ever since.  She loves all things mixed media- paper, paint, pens, wire, gears, clay… the list goes on and on.  She is constantly trying to push through her fears to discover and develop her talents, meet new people, and learn from those around her.  To see more of Anjuli’s art and techniques, check out her website at www.thefarpavilion.com  and like her Facebook page TheFarPavilion   Follow her on Instagram and Twitter as well.

~*~*~*~*~*~*~*~*~*~*~*~*~*~*~*~*~*~*~*~*~*~*~*~*~

.

.

Create your own Hide-away Doll House Play Set

~ * ~

This article is written by Gloriann Irizarry

From a gift box to a one of a kind hide away doll house in a few easy steps.

Gloriann Irizarry creates a hide away doll house

This article will help you unlock hours and hours of play time for any toy enthusiastic ages 0 to over 100. Step by step instructions will guide you through to the final steps of your own one of a kind hide away box doll house play set, with some simple materials

Materials for the Hide-away Doll House Play Set

Gloriann Irizarry creates a hide away doll house

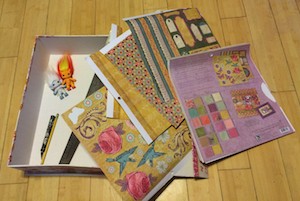
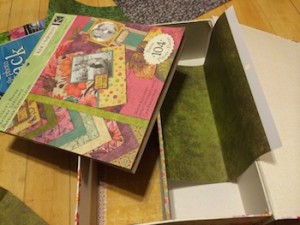
  • Decorative gift box in this project  17 ½ x 12 x 5 ½ by Abbigton Park ™
  • White foam board
  • K & Company Specialty 12 x 12 Specialty Scrapbook Paper
  • DCWV The photo Stack 2 for grass, stone, flowers and water
  • Xacto or hobby craft knife
  • Scissors
  • Pencil
  • Metal ruler
  • Hot glue gun
  • Mounting repositionable spray
  • Pick your favorite size toys like Funko My Little Ponies, MLP blind bags,  Littlest Petshops, Polly Pockets, Frozen mini dolls also Zelfs and Shopkins by Moose Toys.

Gloriann Irizarry creates a hide away doll house

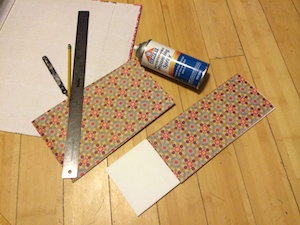
With the metal ruler measure the foam board to 5 inches to 16 ¼  with the pencil. Now with the your Xactor or hobby crafts knife and your metal ruler cut your foam board exactly at the 5 x16 ¼  pencil markings.

Do the same with your favorite scrapbook paper of choice . You will have to layer the papers since the flooring is a little longer than the paper stack. Choose your favorite glue to adhere the flooring. The glue used here was Mounting repositionable spray as it’s a lot easier to use than the permanent kind. If glued wrong repositionable adhesive can be adjusted.

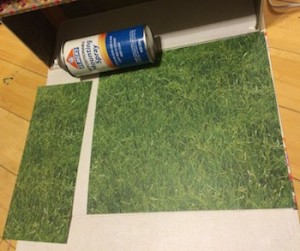
Spray the glue by holding the can  6 inches away from the  flooring paper  and wait a little tfor the glue to get a little tacky and secure it to the foam board.

Gloriann Irizarry creates a hide away doll house

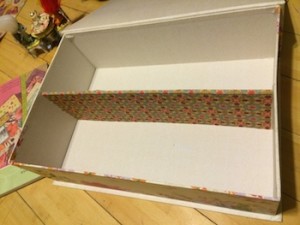
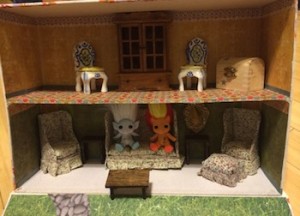
Measure and mark in half your gift box for the second floor for your doll house playset. Use the hot glue gun to adhere the paper covered foam board to the gift box. Make sure enough hot glue is used to secure it in place.

Gloriann Irizarry creates a hide away doll house

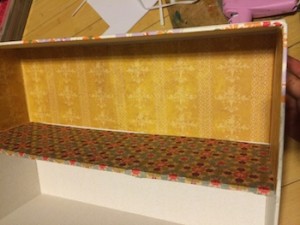
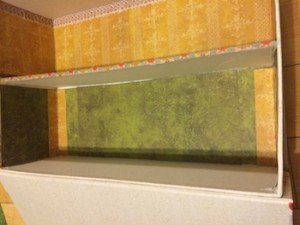
Now measure the upper half and choose your favorite specialty paper.  For this house 2 sheets of 12 x 12 papers were used and layered to create a seamless wallpaper effect. Once the paper is cut to size use the Mounting repositionable spray  and spray a even coat of glue. Let it get tacky and carefully place it inside the box and secure it. Rub to remove any air bubbles out.

Gloriann Irizarry creates a hide away doll house

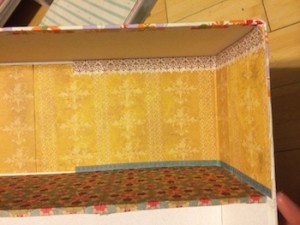
Now to finish the walls the Specialty Paper by K & Company stack comes with borders stickers that will work wonderful to finish the wallpaper on the top and the bottom of the walls. It is recommended to choose contrasting colors.

Gloriann Irizarry creates a hide away doll house

For the lower level floor you will follow the same steps as described above. You can choose the same color or a different color to give the doll house some character. That’s why a nice hunter green pattern was used.

Gloriann Irizarry creates a hide away doll house

If you want to make sure everything looks nice you can add corner strips to the lower lever in the same paper use on the top.  Now finish the wallpaper with some border stickers to cover any imperfections and creates a nice finish.

Gloriann Irizarry creates a hide away doll house

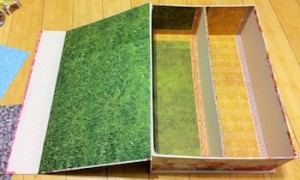
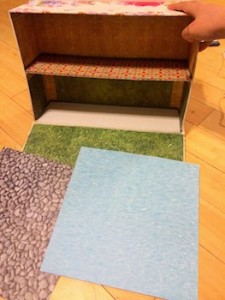
Now the opening of the gift box is going to be use has a garden. The Photo Stack 2 has nice natural patterns. 2 sheets of the grass were used to give the effect of an open outside garden.

Measure and cut to fit and use the Mounting repositionable spray to adhere to the top of the gift box.

Gloriann Irizarry creates a hide away doll house

Rub any air bubbles out and let it dry.

Gloriann Irizarry creates a hide away doll house

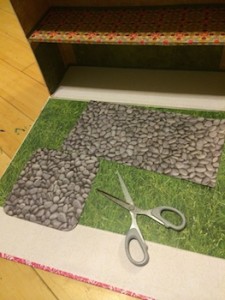
Now the garden is ready but it seem like it need it something. In the same Photo Stack 2 we can find another interesting patterns like this water and river rock .

Gloriann Irizarry creates a hide away doll house

Use the river rock pattern to create a garden path with a seating area.

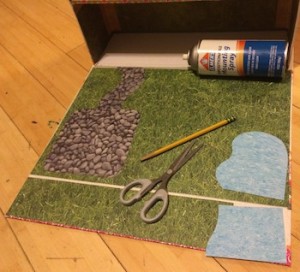
Cut with the scissors or hobby craft knife the shape you want them to look. Now spray an even coat of Mounting repositionable spray and place them on your garden.

Gloriann Irizarry creates a hide away doll house

Use the Photo Stack 2 water pattern to create a side pond. You can draw the shape on the back with the pencil and cut it off with the scissors or the hobby crafts Knife. Apply a nice layer of Mounting repositionable spray to the cut outs and secure them in place.

Gloriann Irizarry creates a hide away doll house

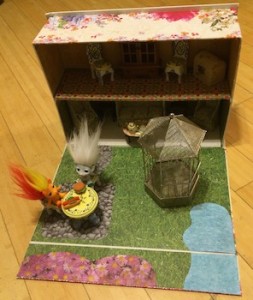
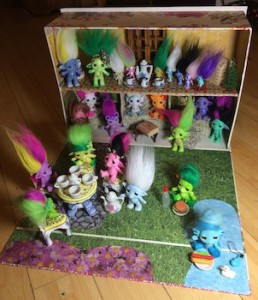
Now every garden needs to have some pretty flowers. Now the Photo Stack 2 we found a nice batch of them ready to be cut to shape and again secure it with the repositionable mounting spray.  Now that the flowers are in place the garden is ready for the Zelfs Angelala and Little D play date.

Gloriann Irizarry creates a hide away doll house

Add some doll furniture and your Gift Box Doll House Play Set is ready to be played with.

Gloriann Irizarry creates a hide away doll house

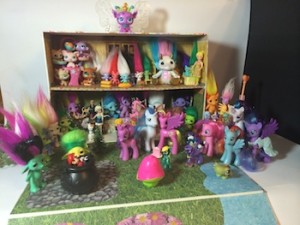
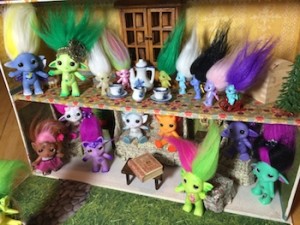
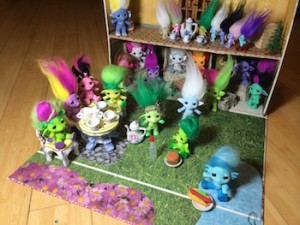
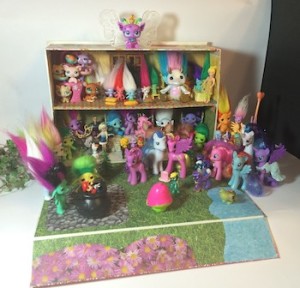
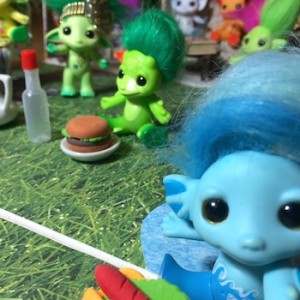
Invite a few of your good Zelfs friends like Tressa, Fluttershy, Elsa, Vampula, Frostette, Flamy and Snap Jack. Now lets start the tea party.

Gloriann Irizarry creates a hide away doll house

Gloriann Irizarry creates a hide away doll house

All the little Zelfs Troll having a blast in their new one of a kind Doll House Play Set.

Gloriann Irizarry creates a hide away doll house

This size house works wonderful for any Mini, medium or large Zelfs. Also Shopkins, Littlest Petshop, Polly Pockets, Frozen Elsa, Olaf, Kristoff, Sven, Funko, My little ponies, MLP blind bags and even lego Mario Bros.

Gloriann Irizarry creates a hide away doll house

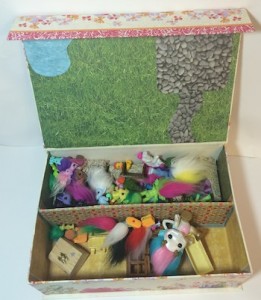
Once you’re done with play time all you have to do is pack all the dolls and accessories in.

Gloriann Irizarry creates a hide away doll house

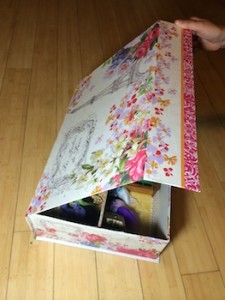
After play time is over all you need to do is close your box and it is ready to go.

Easy way to spark any kids imagination and the fun in this project is you can customized your play set to your favorite colors and style.

Gloriann Irizarry creates a hide away doll house

~*~*~*~*~*~*~*~*~*~*~*~*~*~*~*~*~*~*~*~*~*~*~*~*~

My name is Gloriann Irizarry. I was born and raised in the beautiful Caribbean island of Puerto Rico. Ever since I can recall, I always had my hands on crayons, scissors and paper. My parents knew from the start how much I love to create!

As a mother of three young wonderful daughters, I find myself working, caring for my family, and taxiing kids from here to there for various sporting events.  I have to say I’m never bored!  I enjoy every little moment I spend with my girls, but will always continue to work time to create art into my daily schedule as that means doing what I love the most. My girls are learning the joys of creating also!

I love to sculpt and will never stop creating. I was born this way and for that I thank GOD every day. Art has been a great way to be creative and to express myself.  I like to keep my hands busy creating – whether it is unique jewelry, art dolls, oak sculpture figures, fairy wings for all your project needs, or even wigs and clothing for your sculptures.  I love all the variety in art! Why? because ART is so rewarding. Seeing your creation take form is an awesome feeling.

You can see more of my work on my website – ByGlori

~*~*~*~*~*~*~*~*~*~*~*~*~*~*~*~*~*~*~*~*~*~*~*~*~

.

.