Small Gift Bag

~ * ~

This article is written by Sandra Parés 

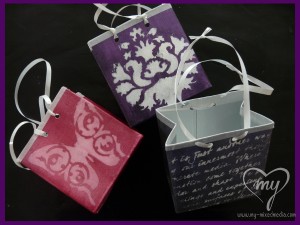
Today I am going to show you an easy way to make a small gift bag, an ideal bag to cover a gift for someone special on the Christmas day.

Three examples of the small mixed media gift bag.

  1. 1 recycled tetra brik that we will have cleaned before
  2. Scissors
  3. Black gesso
  4. Sponge
  5. Acrylic paint: Acrylic Glaze Silks, in my case I will use the violet colour of Irresistible Iridescence
  6. 1 Brush
  7. An adhesive tape, like washi tape or colored tape. I will use a white adhesive tape
  8. A regular white acrylic paint
  9. 1 template
  10. Crop-a-dile or some tool to make holes.
  11. Ribbon to make the handles.

Preparing and painting the surface of the tetra brik

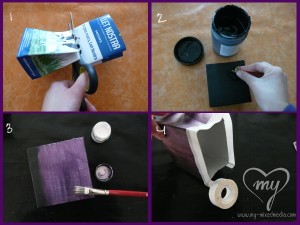
Step 1 – We start cutting the tetra brik. We cut the tetra brik in a half and we get a small bag. We can make it larger or smaller according our personal idea.

Step 2 – Then, with a sponge, we will cover the whole outer surface of the tetra brik with black gesso. If you want, you can also cover it with white gesso, depends on the type of paint you will use after and the result you want to obtain. In my case, as I will use the Silks Acrylic Glaze Irresistible Iridescence to colour the bag, I prefer the black gesso. The Irresistible Iridescence paint works good on dark backgrounds and gives a beautiful bright.

Step 3 – Once gesso is dry, we can paint the whole surface of gesso with the acrylic paint. The colour I choose is a metallic violet with a very nice metallic shine.

Step 4 – When the paint is dry, we can polish the edges of the tetra brik with the adhesive tape.

Stenciling the template and making the holes to make the handles.

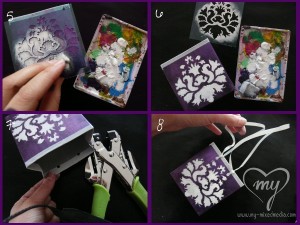
Steps 5 & 6 – Then we take a template to add a picture on the bag. In this step we will stencil the template with a sponge onto one side or both. If we stencil onto both sides, we have to wait to have the first side dry before to stencil onto the other side.

Step 7 – And we only need to make some holes with the crop-a-dile to get a place where we can put a ribbon to make the handles

Step 8 – add ribbon to make handles

With this simple way we will have a beautiful small bag for a gift for this Christmas!

Three examples of the small mixed media gift bag.

~*~*~*~*~*~*~*~*~*~*~*~*~*~*~*~*~*~*~*~*~*~*~*~*~

Sandra Parés loves working with mixed media. The colors and textures leave her amazed and she enjoys creating and getting their hands dirty with paint and gesso. She lives near Barcelona and works in her art workshop. On her site My mixed media you can find a mixed media online store, art and craft products, mixed media workshops in Spanish, tutorials, ideas and mixed media techniques.

~*~*~*~*~*~*~*~*~*~*~*~*~*~*~*~*~*~*~*~*~*~*~*~*~

.

.
Creating a Make-up Case with Image Transfer

~ * ~

This article is written by Cecilia Sanchez Peralta

The good thing about Mixed media techniques, is that you can use everything you have at your fingertips, and you can do all kinds of jobs.

A month ago, I launched my collection of digital stamps “Cecily Worlds”, a project I’ve been working a long time and will come out little by little.

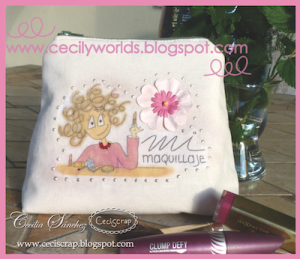
A Makeup case

Supplies:

Fabrics, digital stamp, printer, gel medium, beads, flowers, stickles, etc

Process

* First I used one of my digital stamps and paint it with photoshop. Then I printed as a mirror image to make the transfer.

* Then I searched several scraps of fabric and I cut the pieces to form my makeup case.

A Makeup case

* I put a generous layer of gel medium on fabric and over the printed image.

* Carefully I put the picture face down onto the fabric and pressed to stick it everywhere.

* Then let it dry for 24 hours. (You can also use a heat gun).

A Makeup case

* You must wet the paper with a sponge or “flus flus”
* You have to remove all paper using fingertips gently.
* At the end I decorated a little: A string of beads, some dots with Perfect Pearls, some Prima flowers with a brad … and everything you want.

A Makeup case

* Then I sewed the different pieces of fabric, I’ve lined and I put a zipper, and ready. Now I have my custom makeup case.

A Makeup case

A Makeup case

~*~*~*~*~*~*~*~*~*~*~*~*~*~*~*~*~*~*~*~*~*~*~*~*

My name is Cecilia Sanchez (CeciScrap) and I live in Málaga, Spain. I am married and we have three gorgeous sons. They inspire me every day with their crazy ideas.

In 2006, a few months after birth my twins, I discovered scrapbooking, digital first and then the traditional. I love to do 30X30 pages, cards and mini albums, and for a while now I am fascinated with the Art Journal and Mixed Media, and I do not imagine scrapbooking without getting my hands dirty.

I am inspired by everyday things, feelings … The art journal is a real diary for me, because sometimes I need to express feelings with colors and shapes.

I love learning and discovering new techniques and materials.

You can see more of me at: ceciscrap.blogspot.com.es or at www.facebook.com/ceciscrap

~*~*~*~*~*~*~*~*~*~*~*~*~*~*~*~*~*~*~*~*~*~*~*~*

.

.

Autumn Layout

~ * ~

This article is written by Sandra Parés

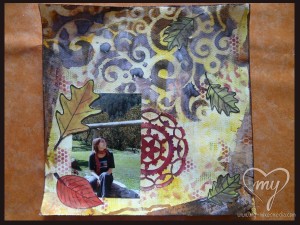
Although in my land these days are still sunny and seems that Autumn resists arriving,  I felt like making a layout with Autumn colors. I love the forest on this season, trees are wonderful with intense colors and a lot of contrast, ideal for shaping it with mixed media!

The supplies I have used to make this Autumn Layout are:

  • 12″x12″ watercolor paper
  • Gesso
  • An old credit card
  • A brush
  • A sponge
  • Some scrap paper with script
  • Some Dylusions inks spray: ground coffee, melted chocolate, lemon zest and pure sunshine
  • Paper towel
  • 12″x12″ Cosmic Swirl Template, The Crafter’s Workshop
  • Big shot and the Thinlit Sizzix Die – Doily by Rachael Bright
  • A cardstock
  • Autumn Leaves drawn in a cardstock (you could print it)
  • Primary Elements by ColoruArte: burnt amber, gold dust, hot cinnamon, sunburst
  • Silks Acrylic Glaze by ColoruArte: love struck, pretty peridot
  • Some stencils to make texture like punchinella
  • Gel medium
  • One photo

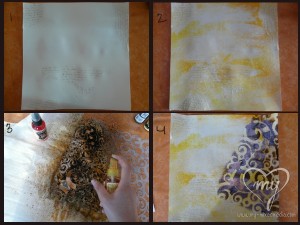
First of all I have pasted some scrap paper with gel medium over watercolor paper to add some texture (picture 1). Then, with the credit card, I have put a very thin layer of gesso, without covering the scrap paper and leaving without gesso some parts of the watercolor paper.

Then I have added a little color in the background with Lemon zest and Pure sunshine (Dylusions ink spray). I have used these colors to have a light background. Before the ink was dry, I have rinsed it with a piece of paper to clarify the color (picture 2).

As you can see in the 3rd and 4th step, I have put the template in a part of the paper, and the rest I have protected it. Then with the brown ink spray I have sprayed the template.

Making the background with collage, gesso and inks

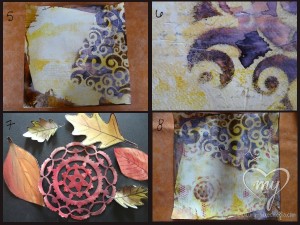
Then, also with the brown ink spray, I have made an irregular frame around the watercolor paper (picture 5). And in the picture number 6 you can see a detail of the background texture.

After I have drawn some autumn leaves on cardstock and I have cut them. And with the big shot and a cardstock I have cut the shape with the doily die.

I have painted all these figures with Silks Acrylic Glaze and Primary Elements. I have directly used the powders with a wet brush (picture 7).

And finally I have added more texture in the background. With a sponge and Silks Acrylic Glaze I have stencilled different templates with punchinella.

As you can see in the 8th picture, one of these textures was too intense and it did not like me. For this reason I have changed the focus of the LO and I have put my photo over this point.

Painting the shapes and adding more texture

As a last step I have stuck with gel medium all missing elements: doily shape, photography and leaves.

And this is the result: an Autumn Layout with a lot of texture and contrast.

Autumn LO with mixed media techniques

~*~*~*~*~*~*~*~*~*~*~*~*~*~*~*~*~*~*~*~*~*~*~*~*~

Sandra Parés loves working with mixed media. The colors and textures leave her amazed and she enjoys creating and getting their hands dirty with paint and gesso. She lives near Barcelona and works in her art workshop. On her site My mixed media you can find a mixed media online store, art and craft products, mixed media workshops in Spanish, tutorials, ideas and mixed media techniques.

~*~*~*~*~*~*~*~*~*~*~*~*~*~*~*~*~*~*~*~*~*~*~*~*~

.

.
Printers Tray Art

~ * ~

This article is written by Shari Welch

Type cases or printers trays were manufactured from around 1890 to the 1960’s. They are wooden trays divided into sections to hold the various letters of a typeface for print. All type cases were finished by hand and were fitted with a hanger. They were well constructed because metal type is heavy. The trays were stored in vertical racks, grouping the different type styles into families. Today artists take advantage of the unique frames to create one of a kind pieces of art.

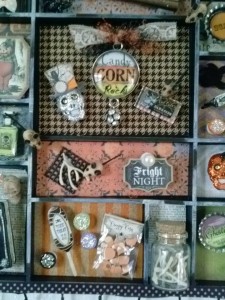
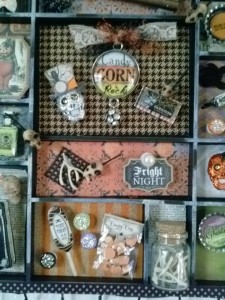
close up tray

There are many printers trays out there. They come in different sizes, colors, shapes, and number of sections. You can find them at craft stores and online.

I was excited to share this project because there truly is not much skill to it. It is mostly a matter of layering different elements. You can create one that is very simple or more detailed. I will be demonstrating some mixed media techniques you may want to try to take it to the next level.

Lets get started!


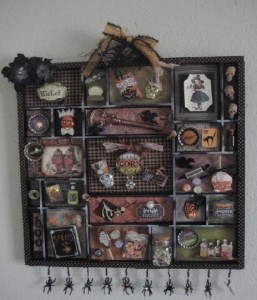
With Halloween just around the corner, I decided to create a Halloween themed printers tray. I absolutely can not get enough of Halloween.

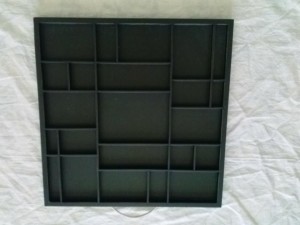
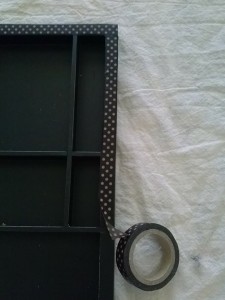
I chose a tray that was already black (as I was going to paint it black anyway) and had a lot of sections. I used washi tape to decorate the edge of the frame.

I chose a tray that was already black I used washi tape to decorate the edge of the frame

Next,to give it some interest, I used Tim Holtz distress paint (picket fence) to define some of the edges of the sections.

adding distress paint to add interest

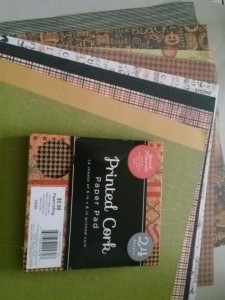
I picked out a few interesting coordinating papers and printed cork sheets to fill up the backgrounds sections.

decorative paper and printed cork

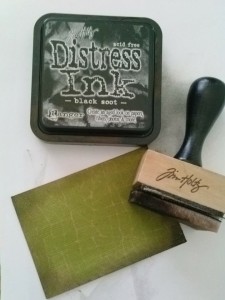
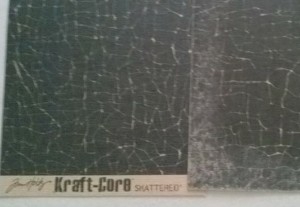
Next came distressing a few of the papers edges using Tim Holtz distress ink (black soot) and sandpaper on Tim Holtz Kraft core paper. Note: Kraft core will hold up to sanding, tearing, embossing, distressing.

distressed paper with distress ink

kraft core paper
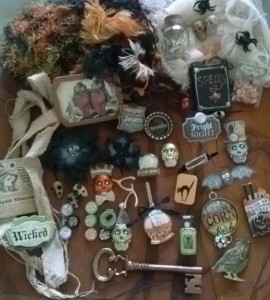
The fun really starts as you figure out what you want to put in the tray. You can add items from a trip, little bits and pieces of things you love, collections, photos, I could go on and on.

The fun starts when choosing your items

IMPORTANT:

One thing I can’t stress enough is that to lay everything out before you glue anything down. Not the background, the type, charms, nothing. I moved elements around a few dozen times or more before they found their permanent homes. I also glued down one section at a time after I was happy with the placement.

Helpful hints: Consider using 3D foam adhesive pieces to help your items look as if they are coming off the page. To age lace or ribbon you can soak them for a few hours in tea. I used Aleene’s tacky glue for the backgrounds and Weldbond glue for attaching my treasures.

Now it’s your turn to create your one of a kind piece of art.

finished tray


close up tray

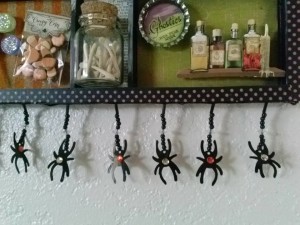
spider ribbon tray

~*~*~*~*~*~*~*~*~*~*~*~*~*~*~*~*~*~*~*~*~*~*~*~*~

Shari Welch is a mixed media artist living in Denton Texas. She is known for using reuse and recycle materials in her artwork. She volunteers for SCRAP Denton  where she is on the education committee, teaches workshops, art camp, and performs art demos. She is passionate about mixed media art and enjoys helping others discover their creativity.

You can follow Shari and see her mixed media art at facebook.com/my.altered.life and on her blog Shariwelch.blogspot.com

~*~*~*~*~*~*~*~*~*~*~*~*~*~*~*~*~*~*~*~*~*~*~*~*~

.

.