~ * ~
This article was written by Martice Smith II
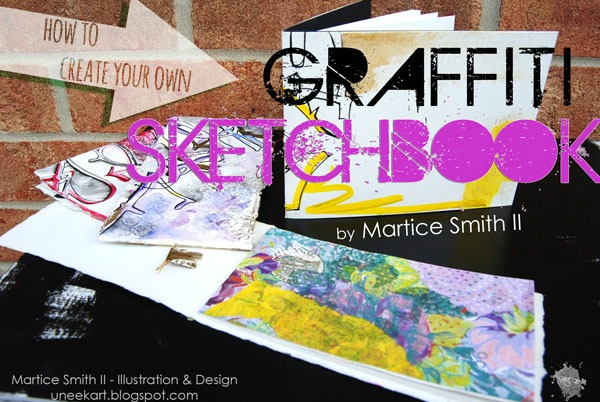
Attention art journalers and doodlers! Do you want a dynamic, eye-catching book cover? If so, learn how to add some ‘urban flair’ to your sketchbook covers. Try your hand at creating a popular graffiti-infused sketchbook, inspired by mixed media artist Martice Smith II.
Learn how to incorporate your hand-lettering as a graffiti style that’s sure to impress. This tutorial is inexpensive and at the end, you will have created your very own, handmade graffiti sketchbook, in as little as 30 minutes. This creative project will urge you to have the courage to experiment with graffiti-styled lettering, inspired by your own personality.
As the great Dr. Maya Angelou states, ‘We come from the Creator with creativity’.
We all have that innate desire to be heard and seen. Here’s your chance! Be bold- make your mark and let YOUR light shine!
~ * ~
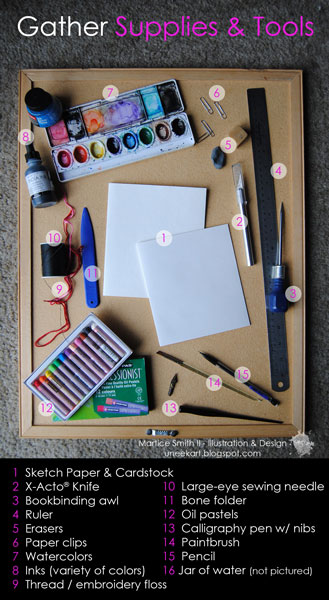
Gather Supplies & Tools
Since this project is inexpensive, you probably already have these supplies and tools on hand. If not, substitute by using what you have!
Instructions
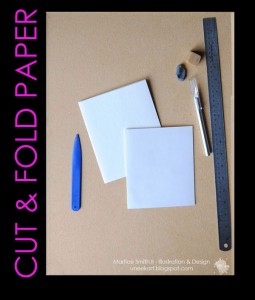
Cut and Fold Paper
The construction is very basic: heavy cardstock folded in half (for the cover) with 10-12 pages of lightweight drawing paper for the inside, bound with a simple Pamphlet stitch. Here’s what you’ll need:
1 sheet of card stock or heavy duty paper (My favorite is Rives BFK)
10-12 sheets of drawing paper (slightly smaller than the cover dimensions; these will be the inside pages)
Instructions to Cut and Fold Paper
Start out by measuring and cutting your paper. (Should be double the size you want for the finished sketchbook.)
Using a bone folder, fold the cardstock cover and all 10-12 sheets of drawing paper, individually. Match up the corners and fold the paper to make a good crease.
Nest all 10-12 sheets, spine (the fold) on spine on spine inside of the cover. This creates one signature. (There should be equal amounts of cardstock showing at the top, bottom and right of the signature.)
FYI: Folding a sheet in half yields a “folio”. A “signature” is a compilation of two or more loose folios. In this technique, the cover and signature are sewn at once.
Use an eraser to clean any smudges or pencil lines.
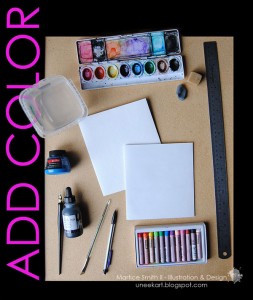
Designing the Cover
Think about the elements of art and principles of design before designing your graffiti-styled cover.
Line is the most basic element of art and one of my favorite elements to use when building a composition.
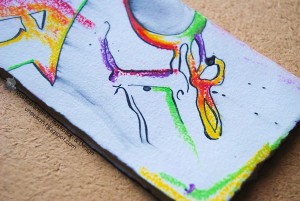
Bold and thick; squiggly and thin; lines that taper at the ends; any combination of above. When grouped together, lines can convey texture, rhythm, and density. My signature style is characterized by the use of vibrant colors and loose, energetic marks- accompanied by phrases and or quotes. How wild can you get?!
My writing is not always legible. Sometimes, I want the viewer to know exactly what I’m writing and other times, I keep it more personal by using it as a design element. Be willing to practice free-style lettering until it feels like second nature to you.
Tip: If you’d don’t have a calligraphy pen, try a marker with a chisel-tip. Do not to use your finer tip pens because you don’t want to risk ruining them when drawing over paint, oil pastel and modeling paste.
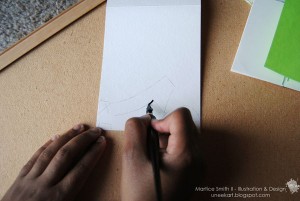
You can draw a sketch of your composition, very lightly, or you can free-hand the lettering. For this tutorial, I’m doing both!
Draw and write intuitively- don’t hold back! If you start mixing uppercase with lowercase letters, that’s perfectly fine! This is your invitation to show off your unique personality. Go ahead, add your charm to the surface!
Rhythm– just like music, art can also have rhythm. It can be seen as repeating shapes or colors. Showing a variety of lines, moving in different directions, helps lead the viewer’s eye around the composition. Add oversized letters diagonally across the paper and try overlapping to give a sense of depth.
Sewing the Graffiti Sketchbook
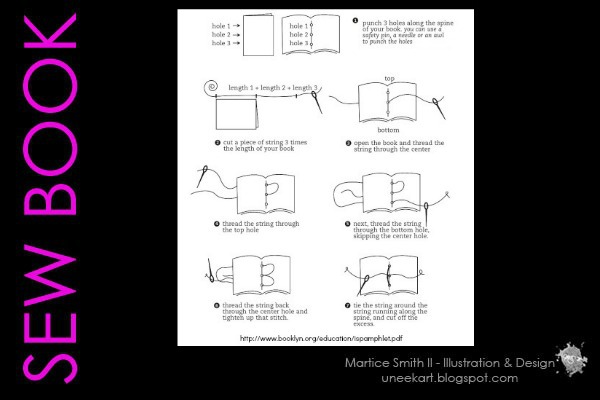
This diagram shows you how to bind your book using a simple Pamphlet Stitch.
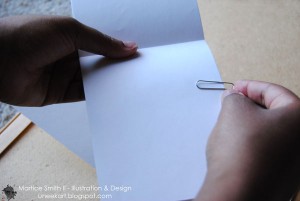
Grab a couple of paper clips. Neatly stack the signature, spine to spine, inside the cardstock cover. Secure them in place.
Using a ruler and a pencil, measure and mark the center of the spine.
Mark two more places: measure 1/4 inch from the top and mark. Next, measure 1/4 inch from the bottom and mark.
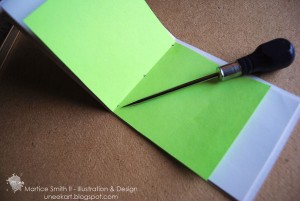
Using the awl, slowly and carefully, pierce thru each mark. (You should be piercing through the drawing sheets AND the cover.)
Having trouble? See diagram, here. Also, refer to this diagram for binding your book using a simple 3-hole Pamphlet Stitch.
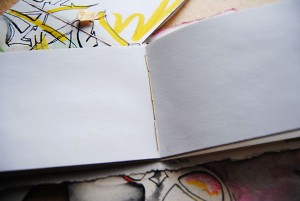
Your sewing should look straight and taut. Check the center of your sketchbook.
Varnish Cover
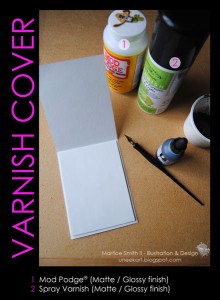
For the final stage, we need to protect the cover of our handmade graffiti sketchbook. I like using spray varnish for the first two coats. Note: dirt from fingertips, dust and wear and tear will create a unique worn-in appearance. If you want to prevent this from happening, apply 2-3 even coats of Mod Podge (after spraying varnish). Important: every coat of varnish needs to completely dry before applying another coat. Usually takes 5 minutes to dry.
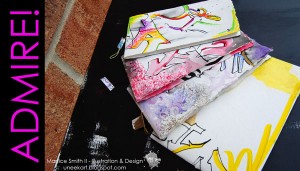
Admire!
Finally, your new handmade, graffiti sketchbook is complete!
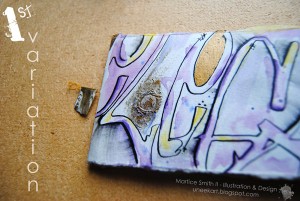
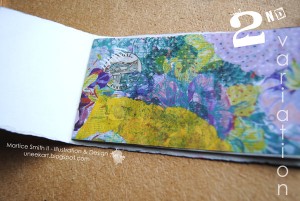
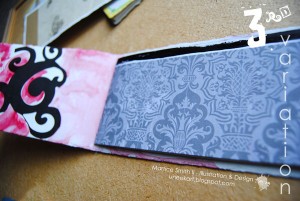
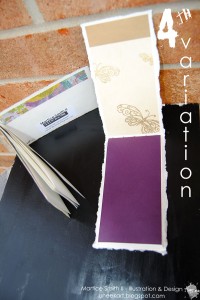
Add more “urban flair” with these four variations
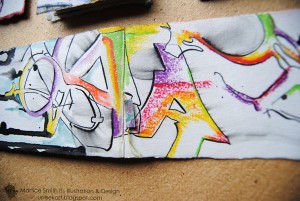
Design your cover with patterns, textures, overlapping shapes and complementary colors that help bring the design together in a cohesive way. Add words, phrases, quotes or expressive writing in various areas. Try metallic paints and modeling paste, like I did here. Use up your scraps of cardstock and paper ephemera by gluing them to the inside of the sketchbook
Take a look at these four variations, from my collection:
~*~
~*~
~*~
Make more of these sketchbooks, just to practice different styles. Take the leap- experiment with creating graffiti-styled lettering. Your new sketchbook can be your safe and comfortable place to play, invent, explore, and make mistakes.
When you fill your journal and flip through the pages, you’ll begin to have a deeper connection with your own handwriting, as it has morphed into something spectacular!
With some practice and patience, your own handwriting is easily transformed into creative, graffiti-infused creations, full of your own personality. Who wouldn’t love to see more of YOU?!
I hope you have fun with this tutorial. Be bold and let your personality shine!
~*~*~*~*~*~*~*~*~*~*~*~*~*~*~*~*~*~*~*~*~*~*~*~*~
Martice Smith II is creative director of Martice Smith II – Illustration & Design Studio, based in Kansas City, Missouri and owner of Uneek Art Boutique. She established herself as a freelance Illustrator and graphic designer after receiving her Bachelors of Arts Degree.
Her stunning illustrations reveals her love for fashion, typography and wildlife- using a combination of analog and digital techniques. Martice also contributes as an article writer for the Creating Mixed Media Art website.
You can see more of her work via her Facebook page or her blog. She invites you to join her monthly newsletter, Uneek Art Letter, for art biz tips, advice and free digital goodies!
~*~*~*~*~*~*~*~*~*~*~*~*~*~*~*~*~*~*~*~*~*~*~*~*~


Great looking book, Martice!
Thanks so much for the wonderful tutorial! I want to make my own journal at some point (when I get through a number of other art projects I have in my head) and when I do, I know where to look for great instructions!. I love the looks of your graffiti letters! I am going to have to give that a try. Thanks for sharing!
I really enjoy reading your article I think it was very helpful and I will be looking for your other articles in the future keep up the good work
Great article Martice!!!
This is a great tutorial. The instructions are very clear. I’m going to make some as gifts for friends.
Hi Martice, I love it, as I’m book making at the moment I’m going to make one like yours. take care Jeanie (Stevenson)
Martice, Your tutorial was great. I’ve never made a book before, but I think I’m going to try it. Thank you for including so many photos.
Great article Martice! I really enjoyed it, especially the part about graffitti writing, as I am not a big fan of my own handwriting, lol!
Love this – thank you – tomorrow I want to make one – your tutorial is wonderful & just love this idea – I know I’m repeating myself but I do love it!
Thank you all for taking the time to comment on my first article! I really appreciate you for doing so! I’m glad the tutorial was inspiring and the instructions were clear. If you need any help at all, please don’t hesitate to ask!
I’m curious to know if anyone was brave enough to tackle this project? If so, post a link so we can see it! Go on, be brave and share your beautiful creation Thank you, from my heart to yours.
*Oh, and a special thanks to my fellow Article Writer Team Members- you all are creative rockstars in my book!