Mixed Media Art Journals give you permission to create and reflect by combining the timeless art of writing down your thoughts with the fun and messiness of the mixed media art genre.
From my research and travels of the internet there seems to be three different approaches:
1. Prepare a layout, then write
2. Write then decorate
3. Write then incorporate into the layout
What do you need to begin?
A book that forms the basis of your journal (as its Mixed Media Art, it doesn’t have to be a book book, but we will start with that). It may be a bought sketch book or notebook, which may have originally been designed as a journal, but doesn’t have to be. It could be an old altered book that you use to begin gluing in.
Once you have the book, you will things to glue into it and some glue; a simple craft glue or gluestick is preferable as we want something that is fast drying. You may also want to include images from a magazine or photos you have printed.
An important aspect of journalling is the writing and good pens are needed for that. We aren’t talking about calligraphy level, but a good gel pen in black is a definite must, while other colours like white and brown can be used as well.
Do we need a theme?
Mixed media journaling is as individual and any of the Mixed Media Art styles, so sticking to a theme is not important. General themes about exploring your inner creativity or creating something everyday may help to focus your energy. Again it will depend if you are liberated or constrained by a theme. Whatever liberates is great; whatever doesn’t is definitely OUT!
Creating a basic layout.
You will develop your own style as you continue to create and practise and begin to notice the work of others. Here is a guideline to get you started:
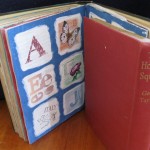
[I am using an old book here]
1. Cut a piece of scrapbooking paper to size and glue in. As this book is sewn bound, I will leave the inner bits clear.
2. Add some contrasting paper in smaller shapes, to break up the page into smaller blocks.
3. (optional) cover with a little gesso to blend the layers in
[this step is not recommended if you really need to write NOW as it will take too long. This approach works if you are preparing layouts, for writing on later]
4. Add images
5. Leave layout to dry and time to gather your thoughts… what are you going to write about today?
Again Mixed media journaling is as individual as any of the MMA styles. If you have a theme, that will guide you. If you are creating something everyday it may be harder to find an idea, but the idea of creating everyday is to keep it simple and whatever comes to mind
You can also use this drying time to put away those crafting bits and clear the table for the next step
6. Get pens poised. Sit comfortable, take a deep breath and…
WRITE…
Don’t worry about your handwriting, or where you begin or end. Write sideways if you want to. Keep going – the journalling process itself has theory and analysis behind it, but we don’t care about any of this as this point.
7. When you run out of space or your hand gets sore (let’s face it, we don’t write things by hand anywhere near as much as we used to, and our hands are out of practice).
Leave to dry – especially gel pens will be a little wet. You can use a heat gun to headset your writing; this is recommended if you plan to varnish or hodgepodge over your journalling, but it’s not necessary if it’s in a book.
Walk away and come back later – the next day is preferable, especially if you have finished it and just thought “YUCK!” A morning perspective always helps to see you own work in a better light.
~*~*~*~*~*~*~*~*~*~*~*~*~*~*~*~*
Enjoy, experiment and play – mixed media journalling is an amazingly creating tool – do not be constrained…
Happy creating!
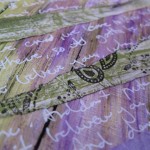
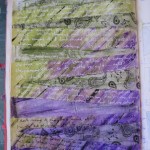
Here is an example of where a mixed media journal can take you.
~*~*~*~*~*~*~*~*~*~*~*~*~*~*~*~*~*~*~*~*~*~*~*~*~*~*~*~*~*~*~*~
For more information about the process of journalling, I’d recommend:

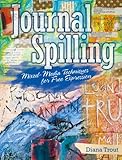
At its core, Journal Spilling is about incorporating journaling and art making into daily life, all the while encouraging a carefree, non-judgmental approach. In addition to step-by-step instruction for getting started in 25 media techniques (watercolor, resist, ink, transfers and more!), you will be guided through exercises to help with writing. The exercises are broken down into accessible parts that can be undertaken in small bits of time and are open-ended, encouraging various paths for journaling. Let go of complete control and trust the journaling process!
.
.


Recent Comments