~ * ~
This article was written by Katja Blum
I love paper marbling. The technique fascinates me, and while it is possible to apply the color to the water or sizing in a controlled manner, the outcome can still be a happy surprise. I love surprises.
However, marbling is somewhat time- and labor-intensive. Making the size, preparing the paper and paints, creating the marbled papers, rinsing… Enjoying one of those busy lives we all lead these days, I rarely find the time. That doesn’t mean I have to do without creatively colored paper or happy surprises. If ten minutes is all you can spare for a little art fix, how about faux tie-dyeing?
“Tie-dyeing”, or rather fold-dyeing, paper is a technique that requires few materials and no preparation. You can do it at your worktable or at the kitchen sink while making tea. On hold with the utility company? No need to get frustrated. Put the phone on speaker and make art.
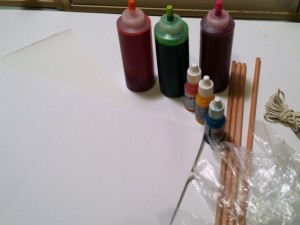
You need:
- Paper
Most paper qualities will work. I often use my son’s sturdy watercolor paper or rice paper. Since rice paper is fairly thin, it’s a good idea to take several sheets at once and use the stick or folded techniques.
- Liquid fabric or silk paints
I like Dye-Na-Flow. If you have one of those tie-dyeing kits with the prepared paints for a summer projects with the kids, see that there are leftovers, because they work really well.
- Gloves
- Bowl of water (or the sink)
- Wooden dowel and rubber bands (for the rolled technique)
- Paper clips to hold folded papers together for drying
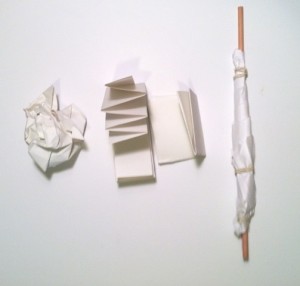
Fold the paper into various shapes. You can also crumple it up or roll it up on the dowel and fasten it with rubber bands.
Put on gloves, protect your work surface from paint spatters and apply random drips of fabric paint to the folded or crumpled paper and into the folds. Remember that too many colors might make mud – even though it can be very pretty mud!
You can use the paper dry or wet it before or while applying the color. Seriously, standing at the kitchen sink is a good way of doing this. When you are satisfied with the color application, secure the folded papers with paper clips and leave them to dry. Done.
Do resist the urge to unfold the papers before they are dry, because wet paper breaks more easily and there might still be wet paint in the creases that could run and cause streaks.
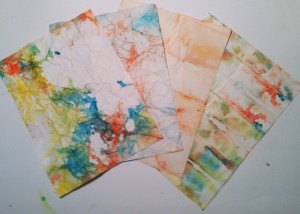
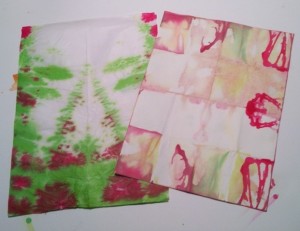
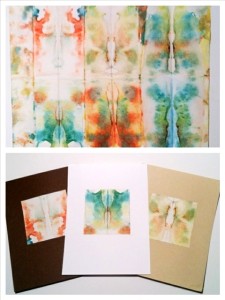
Once the papers are dry, unfold them carefully and enjoy the colors and patterns you have created. Some papers – the folded ones in particular – make terrific Rorschach tests. Let your imagination run wild and see what you can see. To smooth out the creases, iron the papers on a low setting or press them under a few books.
Of course you can use your tie-dyed papers as backgrounds for mixed-media pieces or as collage material – or display them as the pieces of serendipitous ten-minute art that they are.
~*~*~*~*~*~*~*~*~*~*~*~*~*~*~*~*~*~*~*~*~*~*~*~*~
Katja Blum is a writer and translator from Tulsa, OK. As an artist, she started with yarn, fabric and papier mache (rarely together), branching out into collage and other paper arts about ten years ago. Her latest obsession is making soft stuffies and art dolls – to the delight of her toddler. She also likes to find creative solutions for ugly or broken things around the house – to the delight of her husband.
You can see more of her work with fiber, paper and words at www.thewaywardsheep.com
~*~*~*~*~*~*~*~*~*~*~*~*~*~*~*~*~*~*~*~*~*~*~*~*~
.
.


I absolutely LOVE this idea, and can’t wait to try it…I love having my own original collage papers, and although I have made many of them, I have never used this method…I have all of the supplies on hand, so I just may get into this process today! Thanks for sharing a great idea!