Black Altered Book Page

This article is written by Linda Giese

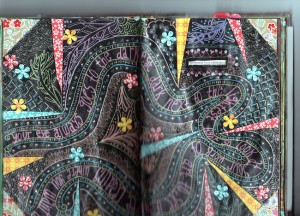
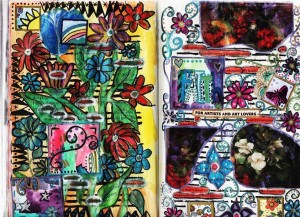
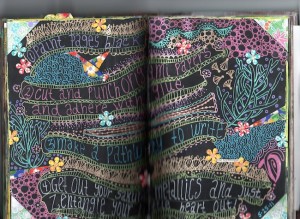
The process and materials for this page spread are fairly easy, but when people turn the page and come upon it, they often say,”Wow!”  It is bright and active with a lot of pattern and color.

Materials & Tools

  • Americana lamp black acrylic paint in the bottle(not tube paint)
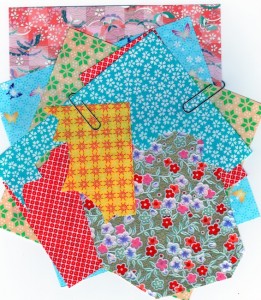
  • 3-5 different sheets(I used some scraps) of origami paper.

mixed media collage

  • Scissors
  • Small punch like heart, flower or star
  • Aleenes tacky glue (or other white glue)
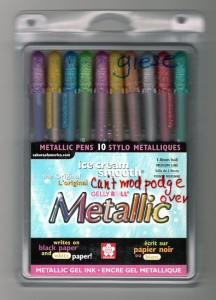
  • Sakura metallic gelly roll pen set, 10 count.
    [Ignore my note on the package, “can’t mod podge over”.  You can work over the pens if you let them dry completely first.]

mixed media pens

Technique

mixed media collage

1. Paint your page spread with black acrylic . Let dry.

2. Cut and punch origami paper and adhere with glue. Origami paper comes in two styles.  The washi papers are more expensive and have a toothy, fibrous texture.  The less expensive papers are like thin wood pulp papers.   For punches the less expensive papers work better.  I used washi for the corners and some cut papers.  I tried to spread the colors around the page with some of the flowers going off the edge.  This way you can punch partial flowers along the edges of your papers to use every pretty bit of them.  I apply a small amount of glue with a toothpick so I don’t get it on the other parts of the background which makes the surface better for the pen work.

3. Draw a pathway (or several of them) with one of your pens to contain your writing.  You can write a favorite quote, something you want to say, or perhaps about your joy in creating art.  I used words I had chosen on the page spread (before I painted with black) to tell me what to write.  One page had the words “the technique” and the other “between two extremes”.  On the technique page I drew the parallel lines over half the page spread and expanded them as needed.

mixed media collage and writing

On the extreme page I wound my lines across both pages and turned and came all the way back across. I used my spears of origami paper to help find the route.  My words happened to cover it all.  I don’t preplan, just start writing, but if they hadn’t filled the space, I may have filled in the line with stars or other symbols.  I don’t really stress over it.

4. The last part is all the fun.  I usually begin with borders along my lines.  These can be as simple or elaborate as you like.  Then I start to fill in areas with my favorite zentangle patterns.I try to repeat patterns in different areas and to repeat colors in the same way.  This helps move your eye around the composition.

There are wonderful zentangle books and many online sites for patterns.  Zentangle was created by artists Rick Roberts and Maria Thomas.  Their website is www. zentangle.com  Other sites I like are www.LifeImitatesDoodles.blogspot.com and TanglePatterns.com

Finishing

I put a coat of gloss varnish over the extreme page spread.  Although I like the look of acrylic paint with varnish over it, I think it detracts from the brightness of the metallic pens.  The technique page has no finish on it.  I hope you have as much fun as I did with this page spread.

I encourage questions and comments!

Hugs to you,

Linda

~*~*~*~*~*~*~*~*~*~*~*~*~*~*~*~*~*~*~*~*~*~*~*~*~

Linda Giese encourages comments, questions, and sharing your art journey at linda.giese@yahoo.com

She teaches classes privately and at a local scrapbook store, The Stamp Addict

~*~*~*~*~*~*~*~*~*~*~*~*~*~*~*~*~*~*~*~*~*~*~*~*~

.
Tag Books

This article was written by: Melanie Statnick

~ * ~

Making little story books from paper tags.

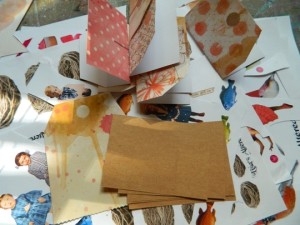
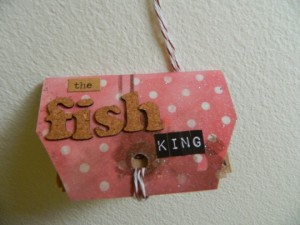
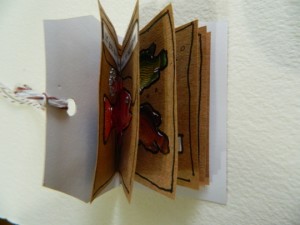
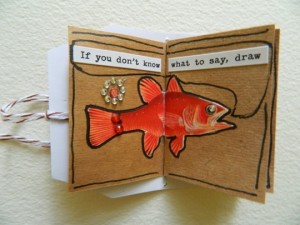
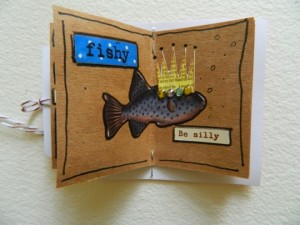
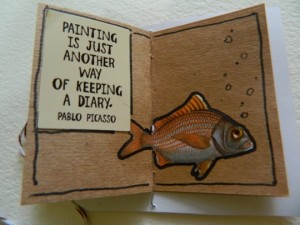
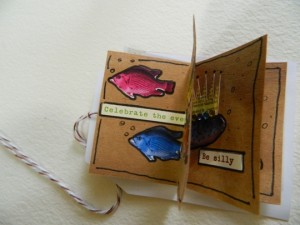
These have to be the cutest thing I’ve seen yet. Little story books or note books made from tags. I used some scrapbook paper and Kraft paper with collaged images to make a little books. This first one is about The Fish King.  Gather tags either pre made or shape to cut. Use any type of paper in between for your pages.

Making little story books from paper tags.

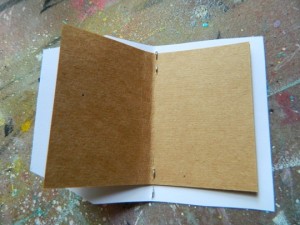
Fold tag in half, you’ll use the string to wrap your book. Cut and fold blank pages to size and staple to the inside of your tag. Cut assorted images and words and glue them onto your pages to create or story or note book. You can use the front and back of each one or use just one side.

Making little story books from paper tags.

Making little story books from paper tags.

Don’t forget to decorate your cover. These are so cute and quick, you can make a dozen in a day. Have fun and be creative! I used a micron pen to outline the pages and images and added scrapbook gems to the images for a little sparkle. I also used a hole punch because I cut my tags from scrapbook paper.

Making little story books from paper tags.

Making little story books from paper tags.

Making little story books from paper tags.

Making little story books from paper tags.

~*~*~*~*~*~*~*~*~*~*~*~*~*~*~*~*~*~*~*~*~*~*~*~*~

Author bio: Artist Melanie Statnick is a Published Artist/Writer out of North Carolina who writes and creates art daily from her private studio.

~*~*~*~*~*~*~*~*~*~*~*~*~*~*~*~*~*~*~*~*~*~*~*~*~

.
.

Reading Between The Lines with Altered Books

This article is written by Laura Thykeson from Taz’s Corner

Many people have asked me to explain how I pick out and put together the “Altered Text” on the pages of the altered books I create. I am hoping that I can explain a few things and make it a little less confusing for the person new to “altered text” and found poetry. In essence, “Altered text” is made when certain words or phrases are chosen, highlighted and connected by “rivers” in the order they are printed on the page. Then the rest of the words are marked out or painted over, making it where you can only read the selected text. “Rivers” are dark lines connecting the words on the page in the order you want them read for added effect. This is a different technique than “Found Poetry” which is when words and phrases are cut out of a page or pages of separate text, then rearranged and attached to a new substrate such as an altered book page, cardboard, a collage or an ATC (Artist Trading Card) or other artwork.

artwork by Laura Thykeson  artwork by Laura Thykeson

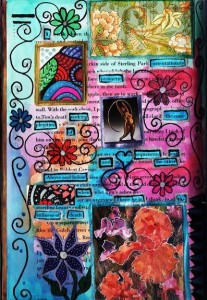
When you are ready to start a new altered book page, before you do anything else, let your eyes skip over the text on the page lightly a few times and see if any words or phrases catch your attention. If so, write them down on a scrap piece of paper (I use separate “altered text workbooks”, made from composition notebooks, for each altered book I create). Keep rereading the page, picking out other words or phrases to go with what you have and write them down, until you have made a sentence or until the wording suits you and “says something” to you. For instance,  the altered text I have chosen in the first picture I have included reads – “I ostentatiously pirouette, seeking the complexities of sequences, one and the other, above and below, when there he is, the stillness of death”. I really like the way this page reads. It “speaks” to me in a way, with a larger meaning than just how the text reads. It makes me think of how short life is, and how we often go through life so quickly, distracted by the things life throws at us, then suddenly – the end of our life looms near and we wonder where the time went so quickly!

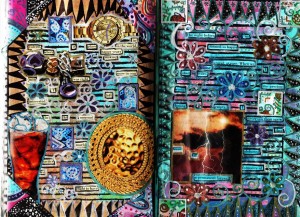
Once I have picked out my “altered text”, I then draw black boxes in permanent ink around each word(Sharpies work well for this), then use a colored highlighter to really set them off where they will show well up on the page. Now I am ready to start creating my layers of artwork, beginning with watercolors,  then layering acrylics, collage elements, permanent inks, markers, colored pencil, etc., making sure to not cover up the words I have chosen with my artwork as I go. One other tip – I also glue together 3 pages, then leave a two-page spread, then glue 3 more pages together and so on, to give myself a sturdy base for my artwork.  I am including a couple more pictures of my pages I have finished, so you can see some examples. Hopefully, this has helped you to add another dimension to your mixed media and altered book art! Once you get the hang of it, it can become quite addicting to see what “Altered Text” sentences you can come up with on each page. After you have gotten the hang of finding your words on the pages, you can also create your art to match or compliment your “altered text” and add a whole new aspect of additional meaning to your altered book art! You can create a whole new “story within the story” with the sentences and phrases you discover when you “read between the lines”!

artwork by Laura Thykeson

artwork by Laura Thykeson  artwork by Laura Thykeson


~*~*~*~*~*~*~*~*~*~*~*~*~*~*~*~*~*~*~*~*~*~*~*~*~

Laura Thykeson has been totally immersed in mixed media art for many years. If it will “take paint”, she has probably painted on it!

Laura discovered altered books and art journals about a year ago and have been hooked ever since! She has always loved mixed media art because of the variety and the “no rules” aspect! Starting out a fine art oil artist, she soon transitioned into her own line of wearable art, purses and jewelry, along with decorative items for the home.

Laura lives in Granbury, Texas USA.

You can see more of Laura’s work at at her blog Taz’s corner

~*~*~*~*~*~*~*~*~*~*~*~*~*~*~*~*~*~*~*~*~*~*~*~*~

.
.

Altered Books – Removing and Gluing Pages

In the previous article we discussed what an altered book is and its history, what to look for when choosing an altered book and where you may be able to find them.

To recap on choosing a book: it needs to be in good condition and it must have page sections have are sewn in. To check the construction of the book, hold the book up so you can see the inner part of the spine and where the pages touch it; if you can clearly see the page sections (the little books within the bigger book) then it will have been stitched. To check further, carefully open the middle of one of the sections. If you can see cotton or thread, then the book has been stitched and is exactly what you are looking for.

"Using books to create altered art"

In the second part of the Altered Books in Mixed Media Arts series, we will look at the technique of removing and gluing pages used to prepare the book before getting started.

Preparing your altered book
If your chosen book is dusty, it is worth wiping it down with a cloth to remove most of the dust.  To warm the book up, open it gently, somewhere in the middle and carefully flex or open and close the book to get it moving. This is particularly important if your book is brand new and hasn’t been worn in.

Removing  pages
As we begin to alter our book and add paint and papers and embellishments, the size of the book will grow. Often this is part of the charm of a finished altered book; it’s so full that it barely closes.

In starting out, we can help the book by removing some pages and gluing others together. This reduced the overall bulk of the book and creates thicker pages. Firstly have a quick look through the book and see if there are any pages that catch you eye; a fantastic heading or font, a lovely picture that could be incorporated into the design. These are the pages you will want to keep. Mark them with a post-it note, so they are easy to find during the next step.

Take a lead pencil and a sharp craft knife or scalpel (as we are cutting in close to the spine, it helps if the knife is a smaller one). In between the pages you want to keep, select four pages (two spreads) to begin the removal / gluing process.  The middle two pages need to be cut out, parallel to the spine, leaving about half an inch (1.5cm). On the outer two pages, that now face each other,  pencil a small “G” (for glue) onto the pages, to remind us that these are the pages to glue together.

Move through the book, between the pages you want to keep and remove quite a few pages (as a guide, about a quarter of the pages will be removed) and mark the pages to glue.

Don’t throw out the removed pages. These can be used later to create background papers or words used for embellishments or to add texture. As these removed pages are the same paper with the same font and format, it makes it easier to integrate these pages into our altered layouts.

Gluing pages
Now we are ready to glue our newly made sections together. Gluing pages together give us a thicker substrate to start our project. Gluing can be a frustrating process, especially if you want it to be “prefect”, so remember that this isn’t a precise art and any imperfections will add character to our final mixed media art piece.

I use a gel medium for this type of gluing; it sticks well but does take some time to dry, so it’s not the best if you are in a hurry. Start by brushing the glue along the middle of the two removed pages and ease these together. Then coat the outside of the stumps and one whole page that is to be stuck together. Carefully ease the second page up, starting from the spine out. Work from the middle out, removing bubbles as you go.

These pages need to be stuck at the right angle to the spine, so that it will close. You need to be mindful of this when bringing the pages together.

Repeat with another one or two sets of pages, then close the book, put it on a flat surface (the floor works well) sit something heavy on it and leave it to dry. After a day or two, you may need to open the book up and sit it on its end, with pages spread, leaving it to dry for a while longer. This is necessary when using gel medium or if the weather hasn’t been really warm. It needs air to circulate to fully dry.

In the next article we will continue to discuss preparing our altered books by using gesso, how to choose a  theme and where to looking for inspiration.

Happy creating!