~ * ~
This article is written by Nicole.
I like making crafts and keeping busy. Here is one of the projects I like to make to give as a personalised gift, or to use as a Teachers Gift at the end of the year.
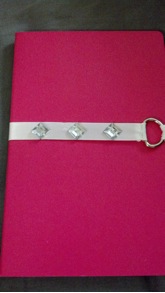
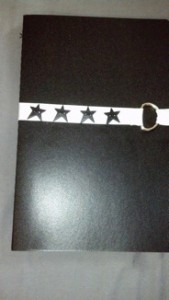
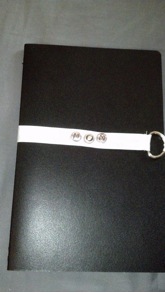
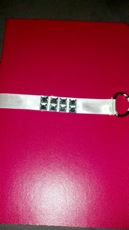
I used 5″ x7″ leather journal that I bought at Wal-Mart in a 3-pack. They were only about 70 pages so I used a thin ribbon, but a wider ribbon would work just as well. I got most of my supplies at Wal-Mart except the black star buttons and the “mom” letters; those I got at Hobby Lobby.
Items needed:
Journal of your choice
Ribbon of your choice
Metal D ring
Scissors
Fabric pen or marker
Hot glue gun and hot glue
Velcro strips
Needle and thread
Buttons and other embellishments
Start by wrapping the ribbon about 1.5 times around your journal and cut it off the spool. This is to ensure that the Velcro closure will be in the back and the D ring will be in the front.
Sew a seam on both ends of the ribbon, being careful if your ribbon has an obvious front and back. You could also hot glue the seam, but I like the look of a sewed seam.
Sew the D ring on to one end of the ribbon. Then, wrap the ribbon around the journal and thread the ribbon through the ring to determine the placement of the Velcro strip; I placed one end of my closure about 1/2 inch inside the seam of the ribbon to give a pull tab. Make sure the ribbon is not twisted and the D ring is straight and on the front of the journal. Mark the placement for the Velcro strips with a fabric pen or marker; remember you will have to make one mark for each side of the Velcro. While the ribbon is still wrapped around the journal go ahead and mark the place for your embellishments. I was unsure at first when I started these so I waited until later, which is fine as well.
Remove ribbon and attach the Velcro strip according to package instructions. I used some that had adhesive on the back, but because my ribbon was satin, it didn’t stick and I ended up having to sew it. After that you can then add your embellishments. Use your imagination and be as creative as you want. Sine I made mine for gifts I used buttons and jewels to represent their personalities.
When your embellishments are attached to the ribbon, wrap it around the journal again, this time gluing it to the spine (and along the back if you’d like) of the journal. At the time I made these I did not have a hot glue gun (I’m just starting out in crafting) so the ribbon just slid right off. I personally think they would have been better if they had been glued down.
Guess what? You are now finished and ready to enjoy your super adorable and one of a kind journal.
I hope my instructions are easy to follow and that you enjoy your journals. I would love to see what you create so feel free to send me a pic of them at luckyhandsproducts@gmail.com.
~*~*~*~*~*~*~*~*~*~*~*~*~*~*~*~*~*~*~*~*~*~*~*~*~
Nicole is happily married with 2 adorable kids. She loves to write, using her degree in creative writing. Nicole also enjoy reading, crafting, photography, and cooking (especially chocolate) and loves to stay busy.
.
.


Recent Comments