Don’t Forget the Embellishments!

~*~

This article is written by Laura Shelton

Hello all! It is wonderful to be back here writing articles for Mixed Media Arts again! Hope you have been being super creative, and I really hope that this new articles gives you some new inspiration to make a lot more neat things! Today I am going to talk about embellishments. We all love them, buy them, and even stockpile them. At least I was, and spending way more money than I wanted on them!


Embellishments

Embellishments can run into quite a bit of money, at least mine did, until I made a decision – I decided that any embellishments I wanted, I was going to make myself…no small undertaking, and needless to say, my embellishments fell off a bit, lol! That was, until I just made up my mind, and really got serious about it… Now I would rather have my own, handmade embellishments than anyone elses!

Embellishments

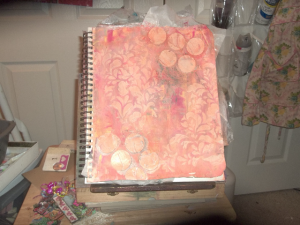
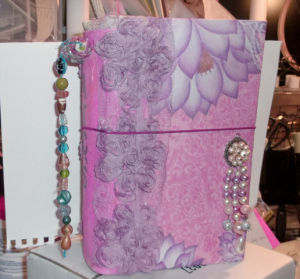
The first embellishments were a bit primitive as you can guess, but as I went I picked my battles, and then things started coming together. Above is an extra large journal page using modeling paste for the lighter sections of the piece. Below you will see an album that I made, where I utilized what I call a “bead tail” coming off of the back of the album, and attached with a handmade bead I made recently

Embellishments

Toward the front, you can see that the closure is made of a vintage bead earring attached to a pendant jewelry finding…on the other side of the album, for the second part of the closure, I have another handmade bead mounted, and it is all held together with a reddish/purple leather cord. The closure alone really dressed up the album a lot!

Embellishments

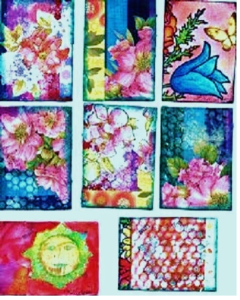
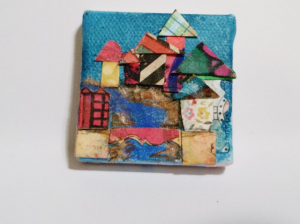
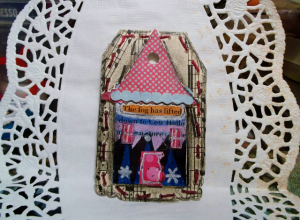
Other embellishments I have made are more suited for your art journal. There are many, many times that I will use an ATC (Artist Trading Card) embellishment for an embellishment to dress up an art journal page or maybe a mixed median art piece I am working on. These are some of my really old ATC examples, and they have been used at some time for an embellishment.

Embellishments

There are so many things you can make from paper and paint.

Embellishments

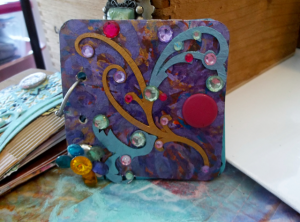
What I also enjoy is making embellishments out of beads and old jewelry findings! I have a ton of old beads and fittings from all of the broken necklaces, bracelets and earrings down through the years. I am so glad that I held onto all of them because they are perfect for making your own unique embellishments! Some that I make regularly are what I call my “bead tails”.

These are basically just strings of glass beads, faux pearls, and other stones that I thread onto a heavy string, and then place a charm at the bottom of the string. These end up being the decorative touch that I add at the back spine of my prayer and scripture books that I make, as well as any other type of book, album or anything that is made that way.

A perfect example is the bead tail at the back of above album. These bead tails seem to add so much to a project! I wouldn’t know how to finish out the albums without adding them! Seriously though-embellishments can make or break a project, at least in my mind. Even if you just string a few beads together and maybe add a little fancier clasp to your project, you will be amazed at the difference just a little addition can make!

Embellishments

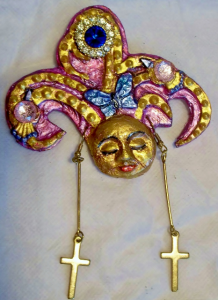
This is Hester, the Court Jester –  she is just one of several art pieces I have made. I can write about them next time!

Laura Shelton

~ * ~


Live, Laugh, Love Mixed Media Canvas

~ * ~

This article is written by Kim Kelley

In one of my other articles I had added that I constantly have several projects going at once, sometimes so many I forget what I was going to do with them! My biggest problem with doing that is remembering to take pictures of each step along the way and then where I put them on my computer. Literally I have picture floating around that I have no clue where they are. I have looked, but it seems they are like that one lost sock…doomed to never be found.

Any way back to the task at hand: this month’s project is a canvas that is a little larger than what I usually do, so let’s see how it turned out!

Here is a list of what I used:

~ 8” x 24” canvas

~ White gesso

~ Spray mist by Lindy’s Shabby Tuxbine Teal

~ Ayeeda  mist by 13 Arts – Chalk Burnt Sienna and Pearl Brown Light

~ Miscellaneous charms, flowers, metal pieces, wooden pieces, and jewelry pieces

~ Chipboard from Dusty Attic

~ Heavy Gel by Golden

~ Glue gun

When I start a canvas I usually have some idea of what I am going to create, knowing the theme, colors and style, with this one I just start throwing a bunch of random items into a box. As far as the colors go, I had just received an order with the 13 Arts sprays and decided I had to try them out. The teal I added because it seemed to work so well.

When I buy canvas I usually get the already primed, but still add my own gesso. So after the added gesso dried I started laying out my pieces…turning, moving until something finally stuck and I liked it. Grabbing my Heavy Gel I started attaching some of the bigger pieces and using my hot glue gun attached the smaller ones.

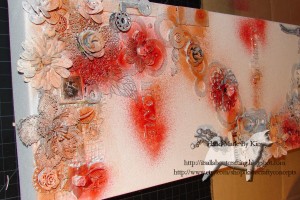
Dusty Attic with Spray mist by Lindy’s on this canvas

Canvas with embellishments 1

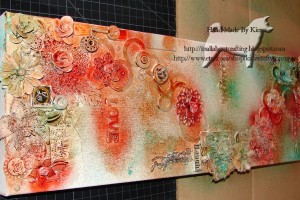
Dusty Attic with Spray mist by Lindy’s on this canvas

Canvas with embellishments 2

As you can see by the pictures color and material did not matter to me. I just grabbed and glued, knowing I would be painting over everything with gesso.

Dusty Attic with Spray mist by Lindy’s on this canvas

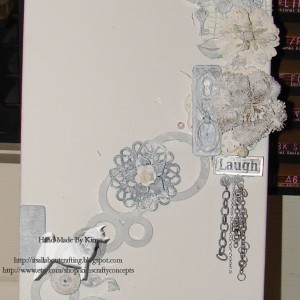
Gessoed embellishments 1

Dusty Attic with Spray mist by Lindy’s on this canvas

Gessoed embellishments 2

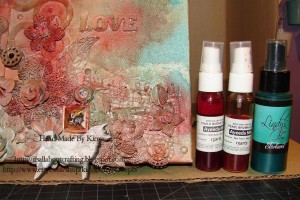
After it dried I started in with my sprays. Now I am one of those people that cannot wait for anything, I don’t like to use the word impatient too often but yes I am impatient, and with sprays it is not a good thing to be. You truly want your spray to dry before going onto the next color…it can get ugly real quick!

Dusty Attic with Spray mist by Lindy’s on this canvas

Sprays used

Dusty Attic with Spray mist by Lindy’s on this canvas

Spots of spray 1

Dusty Attic with Spray mist by Lindy’s on this canvas

Spots of spray 2

Dusty Attic with Spray mist by Lindy’s on this canvas

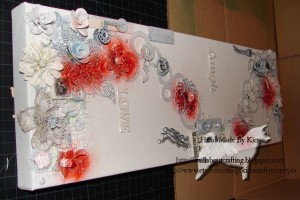
Spots of spray 3

So I was very patient with this one. I continued to spray alternating each color until I felt like I was happy with it. SO….here I is my finished project.

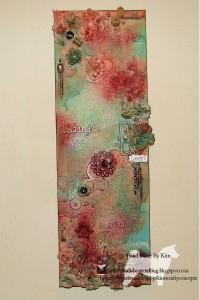
Dusty Attic with Spray mist by Lindy’s on this canvas

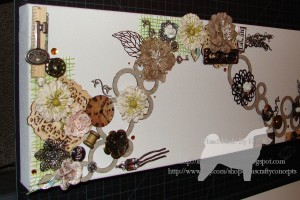
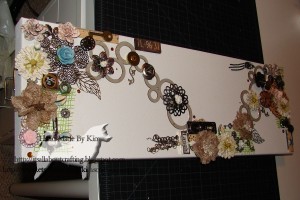
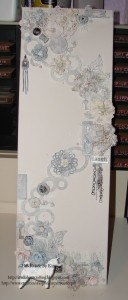
Finished project

I was pleasantly surprised when my husband decided he wanted to hang it up, usually unless it is something I made specifically for him it goes in an area to be sold. (if I ever get my act together to do a show!) But this time he loved it so much he hung it right on the wall!

Life is short, do something creative every day!

~*~*~*~*~*~*~*~*~*~*~*~*~*~*~*~*~*~*~*~*~*~*~*~*~

Kim Kelley is borderline obsessive about her crafting and her art. She loves mixed media art because you are free to go beyond your comfort zone, using your imagination and exploring an anything goes mind set. Kim loves to learn and explore new techniques and hopes that any art she creates leads someone to find their inner creative artist!

~*~*~*~*~*~*~*~*~*~*~*~*~*~*~*~*~*~*~*~*~*~*~*~*~

.

.

Make your Own Faux Metal Embellishments

~ * ~

This article is written by Ann Strecko Koeman

Making your own mixed media embellishments for your crafting and art making can be satisfying to one’s creative soul and also to one’s wallet!  In this article I am sharing my mixed media technique tip on how to make some of your own Faux Metal embellishments with your glue gun and some cardboard.

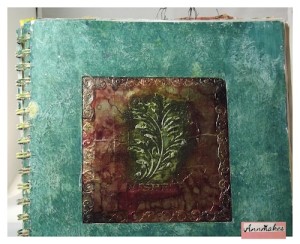
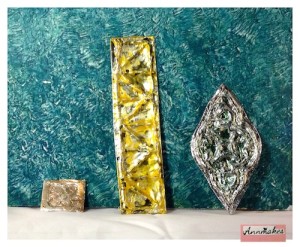
faux metal mixed media embellishments

The examples I have to show you are rustic looking which is what I like when making such embellishments.   I like the look of old and worn even rusty metals and sometimes I want to add such a piece to one of my projects but I find myself limited by certain constraints.  If I do not have such a piece in my studio stash and I am pressed for time then I will make something up.  Also, sometimes I may have a piece of real metal but it is just so heavy that it would not be supported properly on my project.  So here again is when making something light weight comes in handy.

faux metal mixed media

One of the ways I make such mixed media embellishments is by stamping an image such as this one in the picture, of a decorator’s foam stamp intended for painting on walls, but I use ink and cardboard.  Once the ink has dried I heat up my glue gun, add a stick of glue and trace over the design with the hot glue.  I try to make the glue design fairly thick.  Once the glue has cooled and is hard I spread some PVA or Tacky glue onto a piece of kitchen aluminum foil (cut to about twice the size of my stamped image).  I also cut the cardboard around the stamped image to the desired shape and size.  Then, I place the glue coated foil over the dry and hardened glue tracing and press into all the cavities.  I start from the centre of the image and rub with my fingers and the eraser end of a pencil the foil so it sticks to the cardboard.  Aluminum foil is thin and may tear but that is okay because another piece can be patched over any tears.  Colouring the foil afterwards will also hide any imperfections.  Once I am satisfied with the adhesion of the foil I let the piece dry completely.  Once dry, I have fun with inks, paints, embossing powders and more to achieve the look I want.

The process is pretty simple and yet can give such intricate designs!  These light weight faux metal decorations can be used on so many different types of surfaces and will not add too much weight to your project.

~*~*~*~*~*~*~*~*~*~*~*~*~*~*~*~*~*~*~*~*~*~*~*~*~

Ann Strecko Koeman is a busy mom and artist trying to stay warm in the cold cold winters of Canada!  To stay warm she creates something just about every day.  Whether the creation is a painting, a sewn project, a written article for this site, a post for her blog, and even making videos on Youtube!  She is often found with her hair up in a twist , her hands stained with inks, and her clothes with paint splatters underneath her long goose down parka!  She even owns gloves that have flaps so her fingers are free to type away and there is a warm mug of hot beverage close by to warm up those digits.  For more of Ann’s craftiness you can visit her blog here: annmakes.blogspot.com

~*~*~*~*~*~*~*~*~*~*~*~*~*~*~*~*~*~*~*~*~*~*~*~*~

Glorious Glue

~ * ~

This article is written by Ann Strecko Koeman

Glue, glorious glue!  Where would we mixed media artists be without this essential medium ? Personally,  it is of great importance to me. Ever since I was allowed to use paste from a young age I have learned to love and hate the gooey sticky stuff. As a child I used that yellowy syrup sticky liquid, looking like clear honey or diluted maple syrup, but  it did not smell yummy. It came in a little clear bottle with a red rubber nipple top that one had to either create a slit into unless the brand you bought came pre slit.

That stuff was messy and wet, but it worked for my construction paper crafting. With my mom I was allowed to use contact cement glue to paste clippings into our scrapbook.  After all it was the ’70’s! We did not know or care about acid free and archival quality.  We were lucky if our parents actually  bought real glue instead of having to always make due with a homemade paste version.

Over the decades I have learned different types of arts and crafts that all use a variety of adhesives. Some smellier than others, and some more convenient than others. I also learned that glues could be used as more than an adhesive when it comes to art making.  In this article I will share with you a few of my unusual glue uses that involve hot glues, moulds, and plain old white school glue.

Making embellishments

Recently I purposely started playing around with my hot glue gun. I had noticed that whenever hot glue drips ,drizzles and is left to dry on a hard non porous surface such as tile or a silicon mat,it  tends to lift off easily when it is completely cool. So I started playing with making some stars out of glue on my work table. I liked what I saw, and proceeded to do a little research on the internet.

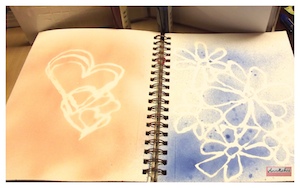
Well, other people had the same idea and they took it a little further and they were making stencils, stamps, and embellishments.  So, armed with my twenty year old little low temp glue gun I started to make some patterns with the glue, let it dry and cool completely and I had made some very funky stencils. These are so much fun to make, easy and inexpensive. I had never had any creative use for my glue gun,  it was just a tool, a means to get things to stick together, but now a whole new world had opened up.

Making embellishments

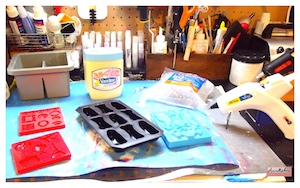
I have since purchased a better quality glue gun that has a precision tip, is dual temperature and can be used without its long electric cord for short periods of time. I started playing with different types and colours of glue sticks. I even invested in some specially made hot glue/resin making moulds.

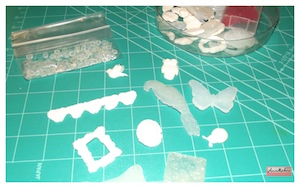
There are even glue like sticks that contain resin that can be melted in your glue gun and shot into these moulds to make super cute embellishments. These embellishments can then be altered with inks, paints, and mica powders to get any colour or look you desire.  It is an economical way to make a large collection of embellishments that can be used in a multitude of projects.

Making stencils and stamps

I  also tried playing with regular white school glue and made a few discoveries. For one, white glue is a wonderful medium to use to obtain a crackled paint effect on just about any surface.  You just need to paint a coat of paint (Acrylic) let it dry slightly, coat that with glue, let that become tacky, and give it another coat of paint. Drying times will vary between glues and paints, so some experimenting is required. However, the effects are so interesting.

Another thing I have learned to do with white glue, cardboard, and aluminum foil is make faux metal embellishments. By drawing a design onto a piece of cardboard with glue, letting the glue dry, then covering the glue design with aluminum foil. Finally, I use inks to colour the foil to make it look like aged metal. The possibilities  are endless.

I am really pleased  with my experiments and  I am happy to share these ideas. Who knew something so plain as glue could be used co creatively? I hope that you get to play and make some discoveries of your own. A few words of caution though:  always work with glues in a properly ventilated area, and don’t stick your fingers together! Please, don’t ask how I know.

~*~*~*~*~*~*~*~*~*~*~*~*~*~*~*~*~*~*~*~*~*~*~*~*

Ann is a Mixed Media Artist, Designer, Instructor, and writer working and living in the country side of Canada’s capital. Where she often finds herself in “sticky “ situations and wishes she had invested in glue stock!

~*~*~*~*~*~*~*~*~*~*~*~*~*~*~*~*~*~*~*~*~*~*~*~*

.

.