Painted Paper Collage

~ * ~

This article is written by Debbie Davis

One of my favorite things to do is paint and collage onto mixed media paper.  When using paper, I let go of any apprehensions about messing up a nice canvas or other expensive substrate.  This allows me to work freely and just have fun.  Once a paper collage painting is complete, depending on the size of the paper,  it can be cut to make smaller pieces of art or you can use the entire piece.

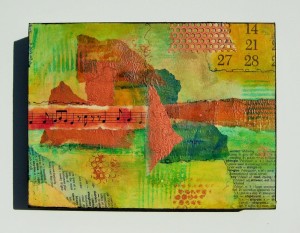
mixed media collage on canvas

I usually start by collaging various papers onto the mixed media paper.

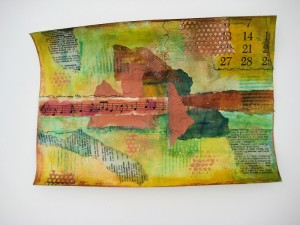
For the collage painting above, I used pieces from a vintage ephemera music book, dictionary and calendar page.  I also added some deli paper that I had painted and crumpled to give it some texture along with some painted drywall tape.  Once the papers were collaged on the mixed media paper, I added some paint and did a bit of stamping with a piece of cardboard that I had brushed some paint onto and pressed onto the paper.  I also used a piece of the drywall tape as a stencil and pounced some paint through it.  Line work was added using a Pitt artist pen.

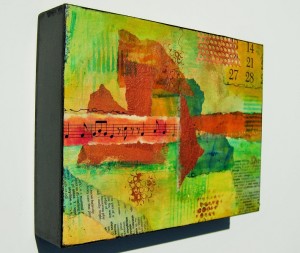
mixed media collage on canvas

I sometimes mount the paintings onto wood panels that I purchase from my favorite art supply store.  Another option is to buy clearance craft art from your local hobby/home decor store, that is done on wood pieces or panels to repurpose and use as your substrate.  I am always on the lookout and buy a lot of my substrates at 80% off.  I recently paid $2.00 for some panel boxes that had words printed on them.  They were just the size I needed for a few of my paper collage paintings.

mixed media collage on canvas

Cut your paper close to the size of the substrate.  Extra paper can be trimmed off after the glue dries.  To adhere your art onto the substrate, use PVA glue by adding it to the center of the substrate and brushing it out towards the edges.  You need to make sure and cover the entire top of the panel with the glue.  You don’t want the glue to be too thin that the paper won’t stick in some areas. You also don’t want to put so much down that it is oozing out the sides once you get the paper down.

Next lay your art onto the panel smoothing out any air bubbles.  I like to cover it with wax paper and roll out the bubbles and smooth down the paper using a brayer.  Next, leaving the wax paper on the painting,  put some heavy books on top and leave to dry overnight.  Once dry, paint the sides of the substrate and finish it off with a spray sealer or varnish.

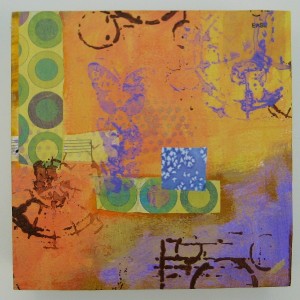
Here is another painting I completed recently and mounted on to a wood panel.  I used some scrapbook paper on this one along with stencils.

mixed media collage on canvas

~*~*~*~*~*~*~*~*~*~*~*~*~*~*~*~*~*~*~*~*~*~*~*~*~

My name is Debbie and I live in Morton, Illinois, USA. I’m happily married and have a wonderful family that includes a daughter, son, son-in-law and 3 of the sweetest grandchildren ever!

What I love most about mixed media art is that you don’t have to be an expert at anything to create beautiful art. It is a great way to recycle found objects. Art is such a wonderful stress reliever. I just wish I had more time to play!

I have a blog called In Art Therapy where I share my art along with techniques I have learned.  I hope you will come visit me there.  I also have an Etsy shop called Artful Explorations where I place some of the art I have created for sale.

~*~*~*~*~*~*~*~*~*~*~*~*~*~*~*~*~*~*~*~*~*~*~*~*~
Mixed Media Mermaid Painting

This article was written by Michelle Brown

I’ve signed up for a tip-in page round robin with one of the groups I belong to over the internet. We are to create a layout of 2 pages each month to send to another on our list.

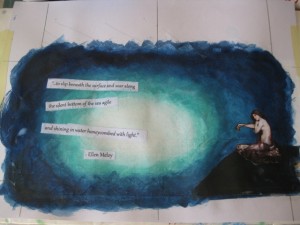
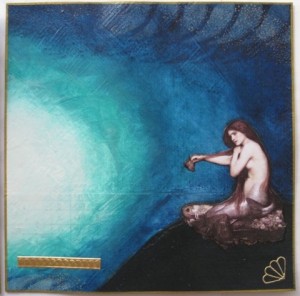
Last month the assignment theme was mermaids and sea creatures and I had heaps of fun creating this layout. I also love the method and formula that seems to be developing for this project and that’s what I wanted to share with you today.

mixed media art with mermaids

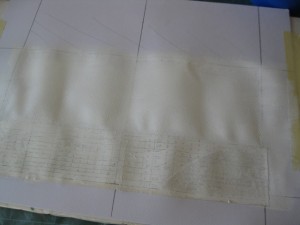
Firstly I take a piece of water colour paper and tape it to a backing sheet, covered in cereal box plastic (as shown in MMA Tips Video #1), add some ephemera with PVA glue then cover with a layer of gesso.

ephemera and gesso base

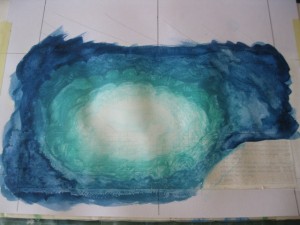
Then I started adding acrylic paints. I was after an effect of looking up into the sunlight from depth of the ocean, so I wanted to use teals and blues and phase them into white. I build up each layer, blending al title between colours and allowing it to dry a little before I add another layer.

white, blue and greens paints

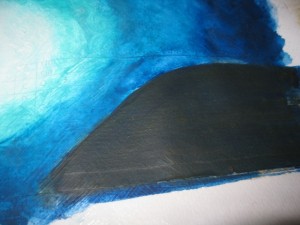
I painted the rock for the mermaid with  a little brown and dark blue. I avoided using black as I wanted it to be dark but not too solid, so the brown and navy washes worked well.

blues and browns for rock

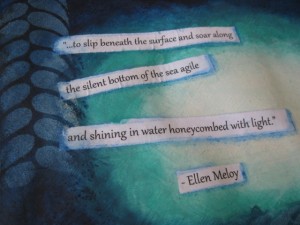
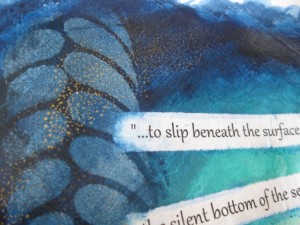
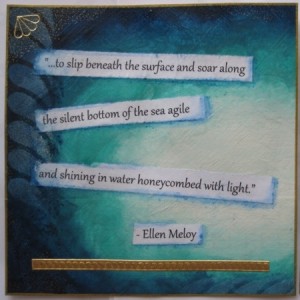
I found a great quote via Google and typed in up in nice font, printed it out then for it into strips. These got stuck onto the background along with the mermaid, with gel medium. The mermaid image was found over at Paper Street Supplies (no longer available.)

computer generated text to add to the story

Then some more blues were added to make the border darker and stencilling, with white paint, and highlighting words, with water coloured pencils, were added.

paints and pastels

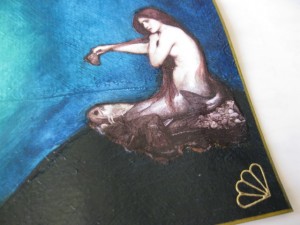
After varnishing the layout, I realised it needed a few highlights, Since I couldn’t find my gold thread to add hand stitching, I chose to use a textured stamp and add a free area with Gold Brilliance ink. I heat set the stamping  with a heat gun as I was worried it may not dry properly over the varnish (and I was in a hurry!)

gold highlights added

Then I cut out the pages with a cart knife and metal ruler, added gold edging with metallic pens. i also added a few little gold sticker and some german scrap to finish it off.

right side of layout

left side of layout

~*~*~*~*~*~*~*~*~*~*~*~*~*~*~*~*~*~*~*~*~*~*~*~*~
Michelle Brown is passionate about mixed media art and enjoys sharing her knowledge and techniques with you to allow you to express your own creativity. Michelle understands that many of us have an inner need to create. By learning a few basic techniques the amazing world of mixed media art is accessible to everyone! You can see more of her work at Mixed Media Art.

~*~*~*~*~*~*~*~*~*~*~*~*~*~*~*~*~*~*~*~*~*~*~*~*~
.

.

Vintage Ephemera

~*~*~*~*~*~*~

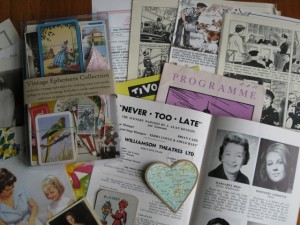
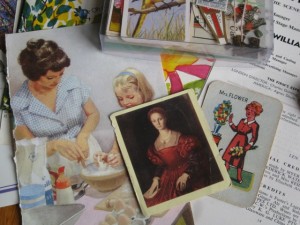
I am having a bit of a vintage ephemera fetish at the moment and thought I’d share what I have collected and learn so far.

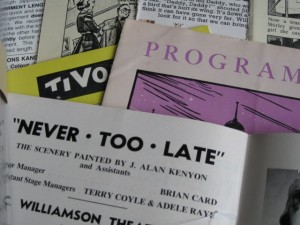
Vintage ephemera consists of “vintage” being anything old. Often this will be from the turn of the century to about the 1950’s. The 1960’s to 1980’s seem to fit more into the retro category, but this era may also be covered when searching for such things. “Ephemera” refers to things that are fleeting or short-lived, which may seem like a contradiction, but in my search, it usually refers to paper and cardboard type products; old pages of text, receipts, sheet music, postcards, greeting cards, posters, cigar cards, swap cards and playing cards all may feature is the collection. Old books often feature in this product grouping as well.

Finding vintage ephemera from the source is the best place; collections from old relatives are the best find as they also have a personal connection. Some second hand shops, flea markets or church fates are good places to go looking for them. If this isn;’ your style (these places can be very dusty and not always the best odds of finding soothing worth while and at decent price) there are places now that have done the hard work for you and have compiled vintage ephemera kits (see L’Uccellos and Meet Me at Mikes ~ both in Melbourne, Australia)

To use original or copies?
This debate continues to rage across the mixed media art world. Some artists love using originals to add authenticity to their work, using rich papers, tinged with age and passed down. Others will scan the originals which preserves the original and allows for multiple reprints and re-sizing.  Books in particular are most argued about.

I personally will decide on a case by case basis; if it is something that I have multiples of, or doesn’t have a significant emotional attachment, I will often use originals. If the piece has intrinsic or emotional (family) value, the scanning to print copies is preferred.

*~*~*~*~*~*~*~*~*~*~*~*~*~*~*~*~*~*~*~*~*~*~*~*~*~*~
I would love to hear about your favourite place to find ephemera ~ leave a comment telling us about your best find!


*~*~*~*~*~*~*~*~*~*~*~*~*~*~*~*~*~*~*~*~*~*~*~*~*~
If you would like to read more…

Now there’s a hip way for crafters to bring family history into their daily lives. Collage Lost and Found combines basic collage techniques and found objects to create edgy and unusual crafts with not only style, but a story to tell, as well. Highlights include:
-20 step-by-step projects with easy, fashionable designs for greeting cards, magnets, necklaces, journals, and more
-Sassy, and alluring artwork that reflects the author’s old-world Sicilian upbringing and her fascination with a bygone era
-Inspirational photo galleries packed with ideas, as well as information on basic collage, collecting ephemera, and jewelry techniques
Readers won’t be able to resist these clever ideas for turning long-forgotten treasures into items they can wear, display, or send!


Vintage Collage Journals is the sequel to artist Maryjo Koch’s Vintage Collage-Works, her first book illustrating her unique style of collage art with antique ephemera. In her new book, Koch has compiled an inspiring portfolio of her many themed journals combining collage techniques with watercolor painting and other artist’s techniques. She explores the collage medium in travel journals, recipe keepsake books, and nature and garden sketchbooks. As an avid collector of antique paper ephemera, Koch utilizes the things she collects in inventive ways to add personal touches to her journals, mingling them with photos, sketches, and paintings of the many themes she explores. Along the way, she also shows how the act of making a journal can be a valuable way to explore an experience or subject in greater depth.
.
.