This article has been written for us by Linda Giese
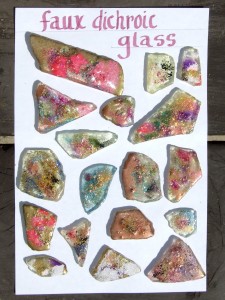
Making faux dichroic glass is a little smelly and time consuming, but a whole lot of fun and endlessly creative! Whenever I get out all the stuff I never want to stop. I keep adding more elements, trying new color combinations and when something works particularly well, I want to do it again before I forget what I did.
There is a little planning in the process and a whole lot of serendipity. I’ve been surprised more than a few times with how a particular embossing powder acts on the surface. Some spread into flower blossoms and some leave airy spaces while others cover everything you did before. The Asian text loses the paper and leaves the beautiful lettering.
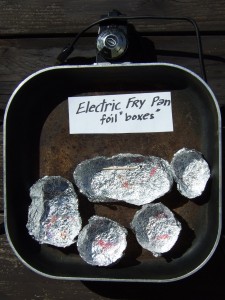
So let’s get started. I use my 44 year old electric frying pan for my heat source. I learned the technique from a friend with a hot plate. We set the glass on a craft sheet, but often burned our hands or dropped the glass using tongs. I tried to find an inexpensive used hot plate to no avail, so looked for another option. One more of my small appliances is now dedicated to my art. I tried putting my glass pieces on a craft mat, but soon had powder and beads all over my pan. I also burned my fingers and dropped a few pieces.
I tried aluminum pans, but most had patterned bottoms so the heat was uneven and parts of the embossing powder took forever to melt. My little foil boxes work so well. I can pick them up easily and keep most of the powder inside the boxes. I can also easily remove the finished pieces while leaving others in place.
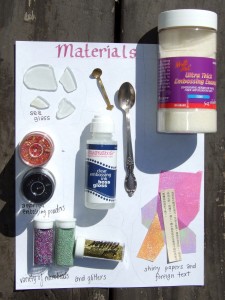
The other materials you will need are sea glass, clear embossing ink, clear ultra thick embossing powder, assorted colored embossing powders, a small spoon for adding new elements and a toothpick for moving things around. Optional extras are microbeads, glitters, shiny papers and foreign text.
The sea glass can be clear or colored, but should be nice and flat. If you can get real sea glass with the smooth edges, that would be ideal. But I often uses the bag of sea glass from the craft or dollar stores. I prefer the bottle of embossing ink with the dauber top to the pad. I feel I have more control and get better coverage. I found my shiny papers at the dollar store as holographic tissue paper.
The process is quite easy. I heat the frying pan to between 250 and 300 degrees fahrenheit I tear some pieces of aluminum foil and fold up the sides, pinching the corners for open boxes, trying to keep the bottom nice and flat. I put embossing ink on one side of the glass and dip it in the clear ultra thick embossing powder. Put the glass, powder side up, in the foil box and into the heated pan until it melts.
Now it is time to have some fun. Add some papers (save the text for a near the top layer)or add microbeads, or colored embossing powders a bit at a time with a very small spoon. Let each layer melt before adding more. Don’t add too much powder at a time. Whenever you want something to show through, add more clear embossing powder on top.
I keep preparing new pieces while waiting for others to melt. You will know it’s all melted when the whole top is shiny. You won’t have to add any more embossing ink after the first layer because the wet powders will grab the additional layers. Leave the pieces in the pan as you add things and remove when they are finished. The top edges of the foil are cool enough to carefully lift out of the pan, but be aware that the glass will be very hot! Let it cool before you touch it.
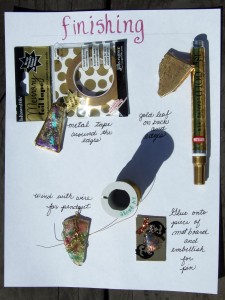
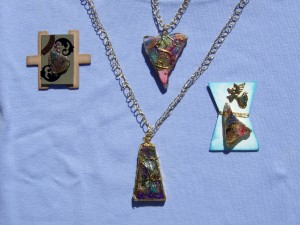
Now that you have a nice array of beautiful pieces, what do you do with them? Most of mine are made into pendants. I also crochet gold thread (just a chain stitch) for the necklace when I sell them. I use 24 gauge wire, cut a piece, make the top loop, wind randomly and tighten. Sometimes I use my gold pen on the edges and or back. I tried the metal tape around the edge, but wasn’t pleased with the result. I also like making the smaller pieces into pins. I glue them (I use Aleene’s Tacky Glue) to small pieces of mat board and embellish them. I adhere a pin back. You can also use them on a mixed media canvas or board.
Let me know if you come up with more ideas for additions or uses. Have fun and be creative!
Hugs, Linda
~*~*~*~*~*~*~*~*~*~*~*~*~*~*~*~*~*~*~*~*~*~*~*~*~
Linda Giese has an altered book in the Autumn 2012 issue of Art Journaling. She welcomes emails, questions and comments at linda.giese@yahoo.com
~*~*~*~*~*~*~*~*~*~*~*~*~*~*~*~*~*~*~*~*~*~*~*~*~
.
.


Recent Comments