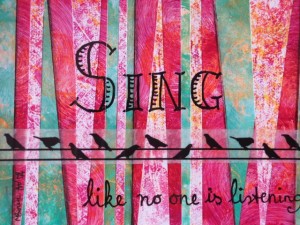
Fixing Your Gel Prints

~ * ~

When getting started with gel printing, it’s easy to create gel prints that we just don’t like! Sometimes with our first gel prints there is too much white space or the second print, also known as the “ghost print”, hasn’t turned out as we had wanted. But do not despair, we can fix these minor problems with a few more layers.

beginner prints mistakes

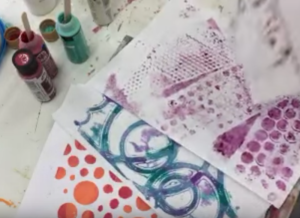
Here Michelle introduces us to techniques to solve the three major problems when we  get when starting out with gel printings.

Argh! Due to technical difficulties, only the first part of the video is playing – we are working on fixing it!

This video was originally shot on Periscope, so it’s a bit slow to get started!

When you try these techniques to fix your gel prints, remember the that translucency of your paints makes a big difference with your results. This is where the glazing medium is so important – it makes your paints more see through, which is just what we want when fixing our gel prints, so we can see the lovely layers underneath.
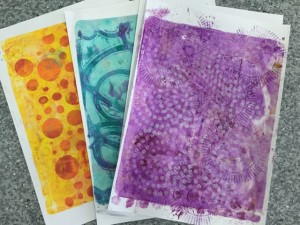
gel print techniques


And we’d love to hear from you – what ways and techniques have YOU found to help “fix” your gel prints?

Leave a comment below.
 

DIY Candle Holder

~ * ~

This article is written by Sandra Parés

Today I am going to show you how to make a candle holder with a magic light to illuminate our summer nights.

Candle Holder

The supplies I will use are the following:

  • An open top container glass (to make these candle holders usually I use recycled glass jars)
  • white tissue paper
  • the big shot and a star die
  • 8”x10” Gelli Plate
  • a brayer
  • black acrylic paint
  • a stencil
  • extra heavy gel medium (gloss)
  • 2 paintbrushes
  • Facetten-Lack metallic platin Vica Deco
  • a makeup brush
  • Primary Elements of LuminArte
  • hairspray
  • wire and a candle

First of all we will start using the Gelli Plate: we will use the brayer to put the black paint over the stencil, then we will press the stencil over the gelli plate. With this step we can print the mark of the stencil over the gelli plate. Then we will take a piece of tissue paper, it must be large enough to surround our glass jar. And we put the tissue paper over the gelli plate to print the texture. With this step, the mark of the stencil will print in our tissue paper.

And with the Big Shot and the star die we will open a few holes in our piece of tissue paper.

Candle Holder

Then we will paste with extra heavy gel medium the tissue paper around our glass jar and we will leave it to dry. Then we will paint the holes with Facetten-Lack to give a touch translucent at the glass. For this step, also you can use any paint or paste that allows you to do this translucent effect.

Candle Holder

Once dried we can add the color. I will paint with the Primary Elements of LuminArte, I will use the pigment directly. First of all we have to spray the entire glass jar with hairspray, you will see how the jar is wet. Taking advantage of this dampness, we will catch the Primary Elements pigments (the color or colors that you want) with a makeup brush and we will paint with them making circles. When we run out of pigment or hairspray dries, we will go back to add more product to get the whole jar painted.

Finally, if we want to hang it somewhere, we only need to put some wire around the jar. And don’t forget to put the candle inside!

Candle Holder

You will see that the result will be beautiful and shining: a candle holder with a magic light for our most special nights. The first time I used these candle holders was at my craft stop in the “Enchanted Night”, the shopping night from my city, and they produced an amazing shine!

Candle Holder

~*~*~*~*~*~*~*~*~*~*~*~*~*~*~*~*~*~*~*~*~*~*~*~*~

Sandra Parés loves working with mixed media! The colors and textures leave her amazed and she enjoys creating and getting their hands dirty with paint and gesso! On her site My mixed media you can find a mixed media online store, art and craft products, mixed media workshops in Spanish, tutorials, ideas and mixed media techniques.

~*~*~*~*~*~*~*~*~*~*~*~*~*~*~*~*~*~*~*~*~*~*~*~*~

.

.

Ideas on How to Make Personalized Gift Tags

This article was written by Martice Smith II

Creating Personalized Gift Tags

Who says small details don’t matter?! Not us mixed-media artists! As a mixed-media collage artist, I love building upon several layers of paint, doodles and various mark-making techniques to set my work apart from the rest.

If you’re looking to develop your own approach, try these ideas to create your own, personalized gift tags. There’s no need to spend a fortune on commercially made products when you can add a unique touch of your own- using what you already have. Just the extra spark needed for a one-of-a-kind gift!

Here are a few supplies to help get you started:

  • Gelli plate
  • acrylic paints
  • paintbrush
  • brayer
  • white ink pen (for doodling)
  • cardstock / kraft paper
  • stencils (I used Tags & Labels stencil from DecoArt)
  • metal eyelets
  • embroidery floss / twine

Personalized Gift Tags – on the Gelli Plate

1. Create the gelli prints, use prints from your stash, or paint directly onto paper.

Using acrylic paints, use a brayer and roll an even, smooth layer to the Gelli plate. You can also use a round tip paintbrush and paint directly on top of the Gelli plate. Make sure to paint loose brushstrokes, going in various directions. This will give you visual interest.

2. Next, lay down a sheet of cardstock (or your choice of paper) and pull a print.

Creating Personalized Gift Tags

3. Use stencils.

Create a large tag template to use or trace through and cut out the Tags & Labels stencil from DecoArt.

Creating Personalized Gift Tags

Creating Personalized Gift Tags

4. Preserve your work!

It’s important to seal the paintings on your tags, especially if there’s any water soluble media. I like to use a spray varnish first. (Remember to do this in a well-ventilated area, to avoid any irritation.)

For one of my tags, I’ve brushed on a thin layer of Crackle Glaze to give a cracked, eggshell appearance.

After drying for several minutes, I brushed on a layer of Triple Thick Gloss Glaze to keep my colors intensely vibrant and shiny. (Both products are from DecoArt.) 

5. Add the finishing touches. 

Eyelets, embroidery floss and twine makes these tags look more polished and really sets the tone for the special gift inside. I love things that twinkle, so I used Sheer Shimmer Spritz in Sparkle (from Imagine Crafts) for some drama.

Add other embellishments to underscore the theme of your tags and you’re done!

Check out these one-of-a-kind gift tags!

Creating Personalized Gift Tags

Creating Personalized Gift Tags

I’ve used a combination of different elements and techniques, such as:

Acrylic paints and rub-on stickers on Kraft paper, DecoArt’s chalky finish paint (Remembrance), gelli paper scraps on foam dots, threading glass beads, faux stitching, and a cute snowman stamp from RubberMoon

Other ideas to try:

▪   Think about how the tag ‘feels’ in your hands. You may want your tags to have a smooth, velvety feel to them. If so, try Dura Clear – Soft Touch Varnish (from DecoArt). This stuff is really impressive!
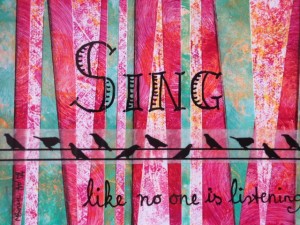
▪   Incorporate symbols and doodles.

There’s nothing like the repetition of shapes to add dimension and rhythm to your tags. I’ll be sharing more doodling and intuitive painting techniques in my online, art course ‘Cultivate Your Symbology.

Check out sneak peeks of the lesson I’ll be teaching in the ‘My Color is Beautiful Art’ workshop HERE and HERE

Do you include gift tags on your presents? If so, do you prefer making them yourself or spending a little extra money for the pre-made ones? 

Happy creating!
.

.

Turn your Gelli Prints into Inspiring Framed Gifts

~ * ~

This article is written by Michelle G. Brown

Mono-printing with GelliArts Gelli Plates has become one of my favourite mixed media art techniques for creating backgrounds (you can see some of my first attempts and step-by-step guide here and once you get into the swing of things, the prints pile up quickly! So I decided to take a second-hand photo frame and up-cycle it into an inspiring piece of mixed media art.

Use background papers into a handmade gift

Materials

– Background papers or Gelli prints

– Photo frame; here I used a 5” x 7” frame

– piece of cardboard to fit frame

– glue; PVA or Gel Medium

– Washi tape

– Black Marker; here I’ve used my Golden Black pen Montana Marker with Golden Fluid Acrylic

Create your Framed Gift

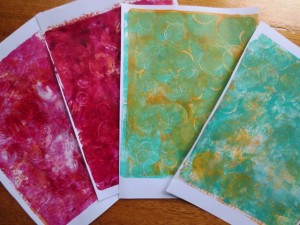
1. Gather your materials and a few pieces of background paper in colors that work well together

Using Gelli prints to make handmade gifts

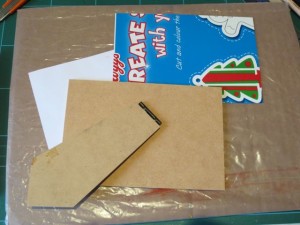
2. Take the back off your photo frame and use it to cut a piece of cardboard to size so it will fit into the frame. I used a piece of cereal box cardboard. Check that it does fit into the frame and trim if needed.

Gelli prints to create mixed media gifts

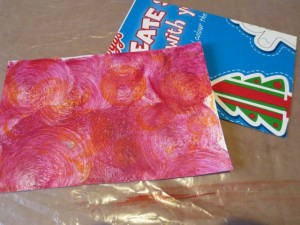
3. Use the cardboard to cut a piece of background paper to size.

Gelli prints to create mixed media gifts

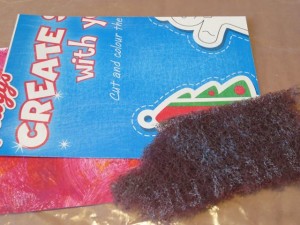
4. Use a piece of scotch brite or sandpaper to rough up the cereal box cardboard. Then stick the background paper to the cardboard. Flatten out any wrinkles.

Gelli prints to create mixed media gifts

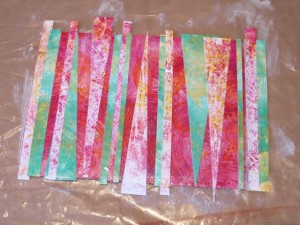
5. Cut two contrasting background papers into strips and thin triangles. Stick these to the background piece. Leave to dry and trim the ends to size.

Gelli prints to create mixed media gifts

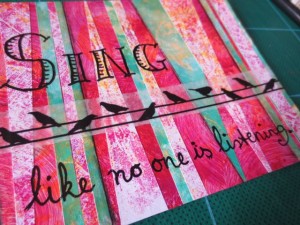
6. Add a strip of Washi tape and write in your inspiring quote with the black marker. Seal with Gel medium or varnish. Leave to dry.

Gelli prints to create mixed media gifts

7. Place your mixed media art into the frame, replace the back and your gift is ready to give!

(I forgot to take a final photo of my piece in the frame but here it is finished!)

Gelli prints to create mixed media gifts

I hope this has inspired you to get out those Gelli prints or dive into your stash of background papers and put them to good use!

Happy creating,

Michelle

~*~*~*~*~*~*~*~*~*~*~*~*~*~*~*~*~*~*~*~*~*~*~*~*~

Michelle G. Brown is passionate about mixed media art and enjoys sharing her knowledge and techniques with you to allow you to express your own creativity. Michelle understands that many of us have an inner need to create. By learning a few basic techniques the amazing world of mixed media art is accessible to everyone!

Michelle lives with her husband and two boys in Melbourne, Australia. When she is not creating or on Facebook, she’s at karate training. Just to make sure she’s properly busy, she has also adopted the From Picture to Page Scrapbooking and Papercrafts Show

~*~*~*~*~*~*~*~*~*~*~*~*~*~*~*~*~*~*~*~*~*~*~*~*~

.

.