Gelato Resistance Technique

~ * ~

This article is written by Michelle G. Brown

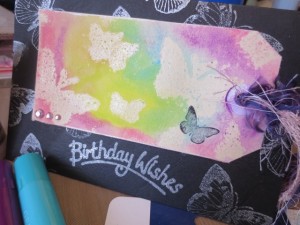
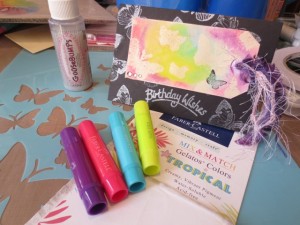
Know what it’s like to wake up early with a BRILLIANT idea in your head?!? That happened to me this week and I couldn’t wait to combine this gorgeous Kaisercraft butterfly stencil with the Goosebumps and Gelatos! The results was this bright card  – perfect for my nieces birthday!

Gelatos work well with this resistance technique with goosebumps

~ * ~

Materials

.

Michelle G Brown creates this bright butterfly birthday card

* Shipping tags

Kaisercraft Template – Flutter

* Goosebumps by Imagine Crafts 

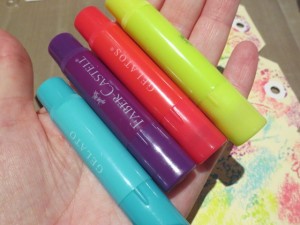
* Gelatos – Tropical Set by Faber-Castell

 Plus

  • plastic cereal box sheet
  • masking tape
  • water container

And card making stuff, as desired

~ * ~

Gelato Resistance Technique

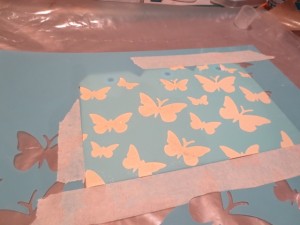
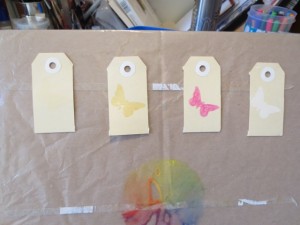
Gather materials and add the tags onto the plastic sheet, using masking tape to secure the stencil (it’s easier than trying to hold it still with one hand and apply the Goosebumps with the other – trust me on this one!)

Michelle G Brown creates this Gelato Resistance Technique

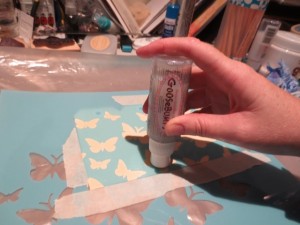
Daub the Goosebumps medium on the stencil. Once you get to the end, go back to the start and repeat to add a second layer. Take care not to add too much or the stencil will bleed.

Michelle G Brown creates this resistance background

Set tags aside to dry. Wipe your stencil clean with a baby wipe or kitchen towel and a little water. The goosebumps will clean off your stencil if you wipe it STRAIGHT AWAY!

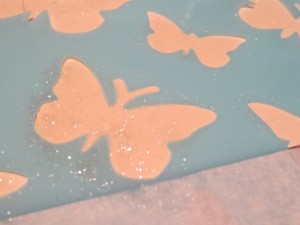
The Goosebumps medium also comes in “Shimmer” which has silver glitter in the mixture.

Michelle G Brown creates this background with shimmer goosebumps

Grab your Gelatos – I used the Tropical set. You can use a combination that inspires you!

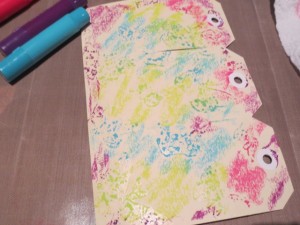
Color in with the Gelatos. This is the fun part!

Michelle G Brown creates a Gelato resistance background

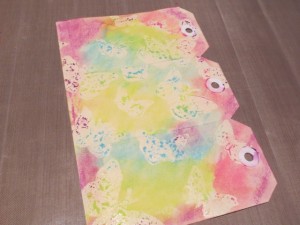
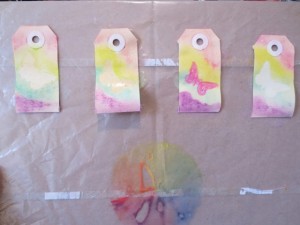
Then use water to activate the Gelatos. I use my finger and start with the lighter colours, cleaning off my finger between colours. Use kitchen towel to rub over your butterflies and clean them up a bit.

Michelle G Brown creates a Gelato resistance backgrounds

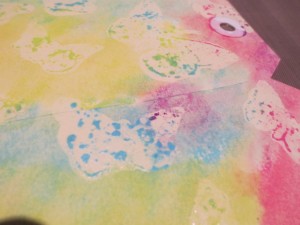
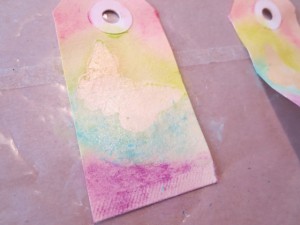
Some clean off better than others, depending on the amount of goosebumps applied – I love this effect!

Michelle Brown creates a Gelato resistance background

Now your tags are ready to turn into whatever you choose – a card, bookmark or gift tag!

~ * ~


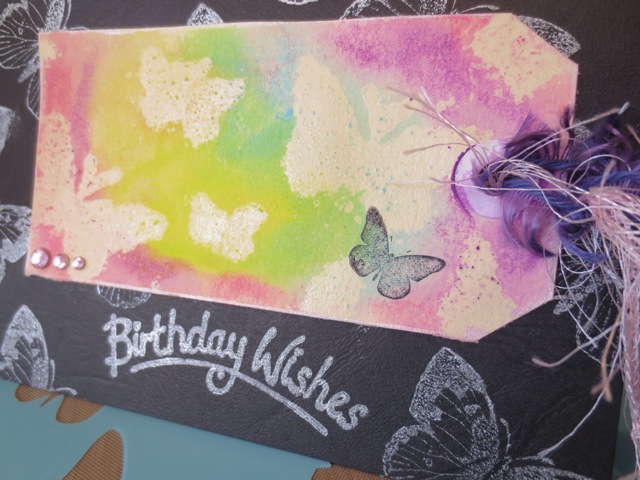
Butterfly Birthday Card

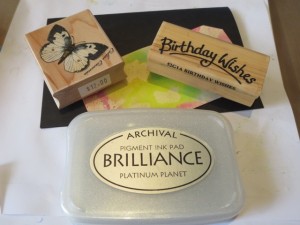
Gather your card making stuff. Here I’ve used black card with silver ink and a few other embellishments to complete the card.

Michelle G Brown makes a handmade greeting card

Using shipping tags makes it easy to add fibres into the top hole. I’ve also added a bit of bling.

Handmade greeting card

~ * ~

Gelato Resistance Trials

After I finished my first card with Goosebumps I realised I had other mediums that could also produce a resist with the Gelatos. So for the sake of completeness, I trialled a total of four mediums:

1. Goosebumps

2. Clear embossing powder

3. Crayon (using pink because I couldn’t find my white one)

4. Gesso

Each mini tag got a butterfly in each of the mediums

shipping tag trials

Then I applies the same Tropical Gelatos as above, using the same process.


Here are the final results:

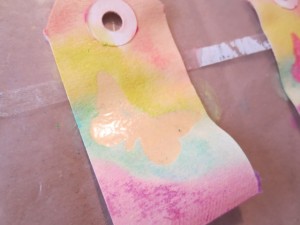
1. Goosebumps – quick an easy and produces a soft resist

2. Clear Embossing Powder – produces a clear, shiny image. Applying the heat to melt the embossing powder has made the small tag a bit wavy

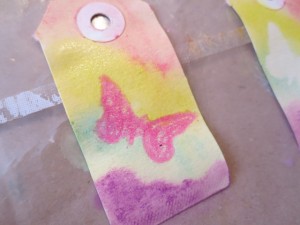
3. Crayon – quick and easy; not a solid image but a different look

Michelle G Brown is super creative

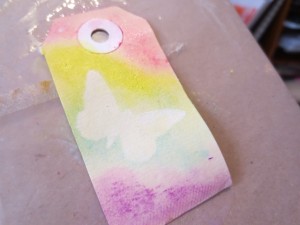
4. Gesso – nice white image

Gesso with stencil for mixed media resistance technique

Each medium produces a slightly different effect, so feel free to choose whichever medium you have on-hand. It’s great to have so many options when it comes to creating fun backgrounds for your mixed media art project.

Happy creating!

~*~*~*~*~*~*~*~*~*~*~*~*~*~*~*~*~*~*~*~*~*~*~*~*~

Michelle G. Brown is passionate about mixed media art and enjoys sharing her knowledge and techniques with you to allow you to express your own creativity. Michelle understands that many of us have an inner need to create. By learning a few basic techniques the amazing world of mixed media art is accessible to everyone!

Michelle lives with her husband and two boys in Melbourne, Australia.

~*~*~*~*~*~*~*~*~*~*~*~*~*~*~*~*~*~*~*~*~*~*~*~*~

Disclosure: Some of  these products have been provided by Imagine Crafts and Kaisercraft  for the purpose of review. All opinions are that of the MixedMediaArt team. The links on this page are affiliate links and any purchases help to support the ongoing work by MixedMediaArt.
A Desert at Sunset Painting by Gloria Malouf-Marsh

~*~

This article is written by Gloria Malouf-Marsh

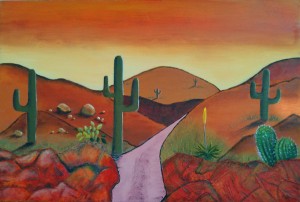
I started this painting from scratch.  I imagined a desert scene, I introduced working with sand textures, texture paste, warm colors sprang to my mind. The gold/yellows/oranges, different shades of hues, spindly plants that thrive in the desert climate, rock techniques, cactuses and the like. I also worked with dark and light – shadow and brightness.

Gloria Malouf-Marsh's Desert at SunsetI started at first to gesso the canvas. From 2/3 of the canvas up, I applied a paste and sand composition and let dry. This raised the texture and added an atmosphere to the base of the picture, which I would like to call a desert composition.   I had no idea where I was going; I just allowed my creativity to lead me.  I knew there was a road leading me somewhere. This road, I could see far in the distance. So I sketched mountains, rocks, cactuses, and started to build the tones and the painting started to come alive.  The rock face at the bottom and foreground was built up with texture paste composition.  I used a palette knife to apply knife shapes and irregular shapes to create the jagged rocks.   I wanted to maintain the warm shades and not to introduce any cool shades.

The different shades of the sunset were very effective.  I painted the area from the mountains upwards with vermilion red and used graduated shades of yellow/gold/ orange to create the sunset-scape.

As the painting was taking shape, I was transported into an earthy desert and the connection to the earth was of paramount importance to me. It’s also a form of meditation for me.  The warmth of the earth beckoned me deeper to the roots of the soil. I felt very close to the earth and very grounded. The symbolic meaning evoked a sense of humility and a deep sense of  gratitude. This desert time  brings on a change of heart, a transformation and a time to reflect.

The desert represents the hardships and challenges one has to overcome in one’s life. And through this challenge, one comes out so much better for it.

Keep creating! Enjoy!

~ * ~ * ~ * ~ * ~ * ~ * ~ * ~ * ~ * ~ * ~ * ~ *  ~

My name is Gloria Malouf-Marsh. I live in Brisbane, Australia, with my husband Greg and my daughter Salwa .  Springtime is glorious in Brisbane. I rise early and go for brisk walks, do my yoga practice and I’m inspired to face the day with inspiration and confidence. I get creative ideas for painting when I’m in nature. I love listening to nature’s sounds and watching and hearing the birds.

I am developing discipline in creating and making time for myself to daily paint. I seem curious to want to further my techniques.  I’m working with the building texture  mediums.  A sense of confidence and enjoyment has developed with me regarding honing my skills and techniques in the art medium, and I do enjoy this website so much.  Hearing peoples’ ideas and seeing their talents, just simply amaze me.  It is a special global family.   If I can create, so can you! Enjoy!

.

.

Focal Points in Mixed Media Art

~*~

This article was written by Madeline Faiella

Emergence

We talked about telling a story with mixed media art and now let’s talk about adding texture.

Emergence

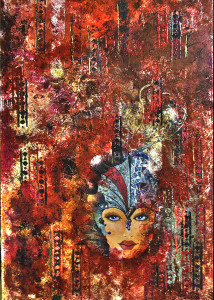
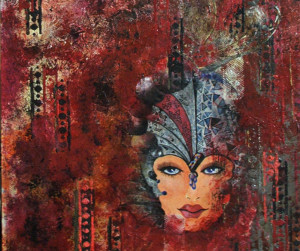
I chose this piece to explain the process because it’s easy to see what I did.  This piece is 3 feet tall and 2 feet wide but try it on a smaller surface if you like.  The surface I used is actually a court room board that an attorney let me have to which I added a base of white paint and gesso.  It’s great when you can re-use something.

The face in this piece is done on paper, painted with acrylic and attached to the base with gesso.  I applied gesso and molding paste in layers across the base surface and around the face in light, graduated layers using a wooden stick.  It’s vital that the edges of the face “live” within the background so lighter layers are better.  Sometimes I add color to the gesso and/or molding paste but in this case I started with clear and let it dry thoroughly.  When applying many layers, drying is very important.  This piece took a while to complete because the humidity here in South Florida can make it very difficult for drying even with the air conditioner on.  Leave your piece to dry overnight between layering to ensure that it’s very dry.

Layer after layer I created my piece with careful planning yet enough spontaneity to keep it free.  I used a trowel and molding paste colored to my desired color and ran it over stencils, burlap and other means of textural items.  Keeping the colors in mind, step back from your work each time you add another layer or item.  Build layer by layer.  The bags that hold oranges make a great textural tool.  Be creative and see what’s around your studio.

Try new things, keep it layered and have fun.  Happy arting.

~*~*~*~*~*~*~*~*~*~*~*~*~*~*~*~*~*~*~*~*~*~*~*~*~

Madeline Faiella is the owner of Madeline Faiella Designs, LLC.  She is a “tradigital” artist.  She works traditionally and digitally in Photoshop and Adobe Illustrator.  Her work is featured on home décor, electronic devices, stationary, fabric and more.  Her arsenal of tools is broad and her work varied.  She is licensed, published, appeared on TV and radio and has written continuing columns for the art and creative community.  She has a line of non-toxic acrylic paint “Art Jacket” with Earth Safe Finishes.  Her art education hails from The School of Visual Arts in Manhattan and the many years she absorbed cultural enlightenment globe-trotting during a 23 year singing career.  She’s been drawing, sewing and making since she was a child. See more of her work at www.madelinefaiella.com

~*~*~*~*~*~*~*~*~*~*~*~*~*~*~*~*~*~*~*~*~*~*~*~*~

.

.

Live, Laugh, Love Mixed Media Canvas

~ * ~

This article is written by Kim Kelley

In one of my other articles I had added that I constantly have several projects going at once, sometimes so many I forget what I was going to do with them! My biggest problem with doing that is remembering to take pictures of each step along the way and then where I put them on my computer. Literally I have picture floating around that I have no clue where they are. I have looked, but it seems they are like that one lost sock…doomed to never be found.

Any way back to the task at hand: this month’s project is a canvas that is a little larger than what I usually do, so let’s see how it turned out!

Here is a list of what I used:

~ 8” x 24” canvas

~ White gesso

~ Spray mist by Lindy’s Shabby Tuxbine Teal

~ Ayeeda  mist by 13 Arts – Chalk Burnt Sienna and Pearl Brown Light

~ Miscellaneous charms, flowers, metal pieces, wooden pieces, and jewelry pieces

~ Chipboard from Dusty Attic

~ Heavy Gel by Golden

~ Glue gun

When I start a canvas I usually have some idea of what I am going to create, knowing the theme, colors and style, with this one I just start throwing a bunch of random items into a box. As far as the colors go, I had just received an order with the 13 Arts sprays and decided I had to try them out. The teal I added because it seemed to work so well.

When I buy canvas I usually get the already primed, but still add my own gesso. So after the added gesso dried I started laying out my pieces…turning, moving until something finally stuck and I liked it. Grabbing my Heavy Gel I started attaching some of the bigger pieces and using my hot glue gun attached the smaller ones.

Dusty Attic with Spray mist by Lindy’s on this canvas

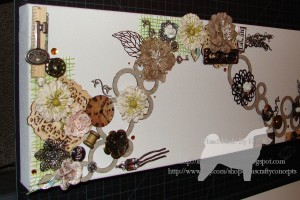
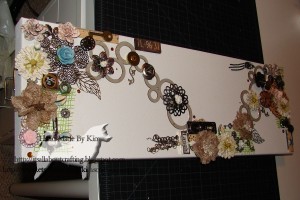
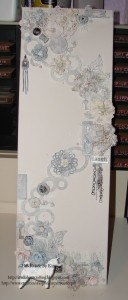
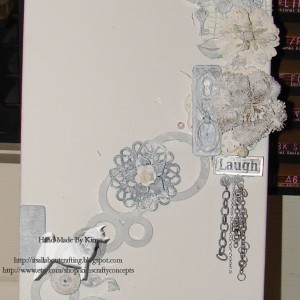
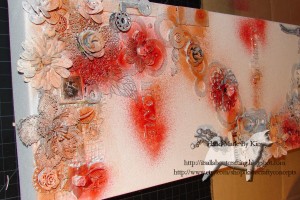
Canvas with embellishments 1

Dusty Attic with Spray mist by Lindy’s on this canvas

Canvas with embellishments 2

As you can see by the pictures color and material did not matter to me. I just grabbed and glued, knowing I would be painting over everything with gesso.

Dusty Attic with Spray mist by Lindy’s on this canvas

Gessoed embellishments 1

Dusty Attic with Spray mist by Lindy’s on this canvas

Gessoed embellishments 2

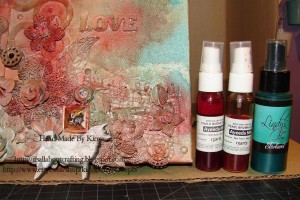
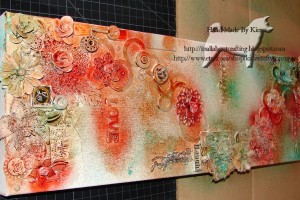
After it dried I started in with my sprays. Now I am one of those people that cannot wait for anything, I don’t like to use the word impatient too often but yes I am impatient, and with sprays it is not a good thing to be. You truly want your spray to dry before going onto the next color…it can get ugly real quick!

Dusty Attic with Spray mist by Lindy’s on this canvas

Sprays used

Dusty Attic with Spray mist by Lindy’s on this canvas

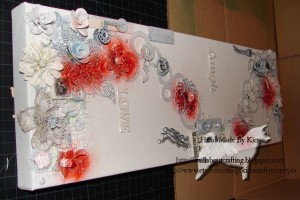
Spots of spray 1

Dusty Attic with Spray mist by Lindy’s on this canvas

Spots of spray 2

Dusty Attic with Spray mist by Lindy’s on this canvas

Spots of spray 3

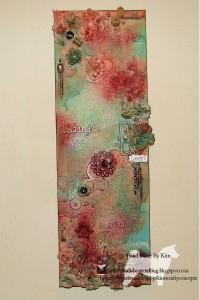
So I was very patient with this one. I continued to spray alternating each color until I felt like I was happy with it. SO….here I is my finished project.

Dusty Attic with Spray mist by Lindy’s on this canvas

Finished project

I was pleasantly surprised when my husband decided he wanted to hang it up, usually unless it is something I made specifically for him it goes in an area to be sold. (if I ever get my act together to do a show!) But this time he loved it so much he hung it right on the wall!

Life is short, do something creative every day!

~*~*~*~*~*~*~*~*~*~*~*~*~*~*~*~*~*~*~*~*~*~*~*~*~

Kim Kelley is borderline obsessive about her crafting and her art. She loves mixed media art because you are free to go beyond your comfort zone, using your imagination and exploring an anything goes mind set. Kim loves to learn and explore new techniques and hopes that any art she creates leads someone to find their inner creative artist!

~*~*~*~*~*~*~*~*~*~*~*~*~*~*~*~*~*~*~*~*~*~*~*~*~

.

.