Turn your Gelli Prints into Inspiring Framed Gifts

~ * ~

This article is written by Michelle G. Brown

Mono-printing with GelliArts Gelli Plates has become one of my favourite mixed media art techniques for creating backgrounds (you can see some of my first attempts and step-by-step guide here and once you get into the swing of things, the prints pile up quickly! So I decided to take a second-hand photo frame and up-cycle it into an inspiring piece of mixed media art.

Use background papers into a handmade gift

Materials

– Background papers or Gelli prints

– Photo frame; here I used a 5” x 7” frame

– piece of cardboard to fit frame

– glue; PVA or Gel Medium

– Washi tape

– Black Marker; here I’ve used my Golden Black pen Montana Marker with Golden Fluid Acrylic

Create your Framed Gift

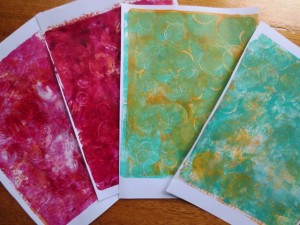
1. Gather your materials and a few pieces of background paper in colors that work well together

Using Gelli prints to make handmade gifts

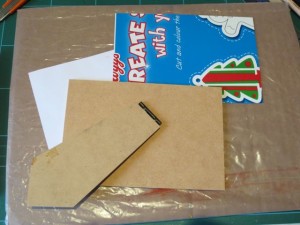
2. Take the back off your photo frame and use it to cut a piece of cardboard to size so it will fit into the frame. I used a piece of cereal box cardboard. Check that it does fit into the frame and trim if needed.

Gelli prints to create mixed media gifts

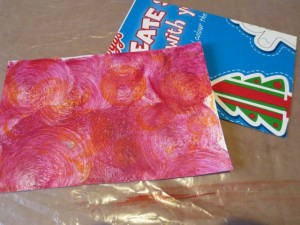
3. Use the cardboard to cut a piece of background paper to size.

Gelli prints to create mixed media gifts

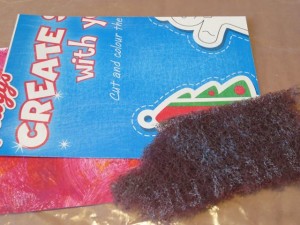
4. Use a piece of scotch brite or sandpaper to rough up the cereal box cardboard. Then stick the background paper to the cardboard. Flatten out any wrinkles.

Gelli prints to create mixed media gifts

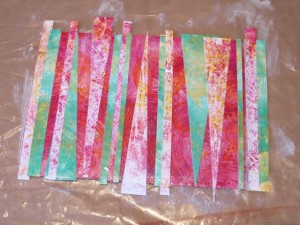
5. Cut two contrasting background papers into strips and thin triangles. Stick these to the background piece. Leave to dry and trim the ends to size.

Gelli prints to create mixed media gifts

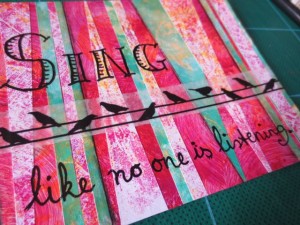
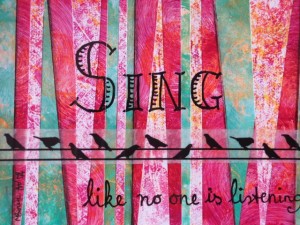
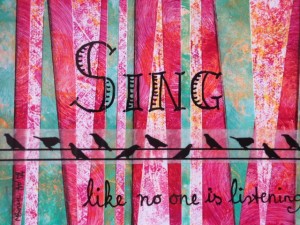
6. Add a strip of Washi tape and write in your inspiring quote with the black marker. Seal with Gel medium or varnish. Leave to dry.

Gelli prints to create mixed media gifts

7. Place your mixed media art into the frame, replace the back and your gift is ready to give!

(I forgot to take a final photo of my piece in the frame but here it is finished!)

Gelli prints to create mixed media gifts

I hope this has inspired you to get out those Gelli prints or dive into your stash of background papers and put them to good use!

Happy creating,

Michelle

~*~*~*~*~*~*~*~*~*~*~*~*~*~*~*~*~*~*~*~*~*~*~*~*~

Michelle G. Brown is passionate about mixed media art and enjoys sharing her knowledge and techniques with you to allow you to express your own creativity. Michelle understands that many of us have an inner need to create. By learning a few basic techniques the amazing world of mixed media art is accessible to everyone!

Michelle lives with her husband and two boys in Melbourne, Australia. When she is not creating or on Facebook, she’s at karate training. Just to make sure she’s properly busy, she has also adopted the From Picture to Page Scrapbooking and Papercrafts Show

~*~*~*~*~*~*~*~*~*~*~*~*~*~*~*~*~*~*~*~*~*~*~*~*~

.

.
Mini ArtBooks: Matchbook-styled!

This article was written by Martice Smith II 

Create Mini ArtBooks: Matchbook-Styled!

No-sew, mini artbooks…matchbook-styled!

Martice Smith II shows us a fun twist on the classic matchbook style design. Follow along as we create beautiful, miniature artbooks with a variety of decorative cardstock, sketchbook papers and a stapler. At least half a dozen in less than 30 minutes!

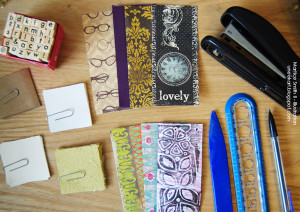
Gather supplies


Gather supplies and tools for Mini ArtBooks project

  • cardstock or decorative papers (for this project, I’m using paper from The Paper Studio®, Prima Marketing, Inc., and Crate Paper, Inc.)
  • blank sketchbook paper
  • ruler
  • pencil
  • bone folder
  • stapler
  • scissors (optional)
  • variety of stamps (optional) (I’m using the alphabet stamp set from Studio G and my own, handmade stamp)

Cut the cardstock and sketchbook papers, to size

Measurement for artbook cover (cardstock): 4.5 inches long by 2 inches wide

Measurement for blank sketchbook paper: 2 inches by 2 inches

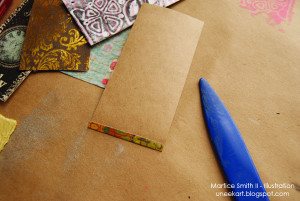
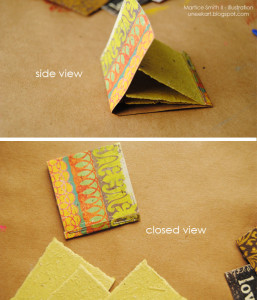
Fold up one edge


Fold up one edge of cardstock paper. Crease fold.

Decorative side facing down, fold up one of the edges about 1/2-inch.

Crease with bone folder.

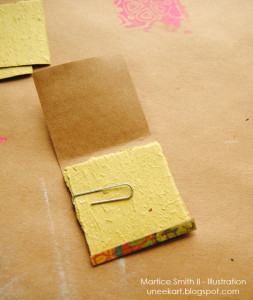
Add paper


Add sketchbook paper. Use paper clip to hold paper in place.

Gather the pieces of blank sketchbook paper and tuck them inside the fold. (Tip: to keep the papers nestled together, use a paper clip.)

I used a variety of paper types. For example, some of my mini artbooks contain handmade paper, charcoal and regular sketchbook papers. I was able to fit 6-7 sheets of paper in each matchbook-style mini artbook.

Lightweight paper works best for this project. If you decide to use heavier paper, you will need to add less paper; maybe 3-4 sheets instead of 7.

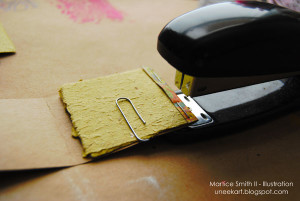
Staple the fold


Staple the folded edge

Staple the fold 1/4-inch up from the folded edge.

Fold the center


Fold opposite end of cardstock cover to finish the mini artbook.

Take the other end of the cover over the blank sketchbook paper and line it up with the bottom edge of the fold. Crease with bone folder.

Tuck this same edge under the 1/2-inch piece of stapled cardstock to form the matchbook-styled artbook.

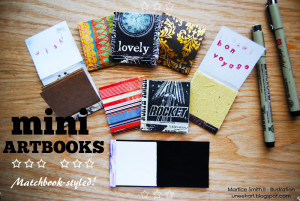
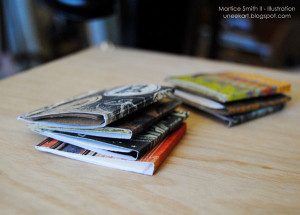
Since these are so easy and quick to make, why not make a dozen of ’em?! They look really nice in a big pile, ready to share with friends! Give them away as small gifts or make some out of collage papers and add them to your art journal when you’re on the go.

Stack of Mini ArtBooks with variety of cardstock covers

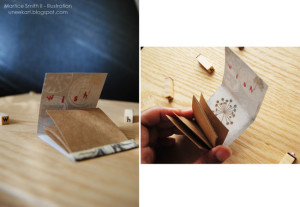
*Optional: use alphabet stamps to add a personal sentiment, rub-on stickers for contrast and distress inks to create a worn-out look. The possibilities for these mini artbooks are endless! Use your imagination to make them uniquely yours. Have fun!

Add embellishments to your Mini ArtBook for a more unique look

~*~*~*~*~*~*~*~*~*~*~*~*~*~*~*~*~*~*~*~*~*~*~*~*~

Author bio:

Mixed media artist and designer, Martice Smith IIMartice Smith II is creative director of Martice Smith II – Illustration & Design Studio, based in Kansas City, Missouri and owner of Uneek Art Boutique. She established herself as a freelance Illustrator and graphic designer after receiving her Bachelor of Arts Degree. Her stunning illustrations reveals her love for fashion, typography and wildlife- using a combination of analog and digital techniques.

Martice also contributes as an article writer for the Creating Mixed Media Art website.

You can see more of her work via her Facebook page or her blog. She invites you to join her monthly newsletter, Uneek Art Letter, for art biz tips, advice and free digital goodies!

~*~*~*~*~*~*~*~*~*~*~*~*~*~*~*~*~*~*~*~*~*~*~*~*~

.

.