A Mixed Media Art Canvas for my Mother

This article is written by Wilna Cremers

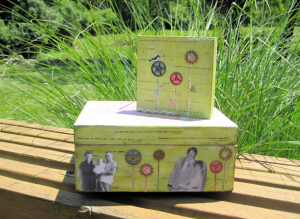
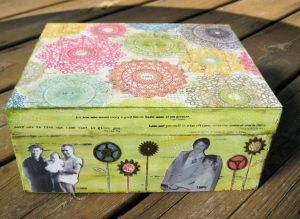
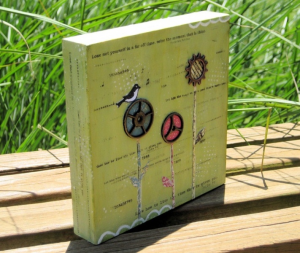
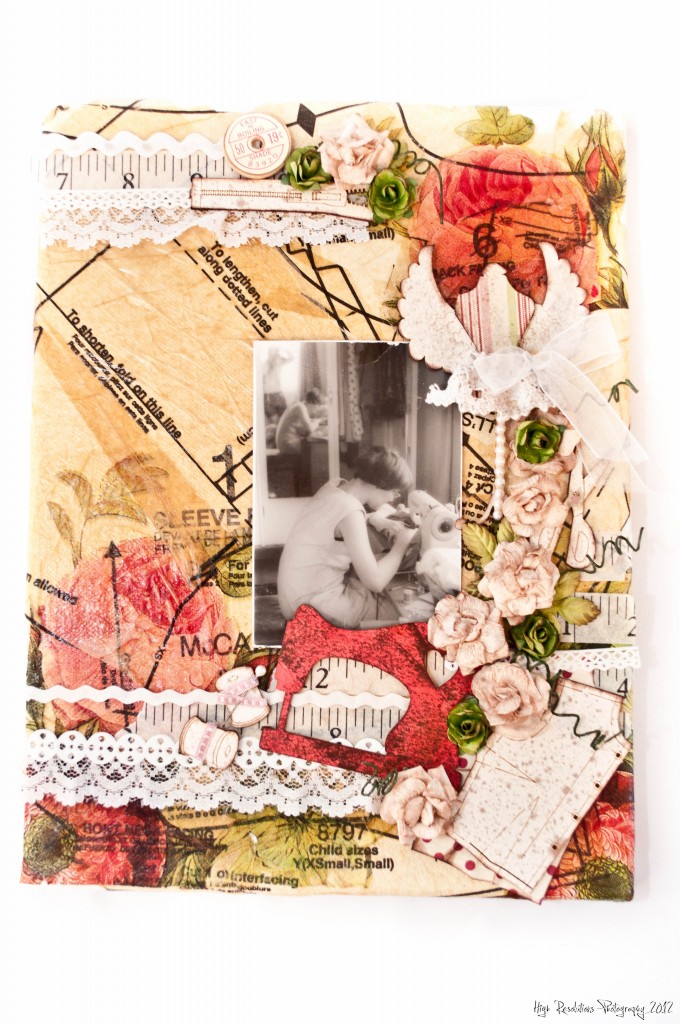
This canvas was inspired by my late mum, she was an extremely talented seamstress and nothing was impossible for her to tackle.  The chipboard items are from Enmarc and were perfect for this project.

Materials:

  1. Canvas recipe
  2. Canvas
  3. Serviettes
  4. old sewing pattern
  5. Plain embellishment –sewing
  6. Solo – Angel
  7. Podge
  8. Assorted Lace & ribbon
  9. paper roses
  10. 7 Gypsies tape
mixed media collage

Process:

  1. I decoupaged pieces of serviette to form the background.
  2.  I then decoupaged old pattern pieces on top of the serviette.  I was not very careful because I wanted a crumpled , textured effect.
  3.  I cross hatched about 3 – 4 layers of podge onto canvas.
  4.  I chalked all the chipboard and coloured some in with Copics, also sprayed with dye spray.
  5. I layered a washi tape measuring tape with lace, ric rac and some gel embellishments.
  6. I covered part of the dress form with paper and added a string of flat backed pearls.
  7. I spritzed the roses with Perfect Pearl mist as well as chalking them.

This is a weekend project as time is required for the podge to dry between layers.

~*~*~*~*~*~*~*~*~*~*~*~*~*~*~*~*~*~*~*~*~*~*~*~*~

I am a happy crafter who is happiest when playing with paper and beads.  I have crafted for many years and dabbled with fabric painting, decoupage, mosaic etc, but when I discovered Scrapbooking I fell in love.  I first started scrapping about 9 years ago and taught craft classes at my own coffee shop. This adventure co-incided with my Mom fighting breast cancer.   In 2006 my life turned upside down as my Mum lost her fight, and we immigrated.  To recover from all this I started teaching part time and then worked full time in a local craft store.

I have realised a dream and now part-own my own craft store.

I have been published in local South African magazines; I was on Let’s Scrap DT team for two terms and am currently on Enmarc Designs DT.

I am really enjoying mixed media as I can combine so many of my craft skills and there are no rules.  I am passionate about people exploring their creative spirits and am challenged when a client says “I am not creative” my answer is always, “have you explored different mediums, because you will eventually find a craft you like”.

~*~*~*~*~*~*~*~*~*~*~*~*~*~*~*~*~*~*~*~*~*~*~*~*~

.

.
SOAP Technique: Creating a Textured Background

This article is written by Sunita Rajvanshi

Materials:

Regular hand washing liquid soap

Acrylic colors & canvas

Method:

  1. Mix a little acrylic color in small quantity with liquid soap (without mixing water in soap); say a ratio of 1: 2.
  2. Make bubbles, and apply with brush on the canvas (you can make many colors and apply at the same time on the canvas).
  3. Now immediately put your canvas under the sun, before the bubbles disappear & keep there until it dries.
  4. Don’t use a blower (hairdryer) for drying as bubbles will disappear with its hot air.
  5. Your beautiful background is ready.
SOAP Technique

~*~*~*~*~*~*~*~*~*~*~*~*~*~*~*~*~*~*~*~*~*~*~*~*~

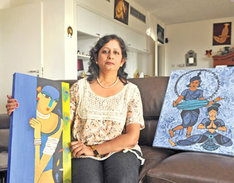
Creating a Textured BackgroundSunita Rajvanshi’s passion for Art started in early childhood in spite her studies in Science. Her relocation to Oman 4 years ago rekindled her passion and now she is using it to reach out and help the less privileged across the world.

She already did many exhibitions (including Dar Al Atta annual charity exhibition) in Muscat in last 4 years for charitable Causes.

Latest in year 2012, she took part in two exhibitions, to raise funds for PETRA (the Para equestrian and Therapeutic Riding Activities) Organization for disabled. One was “Celebration of Colours” from 23-27 April, 2012 with Tania Hens at Intercontinental Hotel and second was “Art for PETRA from 14-17 May, 2012 along with other eighteen artists.

She also worked as AWG art coordinator for 3 years until 2011. Also she is teaching “Mixed Media techniques in Collage” in PDORC Art Centre since 2009. She loves working with most of the mediums like oil, water color, charcoal etc. and nowadays experimenting with different textured backgrounds with Acrylics and planning to write a book about this.

She is also running a charitable Organization called “Second Chance Charitable Society in India to help the needy. One of her paintings appeared on the cover page of one of PDO’s publications in June 2011.

She enjoys leading workshops, also inspiring others to use their Art talent for helping needy by conducting more charity Art Exhibitions.

~*~*~*~*~*~*~*~*~*~*~*~*~*~*~*~*~*~*~*~*~*~*~*~*~

.

.
Mixed Media Layering

This article is written by Jon Webb

I am a beginner and my work so far has been simple. Much of what I have done has been altered imagery from my own photographs and images that I have downloaded from the internet. I have used a lot of photoshop techniques in this type of work. I am just beginning to learn the process of layering and using various mixed media techniques in the layering process.

My artistic style, if I have one yet, tends to be weird to put it bluntly.  I like to use humor in my art.  I believe humor, more than anything else, fuels my creativity. I go to great lengths, however to keep it clean and hopefully non-offensive.

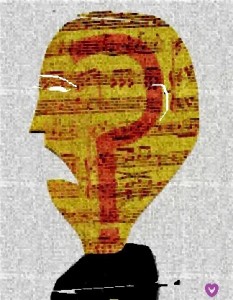
Here’s an example of my work which I have created. This is an image I call, “Can’t Name That Tune”.

Mixed Media Art Layering

It features a fellow named Hugo who has a song playing in his head that he can’t remember the name of. I created this from:

  • a piece of musical print
  • specialty paper
  • a piece of cardstock.

Procedure

  • I cut the specialty paper into the head shape.
  • I then cut the question mark out of cardstock.
  • I laid the specialty paper face down on my scanner and placed the question mark shape on top of it.
  • I scanned everything with the lid of the scanner open to let in the light – This created the transparency effect of the musical print paper over the question mark.
  • I then used computer graphics from the jpeg file menu to create the eyes, ears, and upper body areas.

Creating artworks from simple materials is really fun and exciting. Being resourceful will let you discover things and will certainly boost your creativity.

You are welcome to visit my blog anytime jonfwebb.blogspot.com. I hope you get a good laugh out of it if anything else. Thank you, once again.

~*~*~*~*~*~*~*~*~*~*~*~*~*~*~*~*~*~*~*~*~*~*~*~*~

Hi! My name is Jon Webb. I am a mild-mannered grocery store employee, who lives in a world of weird, ridiculous, and sometimes serious art which is represented here. Although my artwork is warped and twisted much of the time, it is G-rated and not meant to insult anybody, though I do reserve the privilege to poke fun at myself. I now live in the Dallas/Fort Worth Metroplex after spending most of my life in the western U.S. I am also a jack-of-a-few trades who mastered none of them. My greatest joy in life was the 25 years that I spent with my dear wife, Renee, who passed away in 2010.

I now invite you to visit my bizarre and sometimes serious world, and I hope you enjoy the experience. Come back as many times as you wish. To get the picture of what I am doing here, I recommend that you start at the beginning and work up to the current date. Remember, art saves!

~*~*~*~*~*~*~*~*~*~*~*~*~*~*~*~*~*~*~*~*~*~*~*~*~

.


.
Create Your Own Rub-ons

This article is written by Debbie Davis

I’ve been reading Marney Makridakis’ new book called Creating Time. I was intrigued by the name of this book because I always find myself saying things like, time goes by so fast, I don’t have enough time, etc.  I am hoping it will help me to at least feel like I have more time.  I am working on the first “Artsignment” in the book, which is creating a time box.

I wanted to add some quotes on time to the box and needed a quick, simple way to do it.  I had recently made my own text rub-ons for another project and thought that would be a great way to add text and dates to the box.

Creating text rub-ons

I found the quotes on-line by googling “time quotes” and then copied and pasted them into a word document.  I changed the font to a size and style that would fit on my project.  Using overhead transparency film, I placed the film into my inkjet printer so that the text would print onto the smooth side.

When creating rub-ons this way, you need to make sure to print text in a mirror image, otherwise it will be backwards when you rub it on your project.  Also, be careful not to touch the ink after printing or it will smear.  Lay the film, smooth side down, onto your project and, using your fingernail or a wooden craft stick, rub over the text/image you want transferred.  You can rub as light or as heavy as you want, depending on how clear you want the text/image to be.  I like to print off a string of symbols such as ########## and just randomly rub them on.

How to rub a text or image

After rubbing the quotes, etc, onto my time box, I decided to see if I could re-use any ink that might be left on the film.  I was so surprised to find that I could get another print out of most of what was on the transparency.  It was very light, but that just added to the look I was going for.

I added some additional text using the rub-ons so that it was darker in some areas.

Adding texts on the rub-ons    Rub the quotes on the time box

Please note that the rub-ons will not be permanent and will smear if you brush over them with anything wet such as paint or glue.  To set the ink, I took my project outside and lightly sprayed it with a little matt coating before doing any additional “wet” work on it.

Think of the possibilities with creating your own rub-ons!  Here’s an image that I printed onto the film and then rubbed on some scrapbook paper.  I found that you don’t need to set the ink when transferring the image to paper, unless the paper has been previously painted on or coated with any type of acrylic medium.

rubbing on a scrapbook paper

This is a fast and fun way to add text, numbers and even images to your art.


~*~*~*~*~*~*~*~*~*~*~*~*~*~*~*~*~*~*~*~*~*~*~*~*~

My name is Debbie and I live in Morton, Illinois (USA). I’m happily married and have a wonderful family that includes a daughter, son, son-in-law and 2 of the sweetest grandchildren ever!

What I love most about mixed media art is that you don’t have to be an expert at anything to create beautiful art. It is a great way to recycle found objects. Art is such a wonderful stress reliever. I just wish I had more time to play!

I have a shop on Etsy called Artful Explorations where I place some of the art I have created for sale.

~*~*~*~*~*~*~*~*~*~*~*~*~*~*~*~*~*~*~*~*~*~*~*~*~

.

.