Inverting Colors in Mixed Media Art

This article is written by Jon Webb

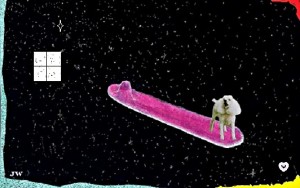
This artwork features my dog Wally who passed away several years ago. I call this artwork, “Celestial Surfer“.

Jon Webb’s Artwork

I created this by using:

  • black marker to make star-like dots on
  • water color paper
  • glue
  • photo cutout of my dog
  • cardstock
  • water color crayon

This is how I created it:

  • draw the surfboard and painted it with a water color crayon.
  • After the paint dried, I glued to the surfboard.
  • Then it was all scanned into the computer – I used the inverse colors feature from the jpeg menu to create the night sky effect (I actually had to use a photo of the dog with the colors inversed when I glued it onto the surfboard). When I inversed the colors in the computer, the photo of the dog also changed back to normal.
  • I created the window from the jpeg menu and, once again, inversed the colors to make it opposite of the surrounding background. The trim around the edges was created from cardstock and from the jpeg menu.

I usually experiment on different things to discover new ideas. Creativity as well assists me in all my artworks. Don’t be afraid to explore new things. Art is fun and you can always use art to express your feelings, thoughts and who you are.

I started a blog last month which features the rest of my artwork. Here is the link to it: jonfwebb.blogspot.com. You are welcome to visit it anytime. I hope you’ll like my artworks. I hope you get a good laugh out of it if anything else. Thank you, once again.


~*~*~*~*~*~*~*~*~*~*~*~*~*~*~*~*~*~*~*~*~*~*~*~*~

Hi! my name is Jon Webb. I am a mild-mannered grocery store employee, who lives in a world of weird, ridiculous, and sometimes serious art which is represented here. Although my artwork is warped and twisted much of the time, it is G-rated and not meant to insult anybody, though I do reserve the privilege to poke fun at myself. I now live in the Dallas/Fort Worth Metroplex after spending most of my life in the western U.S. I am also a jack-of-a-few trades who mastered none of them. My greatest joy in life was the 25 years that I spent with my dear wife, Renee, who passed away in 2010.

I now invite you to visit my bizarre and sometimes serious world, and I hope you enjoy the experience. Come back as many times as you wish. To get the picture of what I am doing here, I recommend that you start at the beginning and work up to the current date. Remember, art saves!

~*~*~*~*~*~*~*~*~*~*~*~*~*~*~*~*~*~*~*~*~*~*~*~*~

.


.
The “FEAR“

This article is written by Cheryl Crane

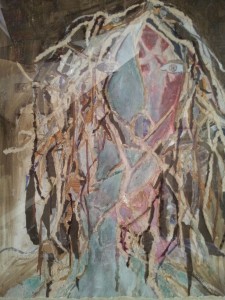
There are many layers in this artwork, layers of thoughts, tears, imagery, and art materials. This artwork was inspired by the 911 attacks on the world Trade Center. There are 2 thoughts intertwined in this piece.  One, Fear of death and dying; hopeful for a better life as we journey with the angels to a greater life without fear.

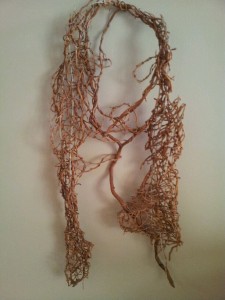
Below is a weaving of wisteria that inspired the imagery for Fear.  Fear was created after 911 as a reminder of evil that lurks.

Image preparation and materials

It’s a mixed media artwork that combines:

  • Stamps
  • torn newspaper with names of victims from the attacks on the world trade center
  • imagery representing death and dying.

The Angels on the face are digital imagery created from a painting. Green oil paint is used to complement the red and cause strong contrast.

The angels represent hope. Each piece of mixed media is painted on with gel medium.

Cheryl Crane

This piece began as a large Reeves watercolor, paper and a lot of newspapers, stamps, and textured papers.

I first planned my imagery levels of fear…fear of death and dying.  This imagery is collaged figures that are placed within the hair.  Different textures/papers are torn and ripped then glued using gel medium. The 2 stamps represent the United States and the beginning of Fear when the atom was split and the atomic bomb fell on Japan.

There is also ripped paper from an old Japanese newspaper.

Also in the hair of Fear is a ripped black paper.  If you look closely you will see the names of the victims who died in the attack. These names were posted in the Free lance Star.

On one half of the face is a cropped altered image of the Angels of Death.

This painting of Angels is an oil painting that hangs in Fredericksburg Baptist church in Fredericksburg, Virginia.

I took a photo of this painting and altered it using photoshop.  I then glued it onto the watercolor paper using gel medium.

The overall color scheme was planned as a monochromatic scheme.  However, I decided to add the greens and red (compliments to show conflict).  I used water and oil paint in the background.

That is how I created my artwork – The FEAR. I hope you like it!


~*~*~*~*~*~*~*~*~*~*~*~*~*~*~*~*~*~*~*~*~*~*~*~*~

Cheryl has been an art educator for 25 years in Stanford County Schools. She also teaches private lessons and sells art in her company Paint with Me. She is known as the Angel painter.

~*~*~*~*~*~*~*~*~*~*~*~*~*~*~*~*~*~*~*~*~*~*~*~*~

.

.
Super-quick Background Resistance Technique

This mixed media technique for creating a resistance image with white crayon is a simple method to make backgrounds, that is super-quick to complete and ideal for making many sheets for a large project.

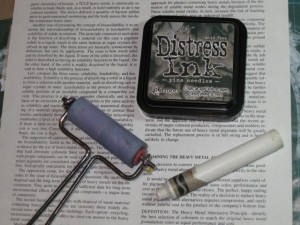
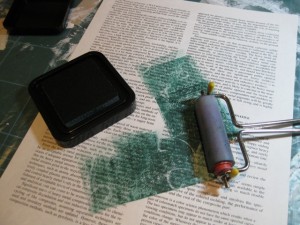
1. Gather materials; used on old conference paper text sheet (as available in the Ephemera kits), white crayon, brayer (like this Ranger Inky Roller Brayer, Medium 3-5/16-Inch) and Tim Holtz Distress Ink Pads in pine needles.

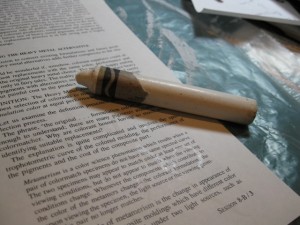
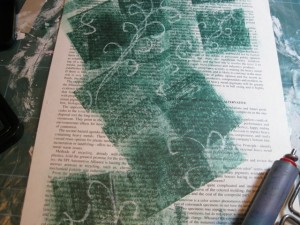
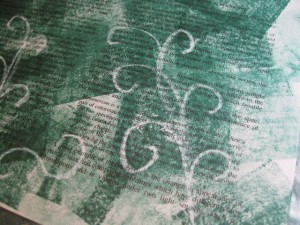
2. Use the white crayon to draw a pattern on the text sheet. I created swirls and squiggles. While it is hard to see where you have been, the light will just catch the crayon, so you get an indication of where you have already drawn. As I was going for a grunge look, I wasn’t too concerned.

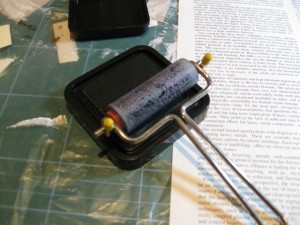
3. Load the brayer up with ink and apply across text page, at varying angles. The white crayon will begin to appear. I tried the direct-to-paper method with the ink pad but it was too hard to get a thick enough layer for the crayon to show through. Also my brayer is small, so each ink application doesn’t go very far and a motley affect results. As I’m going for a grunge look, I wasn’t concerned. A bigger brayer will give a more even finish.

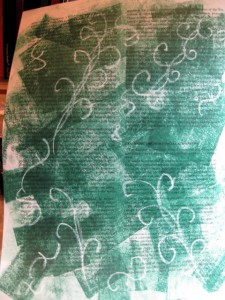
4. Continue to reload the ink onto the brayer and apply to the text sheet until it is completely covered to your satisfaction.

Now I have a background sheet ready to use in making my Christmas cards for this year. As I make about 50 cards each year, I need a design that will be easy to make many sheets and this background method suits that perfectly!

Happy creating!
(Hope that was quick enough for you!)

.
.

.

Welcome to Mixed Media Arts

If you are looking for inspiration and great mixed media ideas, then you have come to the right place!

Mixed Media Arts covers such a range of topics and techniques:

Have a look around and feed your inner muse – you never know when inspiration will hit. And remember; everyone can create!

To receive regular updates, special offers and freebies, join the Mixed Media Art community by entering your name and email over on the right to join our mailing list.  As a special bonus, you will also receive the free report on the Top 10 Tools and Materials you need to get started with Mixed Media Arts.

Happy Creating!
Mixed Media Art Team