Overcoming my Fear of Mixed Media

~ * ~

This article is written by Anjuli Johnson

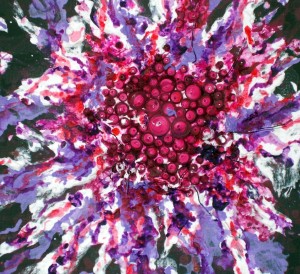
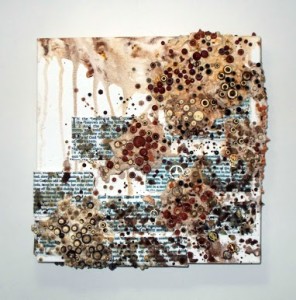
Mixed Media using acrylic paint, texture paste, quilled paper

Having the courage to break into a new form of art can be tough.  I remember my scrapbooking days and being fascinated with other forms of mixed media I would see around me.  My scrapbook pages were one thing- the altered books and art journals I would see in magazines were on a whole other level.  There are so many talented people who do amazing things with canvas, books, paint, beads, paper, and an infinite number of other mediums.  I was inspired every time I turned around, it seemed.  But the idea of actually trying to do something that didn’t involve preserving my own memories was extremely intimidating. How could I, just an ordinary woman, find a way to create such unique mixed media pieces?  I wanted to learn these awesome techniques, but I didn’t want to just copy what everyone else created. The only thing I had that made my creative work unique were the photos I used in my scrapbooking.  So, I kept my mixed media dreams in the back of my mind and stuck with what I was comfortable with.

Of course, then came 3 years of limbo.  I moved across the country and couldn’t afford to bring any of my things with me besides the bare necessities, and it was that long before I was able to access any of my art supplies.  To say I felt the absence of a creative outlet would be an understatement.  By the time I opened those boxes and started organizing everything, I was starving for my long lost supplies, most of which I’d forgotten I had.  There are few things better than unpacking boxes of art supplies.  The creative ideas are like a flood.  It was during this period that I finally found the courage I needed to start experimenting in unknown artistic waters, and as a result was able to develop my signature abstract collection that has been featured in several galleries around Raleigh and has led to some of my first commissioned works.  I’ve have further in the last two years than I could have dreamed possible.

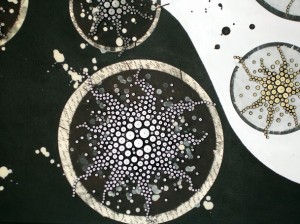
Mixed Media using paper clay, quilled paper, metal, acrylic paint

Mixed Media using paper clay, quilled paper, wire, acrylic paint

Throughout those months I realized the work I was doing was something I hadn’t seen anyone else do. My pieces were unique, not just because of my individual style, but because I was using tools and supplies in ways I hadn’t seen anyone else use. It wasn’t until that moment that I realized the infinite possibilities that are available to those who work in mixed media.

18*24 close up of my first commissioned work

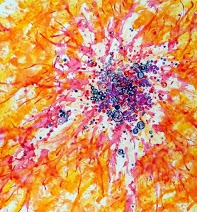
The Milky Way was created using various papers, quilled paper pieces, and acrylic paint.

Most artists who work with quilling strips have a very different way of using them.  Some of the things they create are amazingly intricate, but are less abstract in nature- less accidental than my pieces.  It’s been interesting to see how my quilling is similar and yet different from most quillers out there, but that is an aspect of mixed media work that I love- the fact that artists can take different techniques and mediums and use them in brand new ways that people haven’t thought of before.

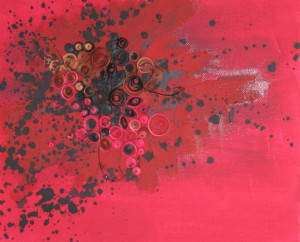
Mixed Media using acrylic paint, quilled paper

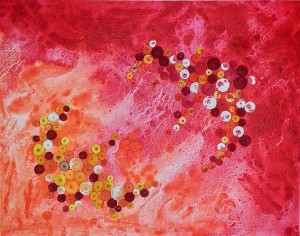
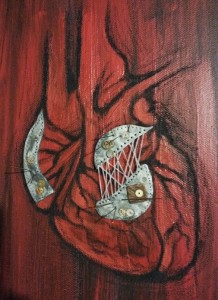
Mixed Media using acrylic paint, oil pastels, polymer clay, metal pieces

I don’t know to what extent other artists have struggled with the false idea that anything they create will be derivative; simply a copy of another artists work.  In some ways, it almost felt like an excuse for me to not even try, despite being a legitimate fear.  I do know that all artists wrestle with fear in one form or another.  It is a daily struggle, but the more we create, the more we learn and the less fear becomes an obstacle.  What art supplies do you use in a unique way?  What pieces or collections have helped you overcome your fears?

Mixed Media using acrylic paint, texture paste, quilled paper, wire

~*~*~*~*~*~*~*~*~*~*~*~*~*~*~*~*~*~*~*~*~*~*~*~*~

Author bio: Anjuli Johnson is a Mixed Media Artist from Raleigh, NC.  She began her art career as a scrapbooker, and it’s been an evolutionary process ever since.  She loves all things mixed media- paper, paint, pens, wire, gears, clay… the list goes on and on.  She is constantly trying to push through her fears to discover and develop her talents, meet new people, and learn from those around her.  To see more of Anjuli’s art and techniques, check out her website at www.thefarpavilion.com, her blog at www.thefarpavilion.blogspot.com, and like her Facebook page TheFarPavilion

~*~*~*~*~*~*~*~*~*~*~*~*~*~*~*~*~*~*~*~*~*~*~*~*~

.

.
The Needs of the Artist

~ * ~

This article is written by Ann Strecko Koeman

In response to my previous article about collecting versus hoarding, a reader posted a very good question in the comments section.  That today is the subject of my article as I pondered this inquiry and deemed it to be a good topic to explore.

A reader asked about how one goes about making mixed media art without over extending our financial capabilities and wasting our hard earned money on purchasing all of the  fancy tools available in the arts and crafting market right now?  Besides having a great amount of self control, it is difficult to not just cave in and buy all that is shiny and new!  However, as I have been crafting most of my life I can say that it is doable. One needs to begin creating humbly.

Using recycled materials for your mixed media projects

To be creative it is not necessary to buy and own all of the newest and greatest that is advertised.  The most important tool is ourselves.  We need to believe in  our own abilities and then just give it a try.  Picasso said. “creativity has to find you working”, not that you must have a well designed and furnished top notch studio!  Nonetheless, it would be hypocritical of me not to admit to personally owning a well stocked and probably over flowing creative space of my own.


I did not get to the point I am at over night.  I have accumulated my inventory very slowly and creatively.  I admit to easily falling in love all too frequently with the latest and greatest of supplies available online or in a brick and mortar store.  I can stay away from the actual buildings, I can avoid going shopping online too!  If I live like a hermit and completely off the grid then I am not tempted at all!  But come on!  Who can pull that off?  NOT me!

Using recycled materials for your mixed media projects

In my own experience I have dealt with having zero funds to spending on my creativity to going into debt.  Over the years my own priorities were tested and I have matured.  Being a mother has definitely made me make some wiser choices.  My priority is my family and my need to be creative and my answering that need made me a better mom.  So how to pull this off?  For one thing establishing some form of creativity budget is key.

By setting aside small amounts of money over the year and waiting for a few fantastic sales and using coupons enabled me to buy some things.  Asking for specific supplies or gift cards from my favourite stores as gifts for my birthday or holidays is another.  There is also the sharing of tools with other people that helps.  Joining a club where we exchange ideas, learn from each other, trade materials and contribute to a group pot whereby each member has a turn to spend the money on tools or supplies.

Over the years I learned about the possibility of renting time and space in some stores such as scrapbook stores where I could work on my scrapbooks and have access to a bunch of tools and equipment that I could not afford to buy on my own.  Joining the frequent buyers clubs at stores and getting loyalty cards (free ones) also contributes, although slowly, to obtaining free stuff.  Working in a crafty environment also enables one to access things usually at a discount.  If one works in an office don’t overlook all those papers and unused supplies going into the bins, ask first and it should not be a problem.

Using recycled materials for your mixed media projects

I joined some design teams which provided me with free materials.  I have also written product reviews for companies that let me keep some products for free.  My teaching means that I get bits and pieces and sometimes whole pieces or even tools for free.  I also worked as a consultant for a few direct sales craft companies which enabled me to earn free products.  I have done volunteer work where I was in charge of a creative project which meant that after the event had passed I could take home any unwanted and used supplies.

Which brings me to looking for FREE stuff!  First and foremost let people know that you are creative and that you will take their unwanted trash (within reason) for your own treasures.  For example your friend has an aunt that is downsizing and would like some help cleaning out the house, and in exchange you get to keep the old but still usable pasta machine that you can use to knead clay!  Or the deceased husband of that same aunt had a set of wood carving knives in the garage, you can use those too.  Oh, and what about that fabric the aunt had bought years ago to make a dress to go to some nephews wedding that never happened!  You could use it to make some handbags!

Using recycled materials for your mixed media projects

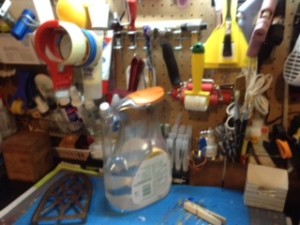
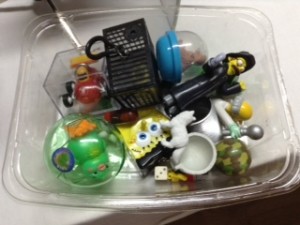
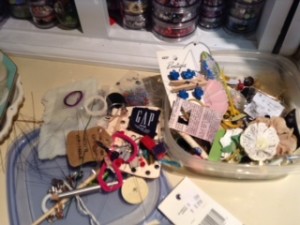
Keep your eyes and ears open, there are people all around who need to unload items and you can use them.  Getting stuff for free means it will cost you some time though.  Another place to find free materials is in your own home; from the recycling bin where you can use good cardboard (chipboard) or clean empty plastic containers, to your closet where those outdated clothes have some nifty buttons that can be used in a necklace, and don’t forget to look in your children’s rooms for broken toys to use in a collage, or the garage (if you have one) for tools and supplies that can make great substitutes for the more expensive craft store tools that will do the same job. 

If your own home is very modest, there are no children’s toys, and no garage to pillage you can always look to online recycling and selling sites.  Don’t forget to check any local free newspapers, the bulletin boards too.  I have found things for crafting on sites such as Kijiji and Free Cycle all for free or as a trade for something I had and did not need anymore.  I see advertisements in local papers for free stuff too.  There are also local businesses who gladly will give away what is useless to them but a luscious supply to a crafter.  For example, stores often have tons of cardboard boxes and signage that needs to get out.


Sometimes my local hardware store would happily give away old wooden pallets and outdated paint samples.  Hello, that is free wood and paint!  The library may need to cull old magazines even books and shelving which equals more free stuff.  There are many alternatives to spending money on tools and supplies, but this would require a series of articles or even a book.  Sometimes it is not possible to replicate a certain tool and one needs to bite the bullet and shell out the big bucks or go without.  But often it is in those situations that we artists show our greatest creative ability:  Making do!

Using recycled materials for your mixed media projects

~*~*~*~*~*~*~*~*~*~*~*~*~*~*~*~*~*~*~*~*~*~*~*~*~

Ann is a mixed media artist working and living outside of Ottawa Canada with her beloved family and cat that use up most of the family budget on food.  Ann has had to find many unusual ways to stretch her crafting budget.

~*~*~*~*~*~*~*~*~*~*~*~*~*~*~*~*~*~*~*~*~*~*~*~*~

.

Rainbow Grunge Backgrounds

~ * ~

This article is written by Kate Palmer (aka Sparkle Tart)

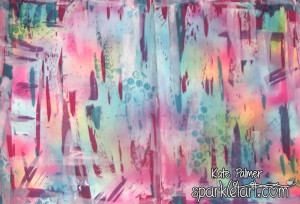
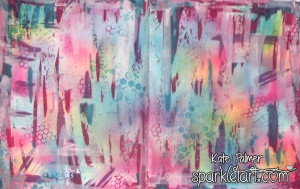
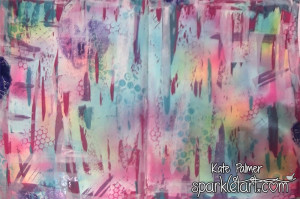
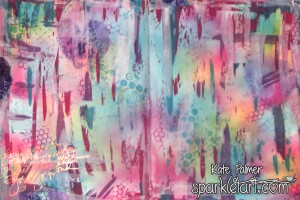
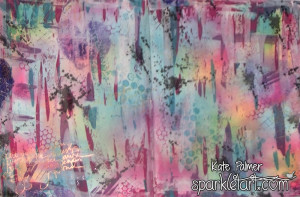
Today I’m going to show you all how to create a vibrant Rainbow Grunge Background suitable for cards, pages, journal backgrounds and even canvas!  This background style is particularly useful for low mojo days as it is low stress, uses up extra paint, when finished can be used as a base for many different projects and of course, it can be created in any colours you like!

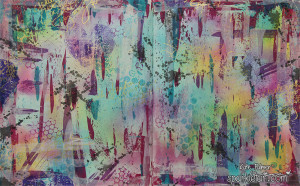
Finished background using Rainbow Grunge Technique

Journal Background

To create a page similar to mine you will need:

  • Lindy’s Stamp Gang Starburst Spray: Time Travel Teal and Flat Fabios: Summer Lovin’ Sun, Ocean Breeze Blue, Hibiscus Rose and T-bird Turquoise
  • Delta Ceramcoat Acrylic Paint:  Seashell White, Royal Fuchsia, Deep Lilac and Laguna Blue
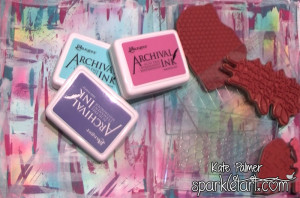
  • Ranger Archival Ink Pads: Deep Purple, Aquamarine, Magenta Hue and Watering Can
  • Delicata Ink Pad – Golden Glitz

Stamps:

  • Dina Wakely & Stampington – Create with Abandon & Script Heart
  • Stampers Anonymous – Spills & Splatters
  • Pam Carriker – Honeycomb
  • Kaisercraft – Bubble Wrap
  • Old credit card or paint scraper

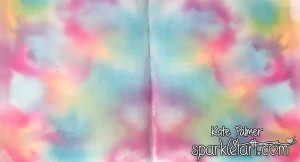
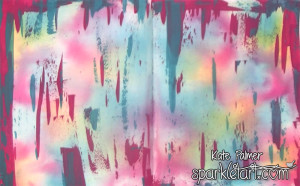
Step One – randomly spray paper or canvas with a variety of Lindy’s Stamp Gang Sprays and allow to dry.

Rainbow Grunge Step 1

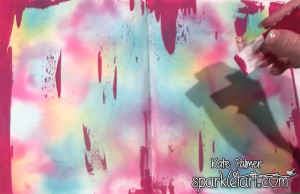
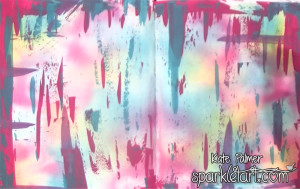
Step Two – using a credit card and Ceramcoat Royal Fuchsia paint, add a little paint to the background by dipping an edge into the paint (I squeeze a little onto my work surface to make this easier) and then scraping the edge along the paper.  Make sure you only add a tiny amount of paint to the credit card otherwise you will end up covering far too much of the background, less is more definitely applies with this technique.

Rainbow Grunge Step 2

Step Three – using this same scraping technique add a little of the Laguna Blue – I like to overlap the colours a little – notice how they appear translucent and you can see one colour behind the other – this can only be achieved by scraping very thin layers of paint – add too much and you lose this effect.

Rainbow Grunge Step 3

Step Four – is a little more subtle as a result of the colour of paint I used – Deep Lilac.  In this step continue to scrape paint onto the background, but add a few horizontal elements.  I like to make sure there is still uncovered background so the whole thing doesn’t end up looking too busy.

Rainbow Grunge Step 4

Step Five – time to tone it down a bit by adding some of the Seashell White (you could a watered down gesso for this if you need to).  Add the white over roughly 1/3 of your paint in both horizontal and vertical directions – it helps to break up the paint streaks and tone down the colours a little.

Rainbow Grunge Step 5

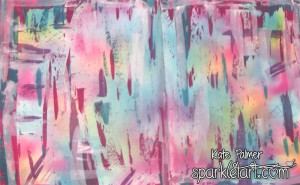
After you paint has dried it’s time to add some stamped images, using Ranger’s Archival Inks.

Stamping on Rainbow Grunge Background

Step Six – using Aquamarine ink add some Bubble Wrap impressions, I like to hold the unmounted stamp in my hand to create these marks as you get a more random and less perfect impression.

Stamping on Rainbow Grunge Background Step 6

Step Seven – using Magenta Hue ink add some Honeycomb stamped images, notice how I’ve echoed the colours used on the first background layer in both the paint and ink layers – this helps to keep the background unified and stops it looking to overwhelming.

Stamping on Rainbow Grunge Background Step 7

Step Eight – time to add a little darkness to the background – but be careful not to overwhelm the more delicately coloured layers underneath.  I’ve used Deep Purple ink and the Script Heart stamp, but to keep it soft, for several of the stamped images I have inked my stamp then stamped lightly on scrap paper before stamping onto my project.  This creates a lighter coloured impression.

Stamping on Rainbow Grunge Background Step 8

Step Nine – this is my favourite part, I’ve added the beautiful text stamp Create with Abandon using Gold ink – while it may not add any additional colour it adds a textural element to the page and catches the light.

Stamping on Rainbow Grunge Background Step 9

Step 10 – this is the final background element and is the only additional colour I have used – Watering Can – a wonderful grey.  I’ve used one of the Spills & Splatters stamps to add a little extra grunge to the background and tone it down a little more.

Stamping on Rainbow Grunge Background Step 10

Now for a few close-ups so you can see the background elements.

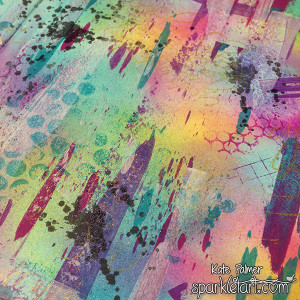
It’s important to have a little bit of ‘something’ everywhere on the page as you never know which bits will be seen in the final piece.  You can see all of the layers and elements – the translucent images and paint marks, really help to bring this background together.

Rainbow Grunge Background Close Up 1

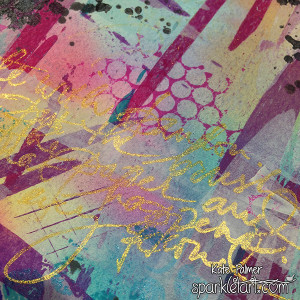
Just a little touch of gold can really lift the colours around it.

Rainbow Grunge Background Close Up 2

While I created this page in one session, the fantastic thing about this background is you could easily create it overtime with the leftovers from other projects.  You could create the first layer from over sprayed liquid, the paint scrapings could be left over paint that you add as you need to (rather than waste it) and the stamped images could easily be added whenever you have ink left over on a stamp – you could even play with the order that each item is added to the page, eg: stamps then ink then paint, as each layer is translucent you will still see each element.  Cool huh!

Challenge and Give-Away Winners

Now I’d like to issue a little challenge – I want to know how YOU would use this background – now that you’ve created it what would YOU use it for, what comes next? THANK YOU for all of your comments and inspiration – it is amazing what can be done with a wonderful background!

And the winners are:

Carole Furlong and Joan McAlpine

Carole Furlong says:
“I love this – the lovely warm yellow survives to the last layer – gorgeous. I would use as a background in my art journal. I think I’s do something like a technical drawing over the top – scaffolding, pipes, conveyor belts and that sort of thing – would be a great contrast to the prettiness of the background”

Joan McAlpine says:
What a beautiful, bright background. More like spring than dull and dark winter in Melbourne.
Firstly, I’d photocopy the original and then play to my hearts content with such things like a small Banksy stencil or a silhouette stamp in black archival ink on the top. Of course I could decorate my studio wall (only one with the window as it might be too much if I did more) and use it as wallpaper, then the colours are there all the time to remind me what works. This would be more interesting than the two colour wheels that hang there (obviously one is not enough as colour is sooo… important).” I love the idea or a living color wheel wall!

Ladies – please email Michelle [Michelle @ MixedMediaArt.net] and we will con-ordinate with Kate to get your prizes posted to you!

Plus a HUGE “thank you” to Kate for offering the give aways!

~*~*~*~*~*~*~*~*~*~*~*~*~*~*~*~*~*~*~*~*~*~*~*~*~

Kate Palmer though perhaps better known as Sparkle Tart loved playing with mixed media and techniques.  Most of her work incorporates sparkly media of some sort, which is used on journal pages, canvases, scrapbooks or hand made cards.

You can see more of Kate’s work at Sparkle Tart or via Facebook – Keep It Simply Sparkly

~*~*~*~*~*~*~*~*~*~*~*~*~*~*~*~*~*~*~*~*~*~*~*~*~

.

.
Dr. Ph Martin’s Bombay India Inks

~ * ~

This article is written by Anjuli Johnson

Being an art supply junkie is something I think all of us reading this can relate to.  The act of creation can be fairly difficult without anything to create with.  We can’t make something from nothing.  So the quest to find different and creative ways or organizing different materials into art is a constant, never ending adventure, and if you’re anything like me, becoming proficient in using a few materials over and over again isn’t satisfying enough- new materials need to be found and experimented with until we become proficient in using them, and we continue to find new things to work with.

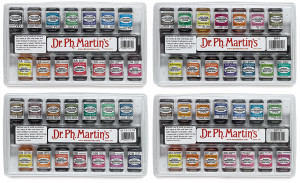
This past week my new material was Dr. PH Martin’s Bombay India ink set.

Sets of India Ink

I used to think that India ink was only available in one color- black.  Nope, these different sets of inks come with as many as 12 colors, all vibrant and versatile.  I decided to try a few different techniques to see just how versatile they are.  Here are a few of the ones I tried.

India and Alcohol ink on clear acetate

Card

India Ink and Alcohol ink on clear acetate

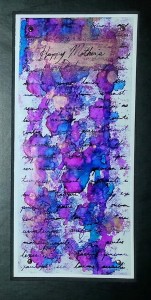
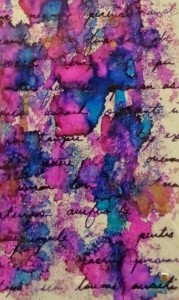
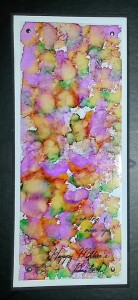
I made these cards for Mother’s Day.  Black and white cardstock with clear acetate attached to top with brads.  I colored the acetate using alcohol inks and india ink.  I tried it two different ways- india ink first, followed by alcohol ink, and vice versa.  It worked both ways.  Even thick drips of alcohol ink had no effect on the india ink once it was dry.  As long as I didn’t rub it really hard, the ink stayed fast.  I’m going to be using this technique a lot. 

Clay pendant

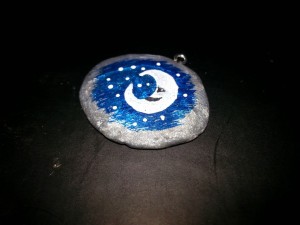
This is a really simple polymer clay pendant I made.  I baked the clay before I painted it, but once the ink dries, it’s permanent.  Anyone who makes polymer clay jewelry, charms, or even art journals- this adds another dimension to the possibilities open to you.

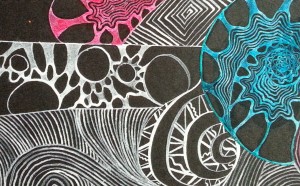
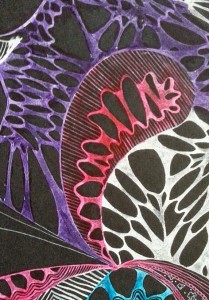
Sketch with white and colored inks on black paper

Sketch with white and colored inks on black paper

These are from a sketch I made in my black journal.  I was curious to see how these inks worked on black paper.  Though the colored inks soaked in and didn’t show that well, the white is amazing on the black.  You can even dilute it a little bit.  These inks are pretty intense, and adding a little water can make them last longer and go further without taking much away from their brilliancy.  Once I was finished with the white, I used some of the other colors on top so they would stand out.  A little more work, but it’s a way to be able to have all the colors stand out against a black background.  So fun!

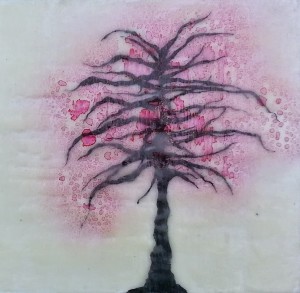
Tree drawn directly onto encaustic wax

This is an example of a sketch directly onto encaustic wax.  You can sketch onto tissue or rice paper and add it on top of the wax, but I didn’t want to see the edges of the paper.  I used my calligraphy tips to sketch and color in the tree, then I added a couple layers of wax before I spritzed some diluted red ink onto the branches, as a way to add leaves without drawing them individually.  Once again, when the ink dries, it becomes permanent and you can leave it as a top layer, or use more wax layers on top.

So, these are some of the things I’ve tried this week with my new india inks.  I’ve found a few tutorials in addition to these techniques that sound amazingly fun. Here’s a quick list with links so you can try them yourself-

Gouache painting with India Ink- www.craftsy.com

Masking fluid resist- www.alenahennessy.com

Shellac sprayed with India Ink- www.littleblackjournal.com

India Ink with bleach- arteascuola-miriampaternoster.blogspot.ca

Watercolor and India ink- www.youtube.com

So, now you have another supply set to add to your growing list of must-try art supplies.  Go have some fun!

~*~*~*~*~*~*~*~*~*~*~*~*~*~*~*~*~*~*~*~*~*~*~*~*~

Anjuli Johnson is a Mixed Media Artist from Raleigh, NC.  She began her art career as a scrapbooker, and it’s been an evolutionary process ever since.  She loves all things mixed media- paper, paint, pens, wire, gears, clay… the list goes on and on.  She is constantly trying to push through her fears to discover and develop her talents, meet new people, and learn from those around her.  To see more of Anjuli’s art and techniques, check out her website at www.thefarpavilion.com, her blog at www.thefarpavilion.blogspot.com, and like her Facebook page TheFarPavilion

~*~*~*~*~*~*~*~*~*~*~*~*~*~*~*~*~*~*~*~*~*~*~*~*~

.

.