Review of Janelle Nichols’ “Little Birdie” Online Class

~ * ~

This article is written by Ann Strecko Koeman

A while ago I got the opportunity to review Janelle Nichol’s Mixed Media class: Little Birdie. The class is available at “Skillshare”.  Being an avid maker of all things, and a lover of learning new techniques I was very much looking forward to testing out this new to me format. I can honestly say that I was pleased.

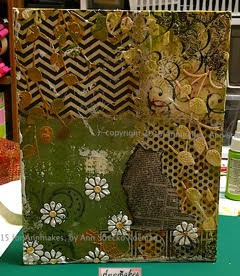
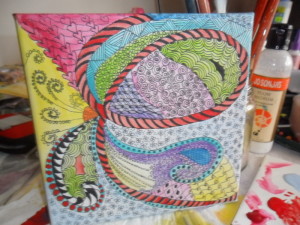
Ann’s project

For one thing, going on the Skillshare website was easy.  Second,  finding the class by Janelle was simple.  All that was required of me were a few clicks on the keyboard. Easy peasy! The hard part came when I began to doubt my own abilities to create something as pretty as the teacher herself had made. However, it did not take long for the soothing voice of the teacher to ease my concerns.

Janelle takes the time to explain all the steps involved in making the project. She gives a lot of information and goes into quite a lot of detail on how to accomplish each step. My favourite aspect of taking the class was the ability it gave me to stop, pause, go back to any part of this video class.  As my own life got quite busy all of a sudden. I needed to take a long break from completing the class.  However, when I returned I was able to just replay the video and begin anew.

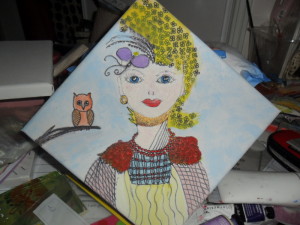
Ann’s 2nd project

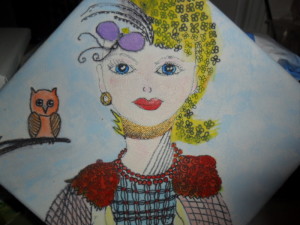
I enjoyed taking a class in this format because of the flexibility it allowed. I also appreciated the extensive notes and lists that accompany the class. It was a pleasure for me to create two projects over on my Youtube channel Annmakes that were due in part to the influence I got from taking Janelle’s class. The links to the two examples I made are here:


You can view the introduction to the Little Birdie class on Skillshare here.

~*~*~*~*~*~*~*~*~*~*~*~*~*~*~*~*~*~*~*~*~*~*~*~*~

Ann loves to collect and organize as many tools and supplies as possible because she is always making things.  Incredibly she finds a use for most of her collections.  She enjoys making Mixed Media Art because it allows her to use all her skills and collections.

~*~*~*~*~*~*~*~*~*~*~*~*~*~*~*~*~*~*~*~*~*~*~*~*~

Disclosure: Access to this course was supplied by Janelle Nichols for the purpose of review. All opinions are that of the MixedMediaArt team. Some links on this page may be affiliate links and any purchases help to support the ongoing work by MixedMediaArt. 
.

.
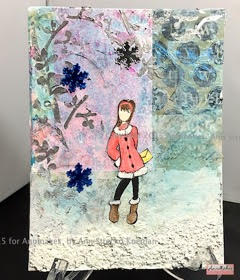
How to Make Your Own Business Cards

This article was written by Jean Mullins

Supplies required

Computer and printer

Laminator (optional)

Coloured Card stock A4 size. This will give you approx. 10 cards depending   on the size.

Water colour paper or thin card A4 size or larger, not printer paper as this is too thin.

Glue, acrylic paint or inks, stencils, stamps etc.

Creating back of cards

Step 1.

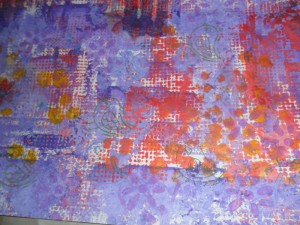
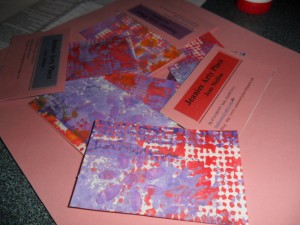
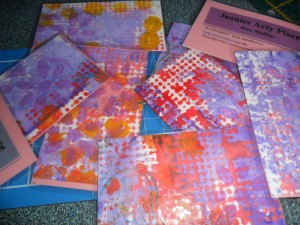
Paint, stencil, and stamp the paper or thin cardboard.  I used Jo Sonjas paints, simply because I have a lot, I love Cad red light, Norwegian orange, French blue, white, touch of yellow, and violet, I used stencils, then stamps.

I made 2 separate backing papers so some cards have the orangey back and some the violet shades.

Making  a DIY business card

TIP: If your painted paper is lumpy and bumpy, for example if you use texture paste, buttons or similar, it will be harder to laminate, creates wrinkles, air pockets etc.

Step 2.

While your painted paper is drying, create your business card.

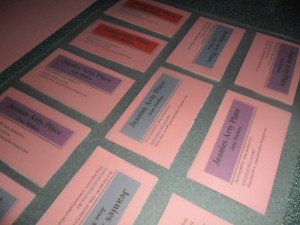
I used an Avery template, 10 cards to the page.Type the wording you want on your cards, name address, webpage, what you do etc.Save,and then print them out on the card stock, use a colour that will blend with the paper you have just painted. Cut each card out.

Step 3.

When the painted paper is dry, use a cut out card as a template on the back of the paper draw around it, this will give you the right size to cut for each card. Cut them out.

Tips in making your own business cards

Step 4.

Now you require one of each, using a glue stick, dab a bit of glue on each card as you stick the front to the back take care to have them back to back. Trim if required.

TIP. Use just a dab of glue and press the 2 pieces together firmly.

Tips in making your own business cards

Step 5.

The fun bit Laminating.

Get your laminator ready, turn it on to warm up.

Lay a laminating pouch on a flat surface, open it, then dab the glue stick on each card as you position it on the laminating sheet. Leave a little space between so that they each seal. (Approx. 10/11 per sheet). When the laminator is ready carefully lift and feed through.

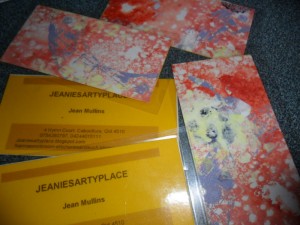
Now cut and separate each of your beautiful, unique business cards and say wow. Trim excess laminate off each card.

For those of you who don’t have access to a laminator, office supplies or similar place will laminate them for you.

Alternatively after glueing the 2 pieces together, use a brad in opposite corners or eyelet in one corner then tie with string cord etc.

Tips in making your own business cards

Tips in making your own business cards

~*~*~*~*~*~*~*~*~*~*~*~*~*~*~*~*~*~*~*~*~*~*~*~*~

Jean Mullins (Stevenson) lives at Caboolture Queensland with 2 little dogs.

Mother and grandmother, Jean is passionate about teaching and passing her knowledge on to everyone she can. Author, pattern designer, magazine contributor for many years, Jean loves to create and play with paint, as well as tutor at U3A.

You can see more of my work at: nannasworkroom-stitcheriesandsuch.blogspot.com & www.jeaniesartyplace.blogspot.com

~*~*~*~*~*~*~*~*~*~*~*~*~*~*~*~*~*~*~*~*~*~*~*~*~

.

.

Upcycle Paper Roll Mini Book

~ * ~

This article was written by Melanie Statnick

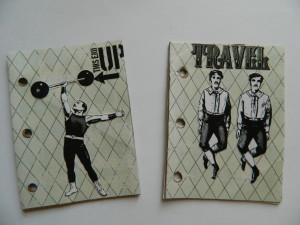
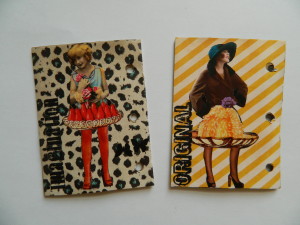
We all have paper towel rolls and bath room tissue rolls. It’s recyclable and reusing able and some save it for all sorts of things. Something I have learned to do with it is make books and or note pads. These ideas can be found on Pinterest. There are many different ways to make and design these and I encourage you to find them and come up with something new and share your ideas in the comments. You can get your children involved also. They are fun and easy.

Melanie Statnick created this fun up cycling mini book

Supplies:

Paper roll

Craft paper or Scrap book

Gel medium/Mod Podge

Hole Punch

Binder Rings or Craft wire

Images, letters, word art

Micron or Copic Pens

Process for Creating your Mini Book

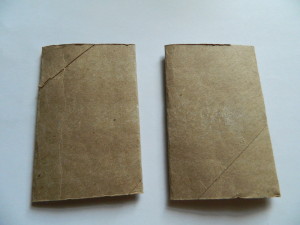
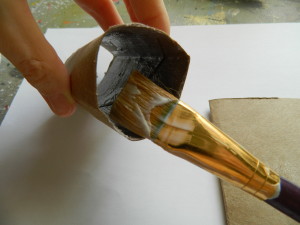
Begin by flattening out the paper roll. Here I used bathroom tissue, you can use a paper towel roll and cut it in half. Glue the inside of both rolls to create your front and back cover and let dry.

handmade books with paper towel and toilet paper rolls

handmade books with paper towel and toilet paper rolls

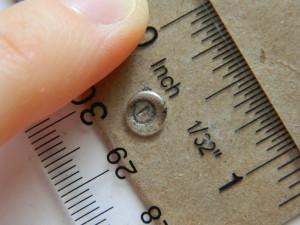
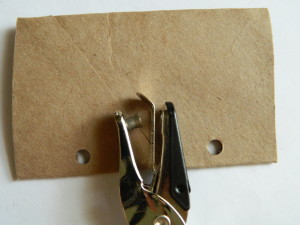
Next you want to take a ruler and measure approximately were you want to your holes and use the hole punch to punch through. Once you have them punched measure and cut your craft paper the same size as your roll covers and punch holes in each to match your covers.

handmade books with paper towel and toilet paper rolls

handmade books with paper towel and toilet paper rolls

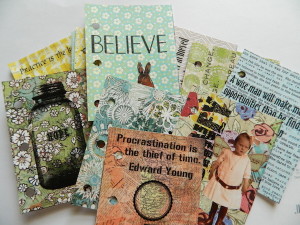
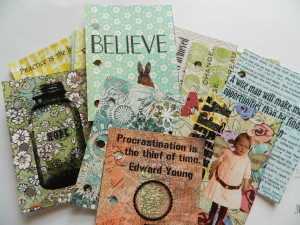
When you have your papers cut use four and glue them to your covers front and back. The excess will be your pages. You can place images and word art on these as you like. Design the covers the same way.

handmade books with paper towel and toilet paper rolls

handmade books with paper towel and toilet paper rolls

handmade books with paper towel and toilet paper rolls

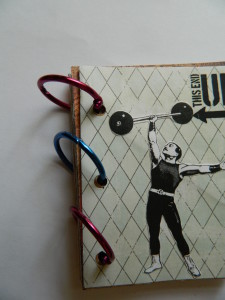
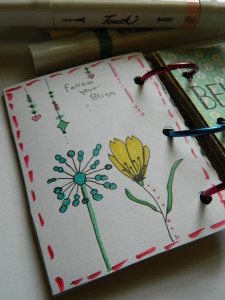
When you are finished with your pages use your binder rings to hold the book together.  On the blank side of the pages you can draw in your own pictures and create your phrases.   Happy Creating.

handmade books with paper towel and toilet paper rolls

handmade books with paper towel and toilet paper rolls

~*~*~*~*~*~*~*~*~*~*~*~*~*~*~*~*~*~*~*~*~*~*~*~*~

Melanie Statnick is a Canadian Mixed Media & Collage Artist out of North Carolina. Melanie creates art daily from her private studio. Her style is fun, whimsy and eclectic. Melanie is also an Art Instructor for local venues and community colleges for students of all ages.

handmade books with paper towel and toilet paper rolls

~*~*~*~*~*~*~*~*~*~*~*~*~*~*~*~*~*~*~*~*~*~*~*~*~

.

.

Canvas Pen and Wash: Zentangle Style

~ * ~

This article is written by Jean Mullins (Stevenson)

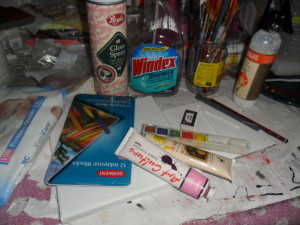
Supplies Required

  • Small canvas
  • Pencil
  • Fine liner permanent marking pen, Small paint brushes
  • Paints, can be whatever you wish. I used acrylics and
  • inktense sticks
  • Spray sealer or hair spray

If you make a mistake, wet a cotton bud with windex and rub gently.

I love doing pen and wash designs, I started out many years ago, painting pen and wash designs on china that were then fired in a kiln between each wash of paint  lots and lots of hours work.  Since then I have created paintings pen and wash style using both oils and acrylics. (separately, as we all know oil paint cannot be used over acrylics.) The technique remains the same, draw or pencil design, go over with a permanent fine line pen, spray seal the design, then add subsequent washes of paint.

Don’t gesso the canvas or you will find the paint will clog your pen, as well as change the ink colour slightly.

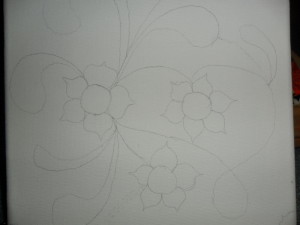
Draw your design on the canvas using a pencil very lightly.

If you aren’t a confident drawer you can always trace a design.

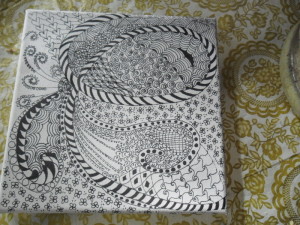
Painting a pen and wash painting, drawn and inked with a tangle pattern

Painting a pen and wash painting, drawn and inked with a tangle pattern

Using the permanent pen draw over your design, alter the pressure for thicker, thinner or lighter, darker areas. If you rest your hand on a tissue this will save ink marks being transferred where you don’t want them onto the canvas.

Tip: Pen all the main design lines in first and let it dry before you fill in the tangle patterns.

When you are happy with your canvas, Let it dry for a couple of hours or overnight if possible then spray thoroughly with hair spray or a sealer. Give it 3 coats drying between each one. Drying time will depend on the weather but generally it dries quickly. Suggest you do this outside as sealer is pretty smelly.

Painting a pen and wash painting, drawn and inked with a tangle pattern

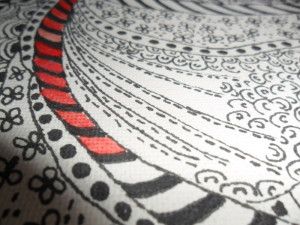
For the painting, use liner brushes or small rounds for applying the paint, the ribbon areas are best painted with a small angle shader.

Definition of a “wash”is a very pale watery mix of paint, to achieve this, rather than using too much water I used a “flow medium” which I loaded onto my brush before loading with paint. Too much water changes the paints “sticking” formula.

Painting a pen and wash painting, drawn and inked with a tangle pattern

Painting a pen and wash painting, drawn and inked with a tangle pattern

The idea is “no stressing, just have fun and create a pretty painting”.

Zentangles (trademark Zentanglesinc.) or tangles is all about meditation or attaining a meditative state of mind while “tangling or doodling”. I facilitate a meditation group for U3A where I am a volunteer tutor. Any form of meditation is a wonderful stress reliever.

Painting a pen and wash painting, drawn and inked with a tangle pattern

Painting a pen and wash painting, drawn and inked with a tangle pattern

What happened with my little painting of Athena. Looking closely at the pictures, particularly Athenas hair, you can see that the pen has bled when I used the sealer spray. This is interesting as the same spray, same pen but maybe not the same brand canvas was used. If you want to test your canvas, pen something, your name, title of your painting, anything on the back of the canvas where it’s secured to the frame, then spray with your sealer. See what happens

~*~*~*~*~*~*~*~*~*~*~*~*~*~*~*~*~*~*~*~*~*~*~*~*~

Author bio:

Jean Mullins lives in Caboolture, Queensland close to beautiful Bribie Island. Not only a mixed media artist, Jean is also a craft teacher, teaching many different mediums, including book making, crochet, patchwork and quilting, ceramics, porcelain doll making, sculpting in clay and mold making. Pattern designer and author of the books, “Dolls Clothes in crochet”.With a lot of knowledge gathered over the years she considers it a pleasure and privilege to share. Being a member of the Caboolture Artisans Guild, Bribie island Community Arts Centre as well as a tutor for U3A and a pet rescue foster “mum” life is busy and fun.

~*~*~*~*~*~*~*~*~*~*~*~*~*~*~*~*~*~*~*~*~*~*~*~*~

More about Jean can be found at:

www.jeaniesartyplace.blogspot.com and www.nannasworkroom-stitcheriesandsuch.blogspot.com

.

.