Altered Steampunk Bird

~ * ~

This article is written by Barbara Rankin 

Barbara shows you how to take a wooden bird, a simple coffee filter, some jewelry findings, and die cuts, then combine them with ColourArte Silks Acrylic Glazes and other mixed media, to alter this sweet little steampunk-style home décor piece.  These techniques can be used for any project and will help you have a better understanding of how to apply them in your art.

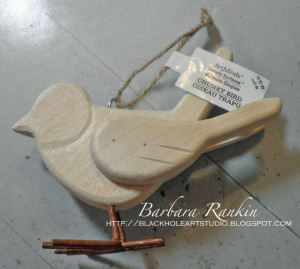
This little wooden bird is going to take on a new life in Steampunk world.  I found this little guy by Art Minds in my local craft store.

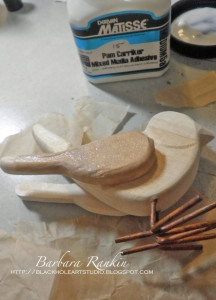
bare wood bird

Remove the screw eye first.  Tear a coffee filter into strips and adhere to bird with Mixed Media Adhesive.

coffee filter adhered to bird’s wing

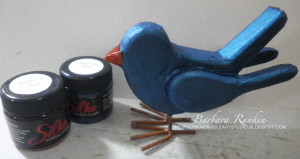
Paint bird with ColourArte Silks Bolivian Blue and beak with Silks Harvest Sol (mixed with a bit of Silks Mango Mama)acrylic glazes. [www.colourarte.com]

painted bird with Silks paint jars

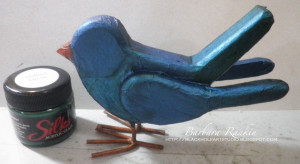
Add a wash of ColourArteSilks Mallard Green to the breast, tail and wing feathers for a bit of highlight.  It is subtle but effective.

birdand Silks paint jars

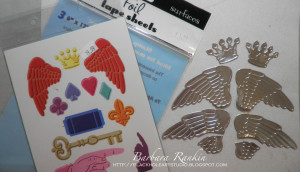
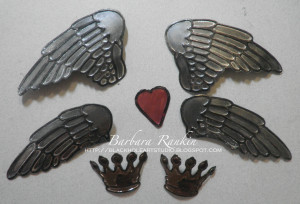
Adhere a 6” x 7” piece of Ranger foil tape to a sheetof silver metallic cardstock. Die cut four wings and two crowns with the Cuttlebug Cut N’ Boss folder. I also cut out two hearts, not shown in photo. Trim lower portion of one of the wings for each side, as shown.

photo of metal foil covered cardstock and diecuts

Apply DecoArt Metallic Lustre Iced Espresso to crowns and Black Shimmer to wings.  Add ColourArte Silks Rusty Mauve to one heart, thenhit high spots with black archival ink (Noir Black Palette Hybrid ink used).  Add metal bling to crowns and shape crowns and wings with fingers.

photo of painted metal foil covered cardstock and diecuts

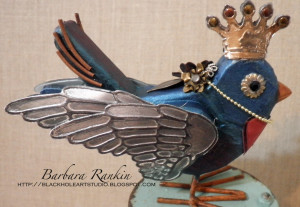
Begin adding embellishments to the bird.  Adhere two wings to each of the bird’s wings, layering one over the other.  Join the two crown pieces, shape and adhere to the bird’s head.  Add jewelry finding with black gemstone on each side of head for eyes.  Add curved tubular beads to each side of the bird’s tail feathers.

adhereddie cut wings, crown, eyes, flowers

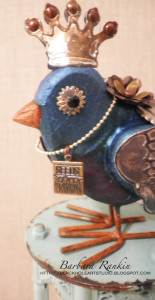
Glue tiny bead chain with “Seeds” charm around bird’s neck, gluing bead chain together on top.  Cover the glued join with Tim Holtz’s Ideaology metal flowers and leaves.

photo of bead chain with “Seeds” charm around neck and metal flowers

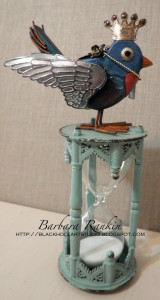
Here are two side views of the finished altered bird.  Isn’t he adorable!

right facing bird finished

~*~*~*~*~*~*~*~*~*~*~*~*~*~*~*~*~*~*~*~*~*~*~*~*~

Barbara is a mixed media artist who loves to teach.  She loves to learn new techniques and to share her knowledge with other artists.   She is a contributing artist in a book:  Make it in Minutes: Mini Albums, and has been published in several paper and online magazines.  She is currently on fourdesign teams, ColourArte, Sin City Stamps,Altered Pages, and Gina’s Designs.  She has served as a design team member for The Robin’s Nest and Creative Paperclay®, as well as guest designer for Craftwell USA, Unruly Paper Arts, and Gina’s Designs.

She lives in the Memphis, Tennessee area with her very supportive husband of 32 years, and her two Yorkies, Chloe and Zoe.

You can see more of Barbara’s work on her blog at Black Hole Art Studio or via Facebook – Black Hole Art Studio

~*~*~*~*~*~*~*~*~*~*~*~*~*~*~*~*~*~*~*~*~*~*~*~*~

.

.
Elena Lishchenko’s Christmas Cards

~*~

This article is written by Elena Lishchenko

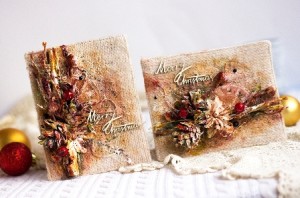
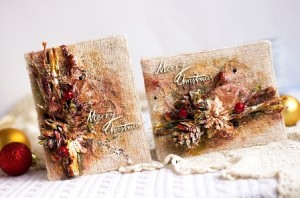
Hello everyone! Today I would like to show you my new Christmas cards.

Elena Lishchenko's Christmas Cards

Supply list of ColourArte products:

  • Primary Elements Artists Pigments:
  • PE-167 Golden Nugget
  • Single-Jar-Pigment “Emperor’s Gold”
  • PE-175 Honey Amber
  • PM-006 Pure Mica Minerals Indian Copper
  • PE-591 Lucky Apple

Silks Acrylic Glaze:

  • SLK-104 Emperor’s Gold
  • SLK-179 Jasper Red
  • SLK-120 Spicy Tomato

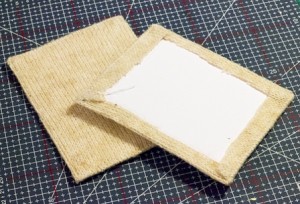
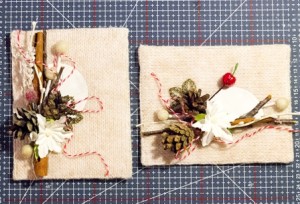
I started with two pieces of cardstock. I cut two pieces from my old sweaters and sew them.

Elena Lishchenko's Christmas Cards

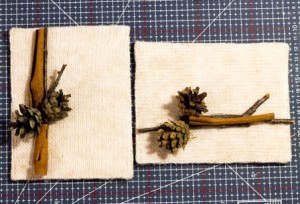
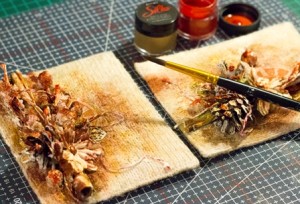
For my Christmas composition I use cinnamon and beautiful embellishments from the forest.

Elena Lishchenko's Christmas Cards

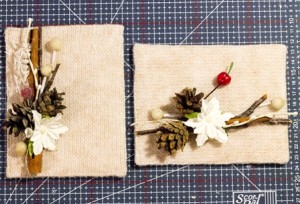
Next two steps – add traditional scrapbook embellishments from my stash.

Elena Lishchenko's Christmas Cards

Elena Lishchenko's Christmas Cards

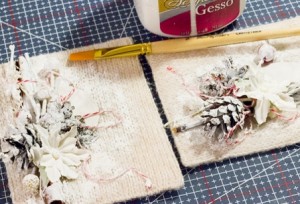
Cover them with white gesso.

Elena Lishchenko's Christmas Cards

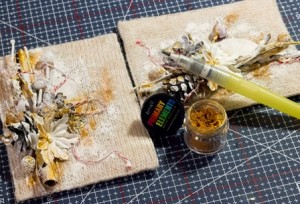
Now it’s time to playing with amazing “Primary elements”. First I lay on Pigment “Emperor’s Gold” with wet brush.

Elena Lishchenko's Christmas Cards

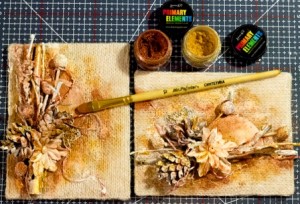
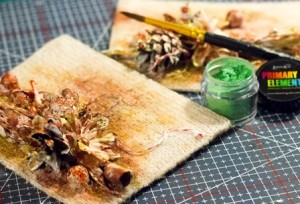
Apply  PE-167 Golden Nugget, PE-175 Honey Amber, PM-006 Pure Mica Minerals Indian Copper with dry brush.

Elena Lishchenko's Christmas Cards

Add SLK-104 Emperor’s Gold, SLK-179 Jasper Red, SLK-120 Spicy Tomato with dry brush. I want just add some accents, so I add a little touches.

Elena Lishchenko's Christmas Cards

I can’t stop and I decide to use PE-591 Lucky Apple, because it’s one of traditional colors of Christmas.

Elena Lishchenko's Christmas Cards

Finally I add some more Christmas decorations.

Elena Lishchenko's Christmas Cards

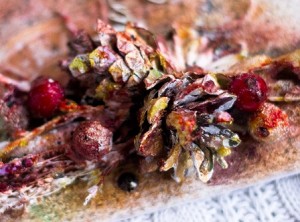
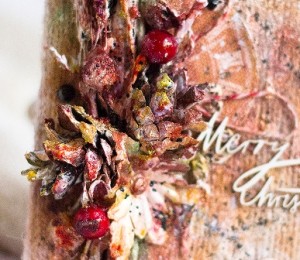
Close-ups:

Elena Lishchenko's Christmas Cards

Elena Lishchenko's Christmas Cards
.

.
ColourArte Products Review

~ * ~

This article is written by Barbara Rankin

ColourArte is the manufacturer of some amazing paint products, such as Radiant Gels, Radiant Rains, Primary Elements Artist Pigments™, Silks Acrylic Glaze, and Twinkling H2Os In this article, I am going to share some examples of the diversity, as well as my observations, using these products.

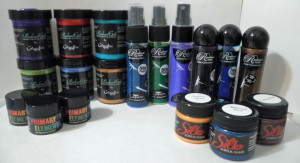
Photo of a group of the products

Following each product description, I have prepared a white tag, all exactly the same, to show you the diversity of each ColourArte product, simply by varying the mediums.  For beautifully finished projects, I would invite you to visit the ColourArte Blog.

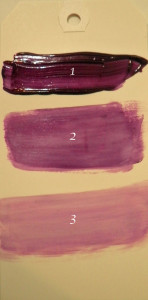
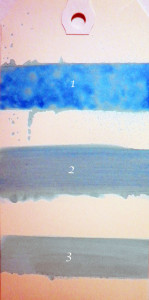
Let’s start with Radiant Gels Dimensional Paint, the newest product in the ColourArte line. This is a thick, shimmery paint that can be used for many different mixed media applications.  It not only can be used as a paint and brushed out to a beautiful, transparent color, but can also be spread with a spatula,leaving brush strokes and lots of texture behind.  It is perfect for applying through stencils, too. It currently comes in 20 luscious colors.

Tag Sample of Radiant Gels applications

  1. Gel brushed directly onto tag with paint brush, dries dimensional and textured    with my brushstrokes.
  2. Gel brushed directly onto tag with a wet paint brush, just enough water to thin the gel to a more spreadable consistency without losing color depth.  Some brush stroke textures remains.
  3. Gel brushed directly onto tag with paint brush and water to add a very smooth, light color to the tag.  The color value does not change.

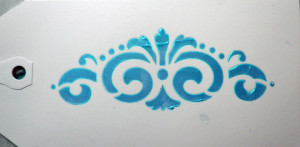
Radiant Gel spread through a stencil and left to dry.  A thicker image can be made by spreading more gel over the stencil, while the colors remain true.

Tag Sample of Stenciled Radiant Gels

Next up, we have Radiant Rains in two different bottles.  The Color Concentrates come in dauber bottles, while the Shimmering Mists come in, you guessed it, mister bottles.  There are 21 Color Concentrates and 26 Shimmering Mists.

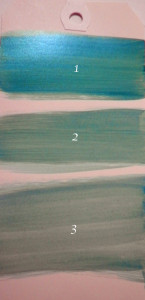
Tag Sample of Shimmering Mists applied with mister and paint brush.

  1. Mist sprayed directly to tag.  Variations in colors, textures, and shimmer are achieved with the mister bottle, and can be diluted with water when working on your mixed media projects.
  2. Mist sprayed onto a craft sheet and color picked up with a brush and painted onto tag.
  3.  Mist sprayed onto a craft sheet and color picked up with a very wet brush and painted onto tag.  The water lightens the color but does not lose its color value.

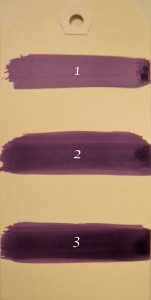
Tag sample of Radiant Rains daubers applied

  1. Dauber applied to tag with one swipe.
  2. Dauber applied to tag with 2-3 swipes, added color depth.
  3. Dauber applied to tag with 5 swipes for increased intensity.

Colors can be applied very quickly to backgrounds using the dauber bottles.

Then there are the well-known Twinkling H20s Shimmering Watercolors.  These are cakes of intense shimmering watercolor that you activate with water.  The colors are so concentrated that a little goes a very long way.  You can add less water to turn them into a creamy watercolor paint, or add more water to increase transparency without losing color value.  There are 210 colors and sold in sets or individually, as well as in two jar sizes.

Tag sample of Twinkling H20s color variations

  1. Twinks mixed with small amount of water to a creamy consistency for true color depth and shimmer.
  2. Twinks applied with a bit more water for lighter color and increased transparency.
  3. Twinks applied with even more water, increasing color lightness and transparency without losing color value.

Next we have the Primary Elements Artist Pigments™.  Artist Pigments are powdered, highly concentrated colors that are perfect for everything, including mixed media.  They can easily be mixed with gum arabicbinders or any acrylic medium to make your own paint.  They can also be mixed with water-based acrylic glazes, gel mediums, and even thicker mediums like molding pastes.  Imagine the possibilities.  And it takes the tiniest amount of powder to make vivid colors, or use less pigment and more medium to decrease it’s intensity. They are available in 198 sumptuous colors.

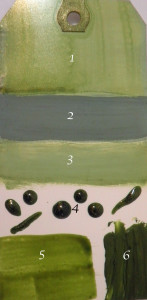
Sample tag of Primary Elements

  1. PE (Primary Elements) added to gel medium
  2. PE added to white gesso (gives a chalky appearance)
  3. PE added to clear gesso (feels chalky, but does not change the color)
  4. PE added to pouring medium (does not change the color and allows the shimmer to show through, as well as drying hard and thick.  Can be poured, dropped, or drizzled onto project for added dimension.
  5. PE added to Gum Arabic.  I think this gives the truest color and shimmer, most closely resembling Twinkling H20s.
  6. PE added to hard molding paste.  Dries with texture without losing color intensity.

Last, but not least, are the gorgeous Silks Acrylic Glazes. These are the most luscious, shimmery paints I’ve ever seen. They are iridescent, semi-transparent, and mix beautifully together, giving you even more color choices. They come in 92 colors, with six new colors just coming out this month.

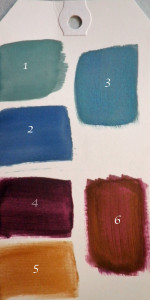
Sample tag of Silks Acrylic Glazes

  1.  Forest Green Silks
  2.  Bolivian Blue Silks
  3. Forest Green and Bolivian Blue Silks combined
  4. Pomegranate Silks
  5. Emperor’s Gold Silks
  6. Pomegranate and Emperor’s Gold Silks combined

This is just a “drop in the bucket” as to all of the possibilities for using these products.  I have touched on just a few.  Think about making your own sample book of “recipes” for color mixtures, using tags such as these, to refer to when you need just that right color or texture.

~*~*~*~*~*~*~*~*~*~*~*~*~*~*~*~*~*~*~*~*~*~*~*~*~

Barbara is a mixed media artist who loves to teach.  She loves to learn new techniques and to share her knowledge with other artists.    She is a contributing artist in a book:  Make it in Minutes: Mini Albums, and has been published in several paper and online magazines.  She is currently on four design teams, ColourArte, Sin City Stamps, Altered Pages, and House of Cards Challenge Blog, and has served as a design team member for The Robin’s Nest and Creative Paperclay®, as well as guest designer for Craftwell USA, Unruly Paper Arts.  She has also been asked to be the guest designer Gina’s Lasercut Designs in June 2015.

She lives in the Memphis, Tennessee are with her very supportive husband of 32 years, and her two Yorkies, Chloe and Zoe.

You can see more of Barbara’s work on her blog at Black Hole Art Studio or via Facebook – Black Hole Art Studio.

~*~*~*~*~*~*~*~*~*~*~*~*~*~*~*~*~*~*~*~*~*~*~*~*~

Disclosure: These paints were given to me by ColourArte for the purpose of designing projects as part of the design team.  All opinions are my own and may not reflect those of the MixedMediaArt team. Some links on this page may be affiliate links and any purchases help to support the ongoing work by MixedMediaArt.

.
.
Layering Mediums for a Unique Art Journal Page

*

Kate Palmer, also known around at “Sparkle Tart” is based in Queensland Australia and she shares her multi layered art journaling process with us, with stunning results.
Take it away, Kate…

~*~*~*~*~*~*~*~*~*~*~*~*~*~*~*~

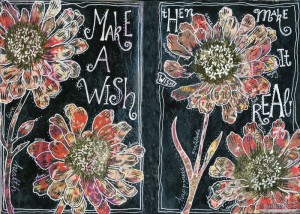
 Hi – I’m Kate Palmer better known as Sparkle Tart, I’m a mixed media artist, Sparkly Experimentalist and lover of all things colourful – you can find me online at www.sparkletart.com  I was a slow starter when it comes to art and sort of fell into creating, while self taught for much of my life, in the last few years I’ve been extremely fortunate to have taken classes online from some amazing women and just recently, my first in person class with Tracy Verdugo.  Tracy’s class opened my eyes to the depth that can achieved through layering, and while this page does not follow her process it was inspired by it.  I was determined after these amazing experiences, to find a way to make to large scale canvas ideas work on smaller scale art journal pages, cards and the much smaller projects I love to create.  So without further rambling from me, this is how I have created ‘Make a Wish’ double page journal spread.

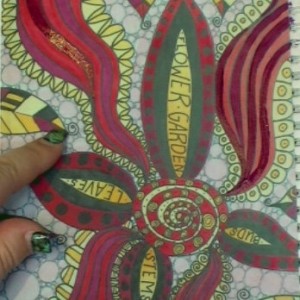
Art Journal layers with paints and stencils to create a brilliant layout

What I’ve used:

  • Stencils:  The Crafters’ Workshop – Mini Punchinella, Mini Flower Garden, Mini Flower Piecing.
  • Copic Markers – R27, R29, R39, Y32, Y35, Y38
  • Copic Multi Liners 0.3 & 0.5
  • Golden Fluid Acrylics: Iridescent Gold Deep Fine & Carbon Black
  • Jenni Bowlin Acrylic Paint: Malted Milk & Brown Sugar
  • Adirondack Acrylic Dabber: Watermelon
  • Molotow Signal White Paint Marker Fine tip
  • Jumbo Zinnia Set (flower stamp) from Stampendous
  • Create with Abandon stamp from Stampington and Co
  • Gold Foil
  • Stippling brush
  • Ranger’s Sticky Embossing Powder
  • Silks Acrylic Glaze in Vavoom Red
  • Liquitex Matt Medium

What I Did:

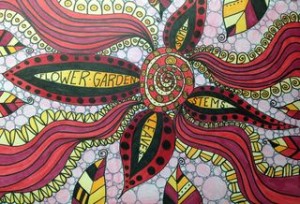
Draw and colour a simple page of doodles using Copic Multi Liners and Copic Markers – I used R27, R29, R39, Y32, Y35, Y38  and Multi Liners 0.5 & 0.3.  This shouldn’t be some amazing work of art – just background colour.  You can also use copies of previous pages, collage or even magazine photos for this step if you are not a ‘doodler’.
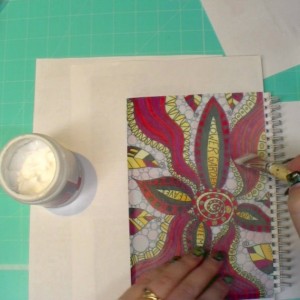
Make a colour copy (or scan and print) your art onto a piece of paper.  Complete all of the following steps directly onto your original doodle (after scanning or photographing) as well as the facing page – to complete a matching 2 page spread.

Art Journal layers with paints and stencils

Cut the copy to size and glue onto facing journal page using Liquitex Matt Medium Gel and leave to dry – coat front and back of copy with Matt Medium for added strength.

Art Journal layers with paints and stencils

Paint Vavoom Red Silks over the darkest Copic coloured areas and let dry, you will find this makes all the other colours appear more vibrant.

Art Journal layers with paints and stencils

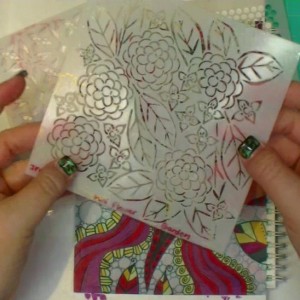
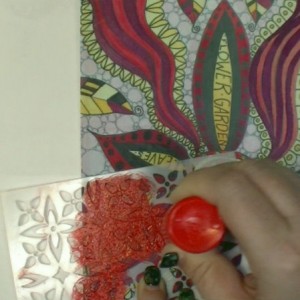
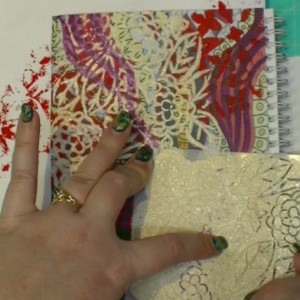
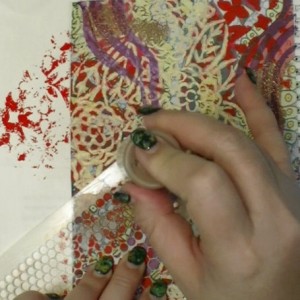
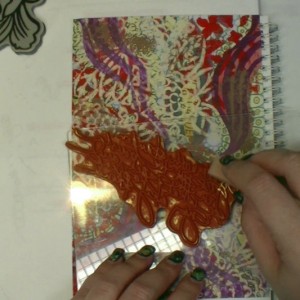
Time to get out those stencils!  Choose 3 patterned stencils and 3 colours of acrylic paint – use one stencil and 1 colour of paint at a time and dry between colours.
Apply paints through stencil onto page to break up the original pattern.

Art Journal layers with paints and stencils

Add colour no 1 (Watermelon) & allow to dry, you can use a heat gun to speed this up.

Art Journal layers with paints and stencils

Add colour no 2 (Malted Milk) & allow to dry.

Art Journal layers with paints and stencils

Add colour no 3 (Brown Sugar) & allow to dry.

Art Journal layers with paints and stencils

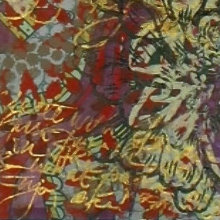
Ink text stamp with Golden Fluid Acrylic Iridescent Gold Deep Fine (I used a sponge to apply the paint) and randomly stamp text onto page.

Art Journal layers with paints and stencils

It should look a bit like this – it won’t be as crisp as it would be stamped in ink, but you will still get a lovely impression.

Art Journal layers with paints and stencils

Ink flower stamp with Carbon Black Golden Fluid Acrylic Paint and use this to stamp flower onto page multiple times.

Art Journal layers with paints and stencils

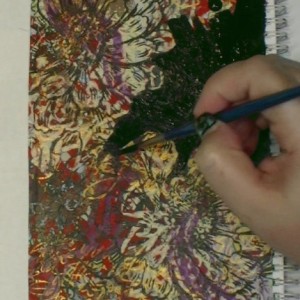
Using Carbon black paint, paint all of the page around flowers, until only the flowers are showing colour.  You may want to draw stems and leaves on before doing this and paint around those as well.
Leave paint until completely dry.

Art Journal layers with paints and stencils

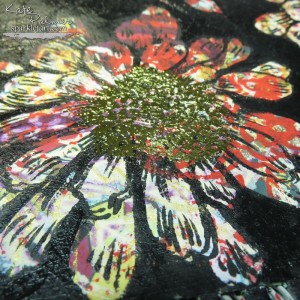
I know I know – I’ve just painted over most of my background!  It’s really an important step though, as without these layers and elements, your flower would look pretty flat and boring.  Have a look at this close up image, you can see each layer that has been added, every colour each layer of paint and it all works together to create something with complexity and interest.

Art Journal layers with paints and stencils

Ink the centre of flower stamp with Versamark ink, using a stamp positioner stamp over flowers and add sticky embossing powder – carefully brush off any excess powder.

Art Journal layers with paints and stencils

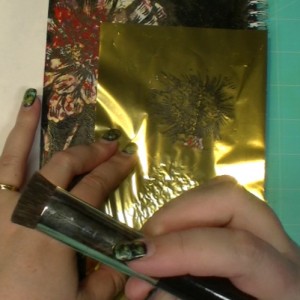
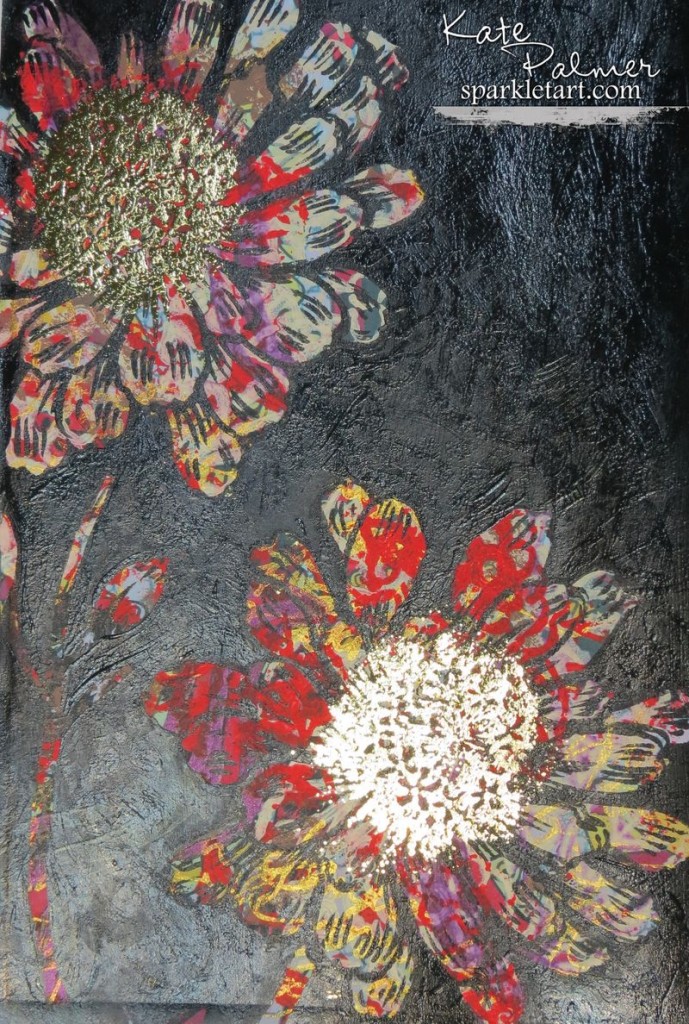
Heat sticky embossing powder with a heat gun until clear, and while hot add gold foil.  If you don’t have these items (foil & sticky e.p.) you may choose to skip this step and embellish the centre of your flower some other way, glitter, paint, gel pen, micro beads etc.

Art Journal layers with paints and stencils

The gold foil is massively blingy – it may not be to your taste, it turns out looking like this.

Art Journal layers with paints and stencils

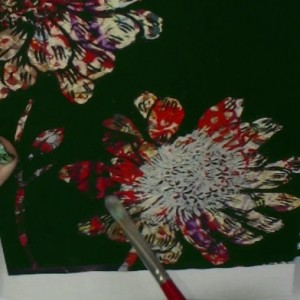
At this stage your page will look fairly unappealing, the colours don’t pop, the image is not very defined – this is UGLY stage.  Don’t give up, as the only difference between this and something stunning is a little white paint!

Art Journal layers with paints and stencils

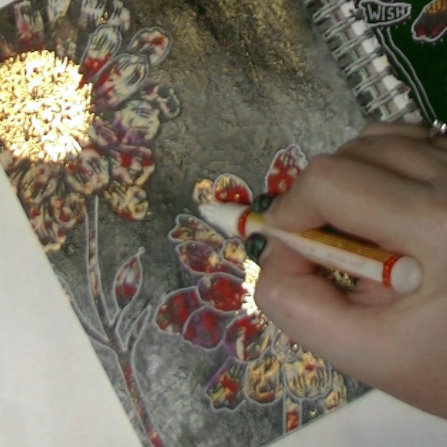
Use a white gel pen (my preference is the Molotow White extra fine nib) to edge the design in white,  colour the patterns in the centre of the flower, draw around each individual petal, the stems and leaves (if you drew any) and add doodling and text as desired – all in white so that it stands out.  You may need to go over the doodling more than once to make the white really pop.

Art Journal layers with paints and stencils

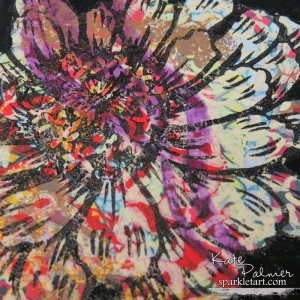
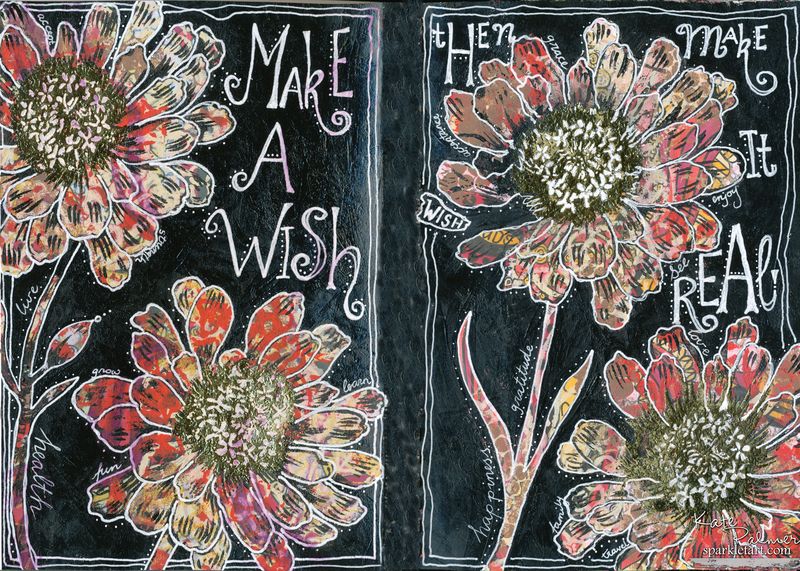
And when you look at the 2 pages together, the result is something like this…
doesn’t the white gel pen make a difference!

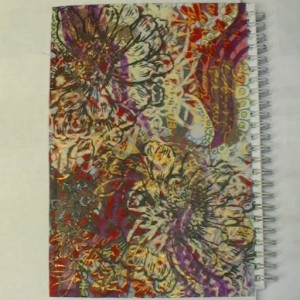
Art Journal layers with paints and stencils to create a brilliant layout

I hope you’ve enjoyed this quick tutorial and that it sparks some ideas for your own creations.

May your day sparkle,

Kate