Ideas on How to Make Personalized Gift Tags

This article was written by Martice Smith II

Creating Personalized Gift Tags

Who says small details don’t matter?! Not us mixed-media artists! As a mixed-media collage artist, I love building upon several layers of paint, doodles and various mark-making techniques to set my work apart from the rest.

If you’re looking to develop your own approach, try these ideas to create your own, personalized gift tags. There’s no need to spend a fortune on commercially made products when you can add a unique touch of your own- using what you already have. Just the extra spark needed for a one-of-a-kind gift!

Here are a few supplies to help get you started:

  • Gelli plate
  • acrylic paints
  • paintbrush
  • brayer
  • white ink pen (for doodling)
  • cardstock / kraft paper
  • stencils (I used Tags & Labels stencil from DecoArt)
  • metal eyelets
  • embroidery floss / twine

Personalized Gift Tags – on the Gelli Plate

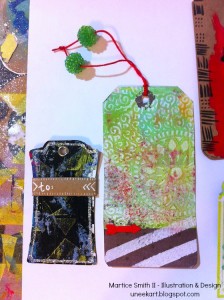
1. Create the gelli prints, use prints from your stash, or paint directly onto paper.

Using acrylic paints, use a brayer and roll an even, smooth layer to the Gelli plate. You can also use a round tip paintbrush and paint directly on top of the Gelli plate. Make sure to paint loose brushstrokes, going in various directions. This will give you visual interest.

2. Next, lay down a sheet of cardstock (or your choice of paper) and pull a print.

Creating Personalized Gift Tags

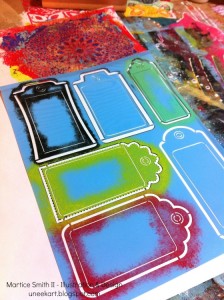
3. Use stencils.

Create a large tag template to use or trace through and cut out the Tags & Labels stencil from DecoArt.

Creating Personalized Gift Tags

Creating Personalized Gift Tags

4. Preserve your work!

It’s important to seal the paintings on your tags, especially if there’s any water soluble media. I like to use a spray varnish first. (Remember to do this in a well-ventilated area, to avoid any irritation.)

For one of my tags, I’ve brushed on a thin layer of Crackle Glaze to give a cracked, eggshell appearance.

After drying for several minutes, I brushed on a layer of Triple Thick Gloss Glaze to keep my colors intensely vibrant and shiny. (Both products are from DecoArt.) 

5. Add the finishing touches. 

Eyelets, embroidery floss and twine makes these tags look more polished and really sets the tone for the special gift inside. I love things that twinkle, so I used Sheer Shimmer Spritz in Sparkle (from Imagine Crafts) for some drama.

Add other embellishments to underscore the theme of your tags and you’re done!

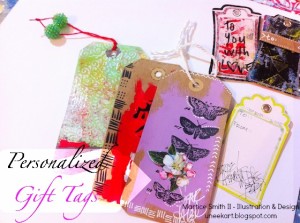
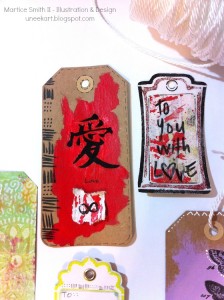
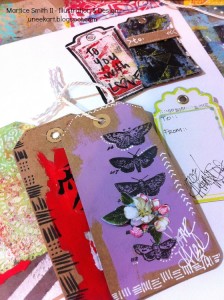
Check out these one-of-a-kind gift tags!

Creating Personalized Gift Tags

Creating Personalized Gift Tags

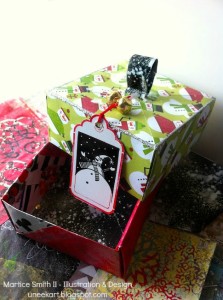
I’ve used a combination of different elements and techniques, such as:

Acrylic paints and rub-on stickers on Kraft paper, DecoArt’s chalky finish paint (Remembrance), gelli paper scraps on foam dots, threading glass beads, faux stitching, and a cute snowman stamp from RubberMoon

Other ideas to try:

▪   Think about how the tag ‘feels’ in your hands. You may want your tags to have a smooth, velvety feel to them. If so, try Dura Clear – Soft Touch Varnish (from DecoArt). This stuff is really impressive!

▪   Incorporate symbols and doodles.

There’s nothing like the repetition of shapes to add dimension and rhythm to your tags. I’ll be sharing more doodling and intuitive painting techniques in my online, art course ‘Cultivate Your Symbology.

Check out sneak peeks of the lesson I’ll be teaching in the ‘My Color is Beautiful Art’ workshop HERE and HERE

Do you include gift tags on your presents? If so, do you prefer making them yourself or spending a little extra money for the pre-made ones? 

Happy creating!
.

.

Personalized Gift Tags – On the Gelli Plate

This article was written by Martice Smith II

Personalized Gift Tags

Who says small details don’t matter?! Not us mixed-media artists! As a mixed-media collage artist, I love building upon several layers of paint, doodles and various mark-making techniques to set my work apart from the rest.

If you’re looking to develop your own approach, try these ideas to create your own, personalized gift tags. There’s no need to spend a fortune on commercially made products when you can add a unique touch of your own- using what you already have. Just the extra spark needed for a one-of-a-kind gift!

Here are a few supplies to help get you started:

  • Gelli plate
  • acrylic paints
  • paintbrush
  • brayer
  • white ink pen (for doodling)
  • cardstock / kraft paper
  • stencils (I used Tags & Labels stencil from DecoArt)
  • metal eyelets
  • embroidery floss / twine

Personalized Gift Tags – on the Gelli Plate

1. Create the gelli prints, use prints from your stash, or paint directly onto paper.

Using acrylic paints, use a brayer and roll an even, smooth layer to the Gelli plate. You can also use a round tip paintbrush and paint directly on top of the Gelli plate. Make sure to paint loose brushstrokes, going in various directions. This will give you visual interest.

2. Next, lay down a sheet of cardstock (or your choice of paper) and pull a print.

Photo of Tags and Labels stencil by DecoArt, Inc.

3. Use stencils.

Create a large tag template to use or trace through and cut out the Tags & Labels stencil from DecoArt.

Example of embellished Gelli plate gift tags by Mixed media artist and designer, Martice Smith II

Example of embellished Gelli plate gift tags by Mixed media artist and designer, Martice Smith II

4. Preserve your work!

It’s important to seal the paintings on your tags, especially if there’s any water soluble media. I like to use a spray varnish first. (Remember to do this in a well-ventilated area, to avoid any irritation.)

For one of my tags, I’ve brushed on a thin layer of Crackle Glaze to give a cracked, eggshell appearance.

After drying for several minutes, I brushed on a layer of Triple Thick Gloss Glaze to keep my colors intensely vibrant and shiny. (Both products are from DecoArt.) 

5. Add the finishing touches. 

Eyelets, embroidery floss and twine makes these tags look more polished and really sets the tone for the special gift inside. I love things that twinkle, so I used Sheer Shimmer Spritz in Sparkle (from Imagine Crafts) for some drama.

Add other embellishments to underscore the theme of your tags and you’re done!

Check out these one-of-a-kind gift tags!

Example of embellished Gelli plate gift tags by Mixed media artist and designer, Martice Smith II

Example of gift tag on box by Mixed media artist and designer, Martice Smith II

I’ve used a combination of different elements and techniques, such as:

Acrylic paints and rub-on stickers on Kraft paper, DecoArt’s chalky finish paint (Remembrance), gelli paper scraps on foam dots, threading glass beads, faux stitching, and a cute snowman stamp from RubberMoon

Other ideas to try:

▪   Think about how the tag ‘feels’ in your hands. You may want your tags to have a smooth, velvety feel to them. If so, try Dura Clear – Soft Touch Varnish (from DecoArt). This stuff is really impressive!

▪   Incorporate symbols and doodles.

There’s nothing like the repetition of shapes to add dimension and rhythm to your tags. I’ll be sharing more doodling and intuitive painting techniques in my online, art course ‘Cultivate Your Symbology.

Check out sneak peeks of the lesson I’ll be teaching in the ‘My Color is Beautiful Art’ workshop HERE and HERE

Do you include gift tags on your presents? If so, do you prefer making them yourself or spending a little extra money for the pre-made ones? 

Happy creating!

~*~*~*~*~*~*~*~*~*~*~*~*~*~*~*~*~*~*~*~*~*~*~*~*~

Mixed media artist and designer, Martice Smith II

Martice Smith II is creative director of Martice Smith II – Illustration & Design Studio, based in Missouri and owner of Uneek Art Boutique. She established herself as a freelance Illustrator and graphic designer after receiving her Bachelor of Arts Degree. Her stunning illustrations reveals her love for fashion, typography and wildlife- using a combination of traditional and digital techniques

You can see more of her work via her Facebook page or The Uneek Art blog.

Be sure to join the Uneek Art Letter, -Martice’s monthly newsletter- that offers art biz tips, advice and more digital goodness that will keep you inspired to be the artist you envision yourself to be!

~*~*~*~*~*~*~*~*~*~*~*~*~*~*~*~*~*~*~*~*~*~*~*~*~

.

.

How to Make an Accordion Book

~ * ~

This article is written by Melanie Statnick

Recently I have noticed the trend in creating our own style of journals, mini books, according books and more. Pinterest is full of inspired artists in the present and in the past each with their own style. Some tell a story and others like the accordion book, are one long piece of art. This can be done in a horizontal or vertical fashion. It is up to your imagination. I had more fun with this book then I thought and it became somewhat addictive. Here is how to make yours, in a fast and simple way in case you’re making art at the speed of life.  You can always add more and take as much time as you need.

How to Make an Accordion Book with your own style

Supply list:

Watercolor paper 140lbs cold press

Cardboard (craft) or heavy card stock

Watercolors

Gel Medium

Stamps and/or other word stickers

Ribbon

Instructions

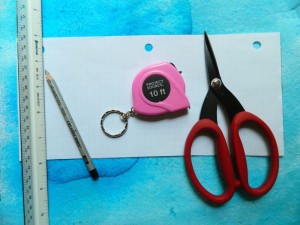
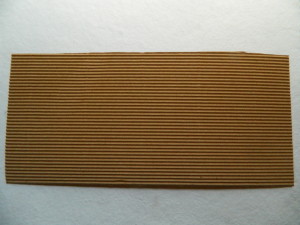
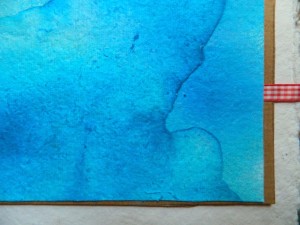
Begin with measuring your watercolor paper approx. 11”x4”.  You can go as big or as little as you want. Measure your cardboard the same to a bit larger 12 x 5”.  Paint your watercolor paper any way you wish.

How to Make an Accordion Book with your own style

How to Make an Accordion Book with your own style

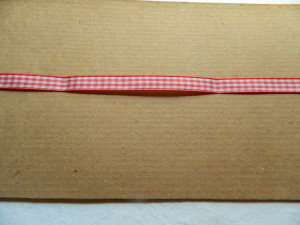
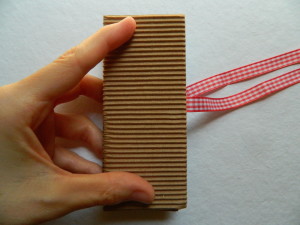
Apply gel medium (glue) to the cardboard piece you’ve cut. This is the cover of your book. Lay your ribbon down onto the glued cardboard, then lay your painted watercolor paper on top of your ribbon. You may want to use a brayer to make sure all your corners are flat and everything is glued well.

How to Make an Accordion Book with your own style

How to Make an Accordion Book with your own style

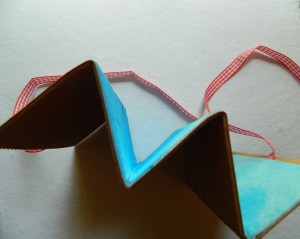
Begin to fold paper into itself in an accordion fashion.

How to Make an Accordion Book with your own style

How to Make an Accordion Book with your own style

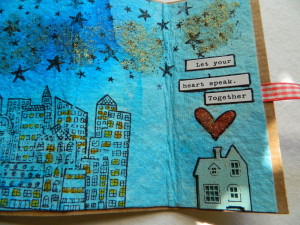
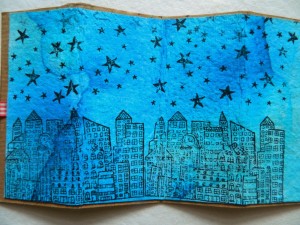
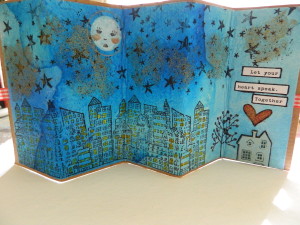
Here is where it becomes fun! You can stamp or draw anything you want to create one long piece of art. I used one of my favorite stamps, my city stamp and my star stamp. I found a heart stamp, some word art and a mini wood house. I painted the house, added some sparkle to my night sky and hand drew the moon using acrylic paint and Micron pens.

How to Make an Accordion Book with your own style

How to Make an Accordion Book with your own style

How to Make an Accordion Book with your own style

When you are happy with your end result use the ribbon to wrap around your book if you have cut it longer. Tie it up in a bow and use it for a gift or make a shelf full.

Happy Creating.

~*~*~*~*~*~*~*~*~*~*~*~*~*~*~*~*~*~*~*~*~*~*~*~*~

Melanie Statnick is a Canadian Mixed Media & Collage Artist out of North Carolina. Melanie creates art daily from her private studio. Her style is fun, whimsy and eclectic. Melanie is also an Art Instructor for local venues and community colleges for students of all ages.

~*~*~*~*~*~*~*~*~*~*~*~*~*~*~*~*~*~*~*~*~*~*~*~*~

.

.

Encaustic and Glass Mixed Media Mobile

~ * ~

This article is written by Anjuli Johnson

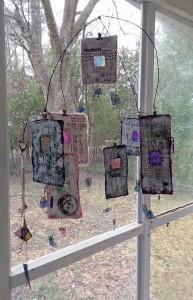
Every once in a while, I slip away from my usual style of work and am inspired to create something drastically different from anything I’ve ever done before.  Whenever this happens, it’s always very exciting and terrifying at the same time.  I think one reason I tend to stay within my practiced range of techniques is that I know what I’m doing- doing something different means a necessary amount of experimentation and trial and error, which may work, or it may not.  Terrifying though it may be, it’s so important to experiment with new techniques, because obviously that is how we learn and develop our artistic talents, especially if you are self taught.

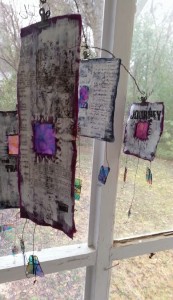
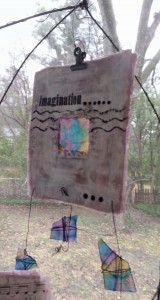
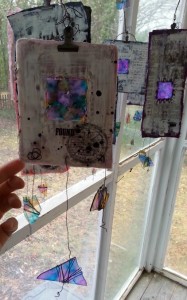
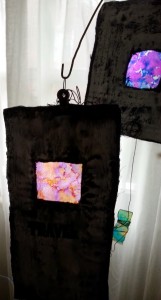
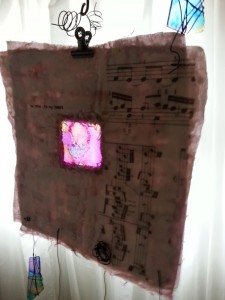
I have worked with encaustics before, but never on fabric, so I knew bringing my mobile idea to fruition was going to be tricky.  I used brocade as my base, not only for its beautiful colors and designs, but because I could leave the edges frayed or burn them smooth.  You can see I chose frayed for some, and smooth, burned edges for others.

I cut 2*2 inch squares of glass for inside my encaustic pieces and random broken pieces to hang from them.  Alcohol ink is what I used to give them a stained glass effect.  You need to use Krylon acrylic coating as a sealant so the ink doesn’t smear.  I used the cut glass squares as a template to stitch squares into my layers of fabric.  I cut out the squares of fabric, leaving an edge that the glass would sit inside once I finished working with the wax.

There are some things to be aware of if you’re going to attempt a similar project- first, the surface you are working on.  Make sure that it’s clean.  My art table is covered with paint drips and old glue, so I improvised another surface to work on.  The other thing is that for my squares of stitched fabric, I wasn’t painting on just one side as I would do when painting on wood.  Both sides of my pieces would be seen in this mobile format, so I knew I would be painting with wax on both sides.  If you’re not careful, working on one side can cause the wax on the opposite side to stick to the surface of your table and peel away.  I found it easier and less messy to work until I was nearly finished adding all my wax and embellishments on one side, and then begin work on the other side.  You need a heating tool to heat the wax between layers so they fuse together- when I finished working on one side fusing the wax, I would lay it on the other side to begin painting, and hold it loosely in my hand to fuse it rather than lay it on the table to fuse it.  This keeps the wax on the fabric rather than peeling away and sticking to the table.  Be careful using your heat gun while you do this- you don’t want to burn yourself.  But I was able to do this quite easily and it worked much better.  Of course, encaustic is a very forgiving medium.  If something goes wrong, don’t fret.  There are always ways to fix mistakes or mess ups, so it’s really the perfect medium for experimentation.

I used around 6-7 layers of wax on each side, and it’s with the last couple that I added most of my embellishments.  (You can use as many as you would like, as long as you fuse between each layer.)  I used stamped and drawn images on rice paper, Tim Holtz patterned tissue paper, rub-ons, metal objects like keys and gears, and india ink stamped and drawn right onto the surface.  You’ll need to add a layer

of wax over any paper or metal embellishments you add, but if you are stamping or drawing with india ink, you can let it dry on the top layer without needing to add any more.

There are countless encaustic techniques you can use on a project like this.  One of my favorite resources is a book called “The Encaustic Studio” by Daniella Woolf. Of course, there are seemingly endless resources on pinterest and youtube, as well.  Check them out, but as I said before, don’t be afraid to experiment and try new things.  They may work, they may not, but I have found that any art experiments you try are well worth the risk!

My biggest risk was building my own mobile frame- fun, but tough.  I’m definitely going to need to practice my mobile-making skills.  The best part was adding the       wire around the glass and the frame- the swirls of dark metal give the whole piece a rather whimsical quality.

So, that’s my venture into the unknown!  I made mistakes, fixed them, had to scrap a few of my original ideas when they didn’t work, but I’m pretty happy with how everything turned out.  Not only that, but I feel like I have a little more courage stored up for the next random idea that pops into my head.  What new things are you going to try this week?


Each of us must face our fears and try new things if we’re going to continue to grow as artists.

~*~*~*~*~*~*~*~*~*~*~*~*~*~*~*~*~*~*~*~*~*~*~*~*~

Author bio:  Anjuli Johnson  is a Mixed Media Artist from Raleigh, NC.  She began her art career as a scrapbooker, and it’s been an evolutionary process every since.  She loves all things mixed media- paper, glue, paint, canvas, pens, wire, gears… the list goes on and on.  She is constantly trying to push through her fears to discover and develop her talents, meet new people, and learn from those around her.  Check out Anjuli’s Facebook page to learn more about her.

~*~*~*~*~*~*~*~*~*~*~*~*~*~*~*~*~*~*~*~*~*~*~*~*~

.

.