Altered Library Card Pocket

~ * ~

This article is written by Melanie Statnick

How to alter old library card pockets

I miss having library cards in the back of books. When I was younger we had to look books up in the card cataloging boxes. Signing the books out with your name and seeing who borrowed it before you, or even how many times you checked out the same book.

Lets get arty and alter these library card pockets

Lets get arty and alter these library card pockets

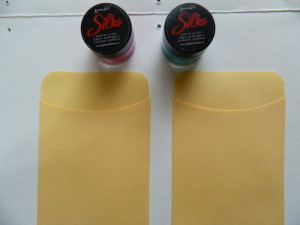
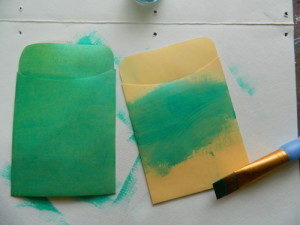
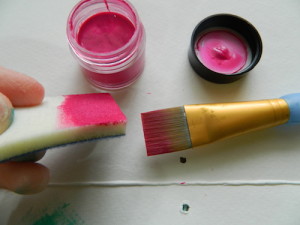
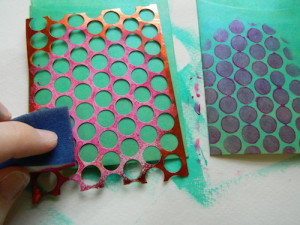
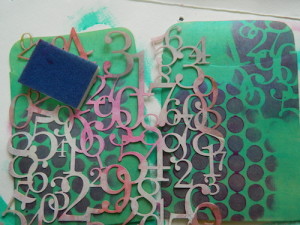
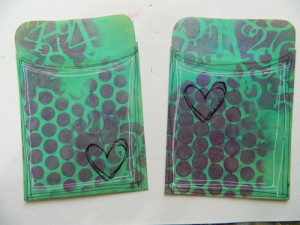
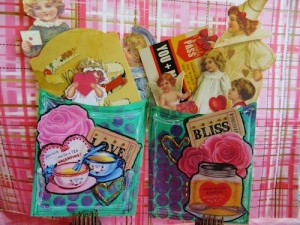
Using Silk Acrylic paints I altered these paper library pockets. I painted the first color coat onto the pocket first, then I used a paint brush to apply the second color to the applicator and rubbed it over the stencil onto the pockets in a circular motion.

Lets get arty and alter these library card pockets

Lets get arty and alter these library card pockets

Lets get arty and alter these library card pockets

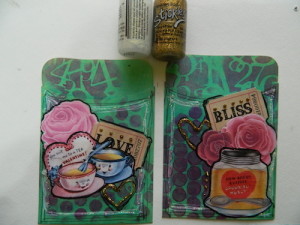
Dry the paint and add some stamps and paper collage sheets and embellishments using a gel medium or mod podge. I outlined the images using a black Pitt pen, white get pen and then added some Stickles.

Lets get arty and alter these library card pockets

Lets get arty and alter these library card pockets

I used a Valentine theme to stuff the pockets with. You can makes them however you like. Cute for sticking a magnet strip on the back and posted it onto your refrigerator and leaving notes for your sweetheart.

*All materials can be found on Altered Arts website

How to alter old library card pockets

~*~*~*~*~*~*~*~*~*~*~*~*~*~*~*~*~*~*~*~*~*~*~*~*~

Melanie Statnick is a published artist/writer out of North Carolina. Melanie creates art daily from her private studio. Her style is happy and whimsy. Statnick’s artwork can be found in art galleries and shops extensively in NC with international private collections. Learn more about Melanie view her website at: www.melaniestatnickart.com
.

.
Designer Block Puzzle

~ * ~

This article was written by Martice Smith II

Remember those little A-B-C blocks you may have played with as a child? This tutorial is a spin on that very concept, although, this one is the “grown-up” version! (Well, if you have a baby Einstein on your hands, that’s a different story…) Each side of the wooden block will have a different design. I will demonstrate how to use various techniques from stamping, cut-outs, stenciling and masking to create a beautiful designer block puzzle. Let’s get started!

Create a Designer Block Puzzle

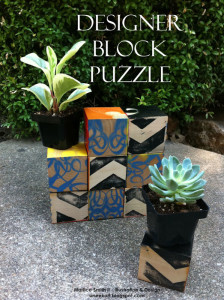
Need to add a bit of visual interest in a corner of your living room, craft space or maybe even a coffee table, this designer block puzzle packs some major punch of creativity! It may look challenging- given that there are 10,077,696 different combinations – but don’t let it fool you. This puzzle is very easy to create yourself.

Gather supplies

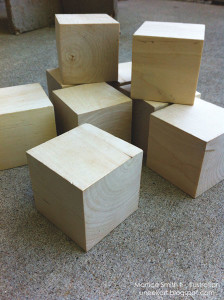
Gather supplies; wooden blocks

Any size blocks will work. For this tutorial, I used nine 7.5 inch wooden blocks.

Gather supplies; stencils and stamps

Stencils, stamps

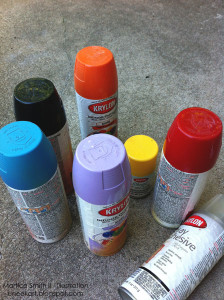
Spray paints (various colors) and a face mask

Masking tape

Prepare the wooden blocks

I love the natural look and feel of the wood, so I let them remain that way.

(Other options to consider: use a clear gesso or wood stain on all six sides of the wooden blocks. This will need to be done in stages to ensure that each side is dry before doing the next side.)

Set up the blocks

Set up the blocks and mask off sides

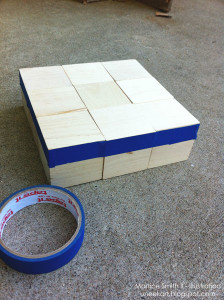
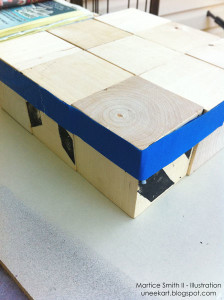
Working on an even surface, set up the blocks three wide by three long.

Use low-tack masking tape around the sides to secure them together, leaving six surfaces facing up together to make a 7.5 inch diameter square surface. (The tape prevents any over-spray from the spray paint.)

Use a stamp to design SIDE 1 

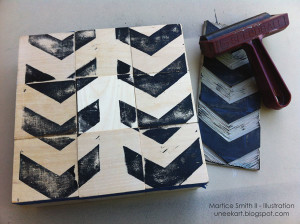
Use a stamp to design SIDE 1

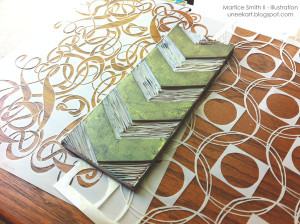
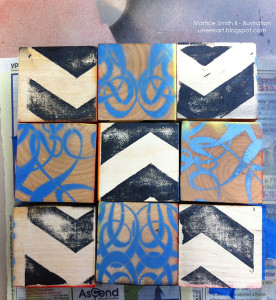
SIDE 1 is designed with my popular chevron stamp (tutorial on how to make your own)

* Let dry and turn each wooden cube to a random side, so that there are 6 blank surfaces on top again. (I will call this step: “Reset the blocks“)

* Re-tape the sides to prevent any over-spray.

Let dry and turn each wooden block to a random side. (Reset the blocks)

Spray paint the cardboard cut-outs and stencils for the remaining sides

Spray paint the cardboard cut-outs and stencils for the remaining sides

Wearing a face mask and working in a well-ventilated area, spray the first color of spray paint over the cut-outs using a steady, consistent motion.

Design SIDE 2 with lightweight cardboard

Here’s how cardboard stencils and masks can be used as well. I’ve used circular, hand-cut shapes as masks and my custom made ampersand cardboard as a stencil. (Side note: The ampersand is on SIDE 6).

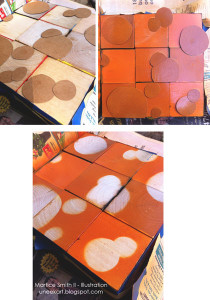
SIDE 2 shows how I arranged my circular, hand-cut shapes in an interesting pattern. Kind of looks like bokeh from photographs!

Design SIDE 2 with lightweight cardboard using circular, hand-cut shapes

* Apply spray paint. (Note: Spray paint can remain tacky for up to 30 minutes depending on the humidity.)

* Remove the shapes.

* Once the spray paint is completely dry, reset the blocks

Design SIDES 3 and 4 with commercial stencils

A couple of my favorite commercial stencils from StencilGirl!

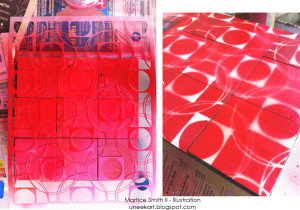
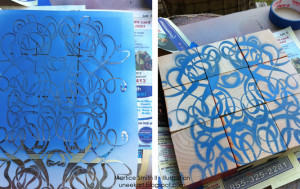
SIDE 3 is designed with Square Dance.

Design SIDE 3 with commercial stencil; Square Dancing by StencilGirl

* Spray the stencil; let dry

* Reset the blocks

For SIDE 4, I used the Art Nouveau stencil.

Design SIDE 4 with commercial stencil; Art Nouveau by StencilGirl

Design SIDE 5 and 6 with handmade stencils

Add more of your own flair to this project! Here are two handmade stencils that I cut out by hand. This one has a tribal and primitive feel, displaying the triangle and rectangular patterns.

Design SIDE 5 with handmade stencil for personalized touch.

Reset the blocks

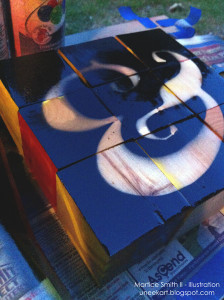
Finally, for SIDE 6, I took a more bold and graphic approach by using the “and” symbol (technically called, the ampersand. Look how much style this has!)

Design SIDE 6 with lightweight cardboard using the "and" symbol.

Now that all sides have been designed, you can create different looks for your visual pleasure! This will keep your imagination fresh and give you a good challenge to recreate your own, unique combinations.

I will use my designer block puzzle as props and a cool backdrop for my product photo shoots!

01Aug_MFS_DesignerBlockPuzzle-Pic12

Try utilizing this puzzle in unexpected ways. Add visual interest in a corner of your living room, craft space or maybe even place them on a coffee table. It’s your choice!

How will you use your Designer Block Puzzle?

~*~*~*~*~*~*~*~*~*~*~*~*~*~*~*~*~*~*~*~*~*~*~*~*~

Author bio:

Mixed-media illustrator and designer Martice Smith II

Martice Smith II is creative director of Martice Smith II – Illustration & Design Studio, based in Kansas City, Missouri and owner of Uneek Art Boutique. She established herself as a freelance Illustrator and graphic designer after receiving her Bachelor of Arts Degree. Her stunning illustrations reveals her love for fashion, typography and wildlife- using a combination of analog and digital techniques.

Martice also contributes as an article writer for the Creating Mixed Media Art website.

You can see more of her work via her Facebook page or her blog. She invites you to join her monthly newsletter, Uneek Art Letter, for art biz tips, advice and free digital goodies!

~*~*~*~*~*~*~*~*~*~*~*~*~*~*~*~*~*~*~*~*~*~*~*~*~

.

.
Intricate Paper Stencils, PART 2: Gift Wrap

This article was written by Martice Smith II

Martice Smith II demonstrates how to make your own gift wrap using intricate, paper stencils

Make the stencils, first! PART 1 of this tutorial can be found here.

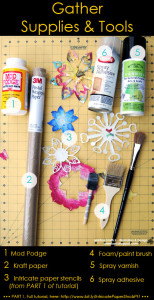
Gather Supplies & Tools

Gather supplies and tools

If you have used watercolors, water-soluble pencil or any other water-based mediums on the stencils you created, go ahead and spray 1-2 light coatings of varnish (matte or gloss; it’s your choice) to seal everything in and to prevent bleeding or mixing of colors on your stencils.

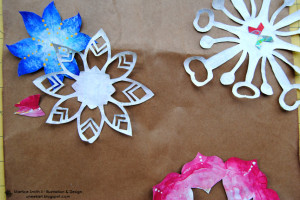
1. Position stencils onto kraft paper 

Position stencils onto kraft paper

Unless your stencils are very large, there’s no need to work on large areas for this step. You will be able to control your work surface much easier if you’re able to work in manageable sections, at a time.

Try a layered look by overlapping the stencils.

Don’t clutter too many of your intricate paper stencils in one area. It’s ok to leave some larger areas of kraft paper!

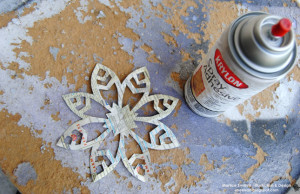
2.  Apply spray adhesive

Apply spray adhesive

Do this step outdoors, as the fumes are very strong and can be harmful or cause irritation to eyes and throat.

On a separate work table, turn over 2 or 3 stencils so that the ‘wrong’ side (the side with no paint) is facing up. Spray each stencil, individually, with an even layer of adhesive. (Sometimes, I allow the spray adhesive to sit on the stencil for about 3 seconds. This will create a stronger bond to the paper.)

Gently place the stencil onto the kraft paper.

Use light pressure from the palm of your hand of fingers to flatten the raised areas of the stencil.

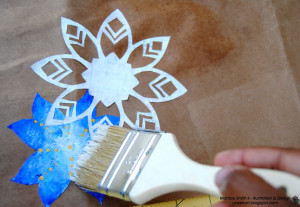
3.  Brush on decoupage medium

09May_MFS_IntricatePaperStencils_PART2_GiftWrap-Pic5

Take your large, bristle brush or a foam brush and generously apply Mod Podge® directly to the stencils.

Depending on the design and delicacy of your paper stencil, spread the Mod Podge®, working from the center, then out to the tips.

4.  Let dry, then trim excess

This step is very important! You need to allow the Mod Podge® to dry completely.

Drying time will vary, depending on how many layers you applied, but a good 15 minutes should be fine.

TIP: If any of your stencils are extending beyond the kraft paper, use scissors to cut off the excess. (Yes, you can use these pieces, too! Go ahead and glue them down.)

5.  Repeat or re-roll

If you like what you see so far, continue adding more of your intricate paper stencils.

When you are done, you can cut off what you need to wrap a package or you can re-roll the kraft paper until you’re ready to start again, later.

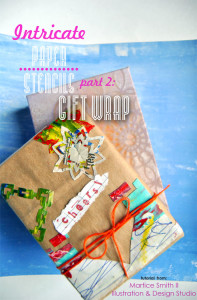
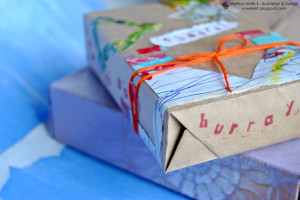
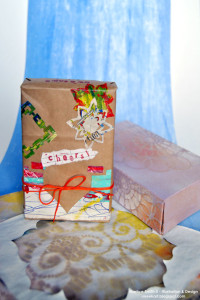
Now go wrap some gifts!!

Now you're ready to wrap some gifts!

Now you're ready to wrap some gifts!

Great for mail art packages, too!

Would you like to try 10 more stencil designs? If you’re interested, you can sign up to receive “10 NEW Intricate Paper Stencil Designs”, a free e-book that showcases more of these stunning designs…click here to sign-up to the Uneek Art Letter to get access to download this pdf! (Courtesy of Martice Smith II – Illustration & Design Studio)

~*~*~*~*~*~*~*~*~*~*~*~*~*~*~*~*~*~*~*~*~*~*~*~*~

Author bio:

Mixed-media illustrator and designer Martice Smith II

Martice Smith II is creative director of Martice Smith II – Illustration & Design Studio, based in Kansas City, Missouri and owner of Uneek Art Boutique. She established herself as a freelance Illustrator and graphic designer after receiving her Bachelor of Arts Degree.

Martice also contributes as an article writer for the Creating Mixed Media Art website.

You can see more of her work via her Facebook page or her blog. She invites you to join her monthly newsletter, Uneek Art Letter, for art biz tips, advice and free digital goodies!

~*~*~*~*~*~*~*~*~*~*~*~*~*~*~*~*~*~*~*~*~*~*~*~*~

.

.
Intricate Paper Stencils, Part 1

~ * ~

This article was written by Martice Smith II

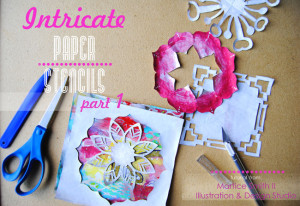
Martice Smith II shares a tutorial on how to make intricate, paper stencils using phone book paper

I love creating my own backgrounds for my illustrations and art journal pages. But sometimes, when I’m learning a new technique, I can go through a stack of papers and I don’t want to necessarily throw them away and then, I’m left searching for more paper to use up. So, the next best thing is to re-purpose them by creating something entirely different!

For this tutorial, I will show you how to use pages from a phone book to create these intricate, paper stencils.You can even use up all of those ‘unsuccessful’ gelli prints and breath new life into them with this easy tutorial.

Let’s get started!

Gather Supplies & Tools

Gather supplies and tools

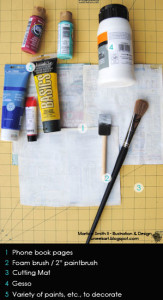
Old Phone book (pages will be torn out)

You can, certainly, use any kind of decorative paper you like for this tutorial. I’m just using up what I already have around the house and adding my own flair to it! Using something old to create something new…

Glue & Gesso

Apply gesso to phone book paper

Supply needed: Glue (not pictured)

I felt that one page of phone book paper was too thin, so I glued two pages together for a little more stability and strength. (The final stencil will still appear delicate.)

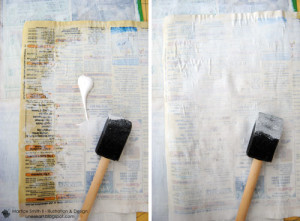
Next, use a foam brush or a 2 inch brush to apply 2 light coats of gesso to one side of the phone book paper.

Tip: I like to use a foam brush because it applies an even coverage. I like how the words and numbers peek through the gesso. This will give more depth to the final stencil.

Paint & Decorate

Add color and decorate the phone book paper. Gelli plate prints can also be used!

**If you’re working on pre-designed paper, you can skip this step and proceed to the next step, ‘Create the stencil’.

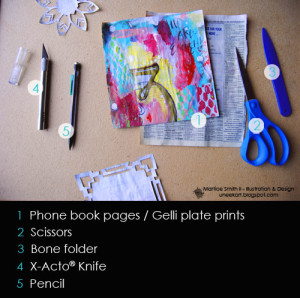
Make sure you grab the supplies listed in the photo.

Now let’s paint our gessoed phone book pages with acrylics, watercolors, oil pastels- whatever we want! Keep in mind, though: the more layers of paint added, the heavier/sturdier the final stencil will become.

Create the stencil

It really doesn’t matter if your paper is right (paint) side up or wrong side up. Personally, I like to fold the paper with the ‘wrong side’ facing up, simply, because I can easily see the lines I’ll need to draw.

Fold. 

For this particular design, I will need to start with a square sheet of paper.

Since phone book pages measure 7 inches (18 cm) wide by, approximately, 9 inches (22.5 cm) in height, I’ll have to trim the excess.

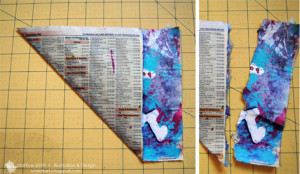
Take one corner and bring it up, diagonally. Line up the top edges.

Folding paper to make a square

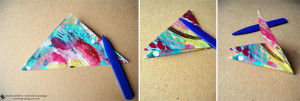
Be sure to crease all folds with a bone folder.

Phone book pages are rectangular so I’ll need to trim off the excess paper, after I make my fold.

Note: There will be a leftover strip that measures, approximately, 2 inches (5 cm) wide by 7 inches (18 cm) in height.

Cut or tear off the strip on the side.

Set this strip to the side, for now. (Later, you can make mini-stencils from this same strip.)

Fold paper

Now your page should look like a triangle.

Fold this triangle in half, twice, in the same direction. Remember to crease every fold with the bone folder.

Now, we’re ready to add our design!

Mark. 

Let’s first visualize what kind of shapes and lines we want our finished stencil to have. There’s no need to measure anything- just go with the flow and enjoy the unique and organic line quality coming from your hands!

Draw a design onto the triangle.

Place the fold on your right hand side. Draw your design onto the paper triangle.

To avoid cutting the wrong lines, shade in the areas that need to be cut away.

Cut out your lines. 

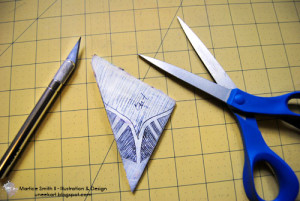
Look for the largest area that needs to be cut away. This particular design calls for me to use scissors, first.

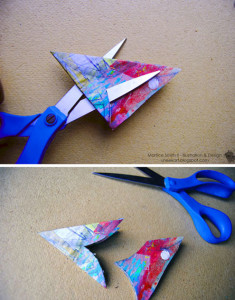
Use scissors to cut out the largest area(s).

Next, determine if you need to continue using scissors to finish cutting out the design. A sharp X-Acto® knife would be a better choice for those narrow, hard to reach areas.

Next, determine if you'll need to use scissors or an X-Acto® knife to cut out the remaining areas.

Use an X-Acto® knife for narrow, smaller, and hard to reach areas in your design.

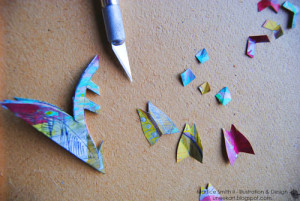
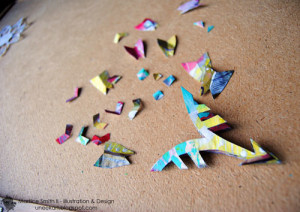
Tip: When you cut out the smaller areas, DO NOT throw them away! If you’re like me, you love to keep small bits of paper because, who knows? You might want to add them to your next collage! These small pieces can add some much needed color or texture to that ‘unsuccessful’ gelli print you have laying around.

You’ll thank me later for this tip 😉

Look at those beautiful bits of paper! DO NOT throw them away…

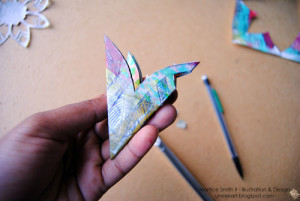
This is what the stencil looks like after cutting away a few areas. Don’t worry, we’re not done yet! Small things pack a big punch…you’ll see.

Open

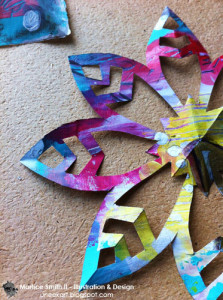
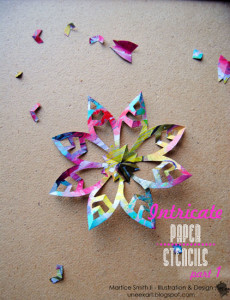
Once you’ve cut out your design, slowly and gently open your intricate paper stencil. Whoa! Isn’t it beautiful?!

: Very slowly and gently, open up your paper stencil.

You can add finishing touches with distress inks, more paint to accent certain areas, embellish with textured stamps or add some glitter, bling bling!

An example of an intricate paper stencil, made from phone book paper.

Did you enjoy this tutorial? If yes, don’t miss Part 2! Look for Intricate Paper Stencils, Part 2: Gift Wrap! I will show you how easy it is to make your own gift wrap using your beautiful, phone book paper stencils.

Until then, have fun and keep creating!

~*~*~*~*~*~*~*~*~*~*~*~*~*~*~*~*~*~*~*~*~*~*~*~*~

Author bio:

Mixed-media illustrator and designer Martice Smith II

Martice Smith II is creative director of Martice Smith II – Illustration & Design Studio, based in Kansas City, Missouri and owner of Uneek Art Boutique. She established herself as a freelance Illustrator and graphic designer after receiving her Bachelor of Arts Degree.

Martice also contributes as an article writer for the Creating Mixed Media Art website.

You can see more of her work via her Facebook page or her blog. She invites you to join her monthly newsletter, Uneek Art Letter,  for art biz tips, advice and free digital goodies!

~*~*~*~*~*~*~*~*~*~*~*~*~*~*~*~*~*~*~*~*~*~*~*~*~

.
.