This article was written by Martice Smith II
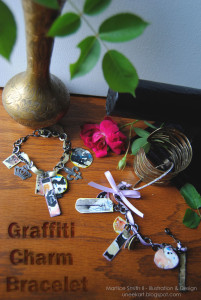
Lately, I’ve been experimenting with creative ways to incorporate more color into my wardrobe and accessories. I shopped around my local art store’s jewelry section and I had a serendipitous moment: why not transform my art into ‘wearable art’? I grabbed up some fun-sized, canvas ATCs and some basic jewelry making supplies and imagined infusing them with my own, signature style…vibrant splashes of color and of course, graffiti flair!
Simply put, this tutorial is the perfect way to show off your artistic side when you’re on the go! I’m sure your Graffiti Charm Bracelet will serve as a unique statement piece and will strike up a conversation in no time…let’s get started!
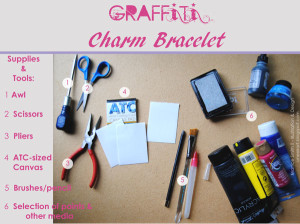
Gather supplies and tools of your choice.
Note: ATC Canvas sheets measure 2.5 inches by 3.5 inches
**Not pictured: 12″ chain ; makes approx. 2 chains
Jump rings; start with 10-15 pieces
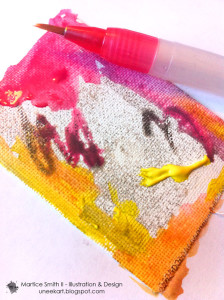
1. Paint the front and back of the canvas ATCs with your favorite media.
Set aside to dry.
TIP: If you used any water-soluble media, make sure to varnish!
These canvas ATCs will be very light. For my bracelet, I glued two sheets together for a little more sturdiness.
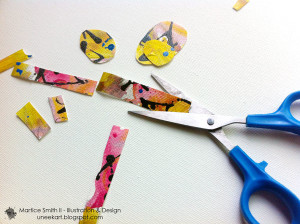
2. Cut canvas into pieces.
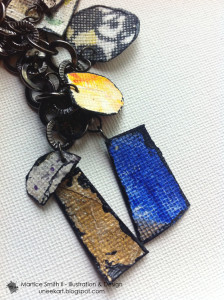
Narrow shapes, squares, ovals, and irregular shapes will add more interest and variety to your design. These will be our “charms”.
Feel free to add extra layers of handwriting to some of the charms.
3. Seal the edges with black acrylic paint or a gold leafing pen.
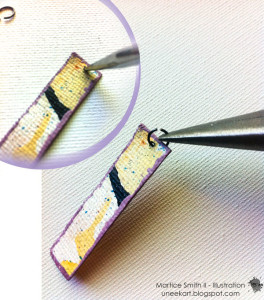
4. Using an awl, pierce through each piece of canvas, 1/4″ from the edge.
5. Insert jump rings.
Use needle-nose pliers to slowly open the jump rings.
Attach a jump ring through each of the holes in the cut out canvas pieces, using the pliers.
TIP: Try layering several pieces of canvas shapes together.
Also, think about pairing up a few complementary colors to give your bracelet’s color palette more contrast.
6. Measure around your wrist with a flexible tape measure or a piece of string, add 3/4″ to that measurement, and then cut the chain to that length.
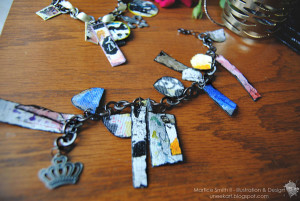
Next, take your chain and attach the jump rings, however you wish.
I found that skipping every other link accommodated the number of canvas pieces I had without being too overwhelming.
7. Finally, attach a small lobster clasp closure to finish the graffiti charm bracelet.
Other variations to try:
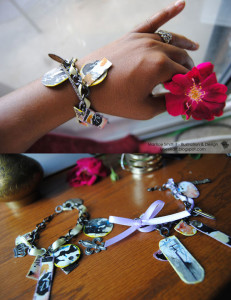
For a more feminine look, weave a silk ribbon through every other link in the chain. Secure ends with a double knot.
I rarely throw away leftover paper or fabric scraps from my previous projects. To clear the stash, I could also glue those bits onto the ATC canvas, before cutting. Got washi tape scraps? Use them for this project, too- they’d be perfect!
Have fun and don’t be shy to strut your beautiful artwork!
~*~*~*~*~*~*~*~*~*~*~*~*~*~*~*~*~*~*~*~*~*~*~*~*~
Author bio:
Martice Smith II is creative director of Martice Smith II – Illustration & Design Studio, based in Kansas City, Missouri and owner of Uneek Art Boutique. She established herself as a freelance Illustrator and graphic designer after receiving her Bachelor of Arts Degree.
Martice also contributes as an article writer for the Creating Mixed Media Art website.
You can see more of her work via her Facebook page or her blog. She invites you to join her monthly newsletter, Uneek Art Letter, for art biz tips, advice and free digital goodies!
.
.


I absolutely love this idea! However – when I do mine, I think I will make my art on a sheet of shrink plastic, cut it up and punch holes, shrink and assemble. Do you think that would work? I guess you would be more limited in the media you use, but must try! Thanks for the great idea!!
What a great idea, thank you